When we create a B2B Wholesale business in WooCommerce, it is hard to manage all users with just a single Customer Role. WholesaleX is here to make this difficult task possible with less effort. It allows you to create unlimited user roles, facilitate them with offerings and restrict them with conditions.
In this case, we have to create different user roles to facilitate different types of customers effectively. If you create multiple user roles, you can facilitate and restrict groups of users at once and effectively.
How to Create User Roles in your WooCommerce Wholesaling Store with WholesaleX?
WholesaleX lets you create and manage User Roles, let’s see how to create a user role with these easy steps.
Step 1: Go to the User Roles section of WholesaleX
Go to WholesaleX’s User Roles page from website’s dashboard. Here you can see all the user role existed in your store.
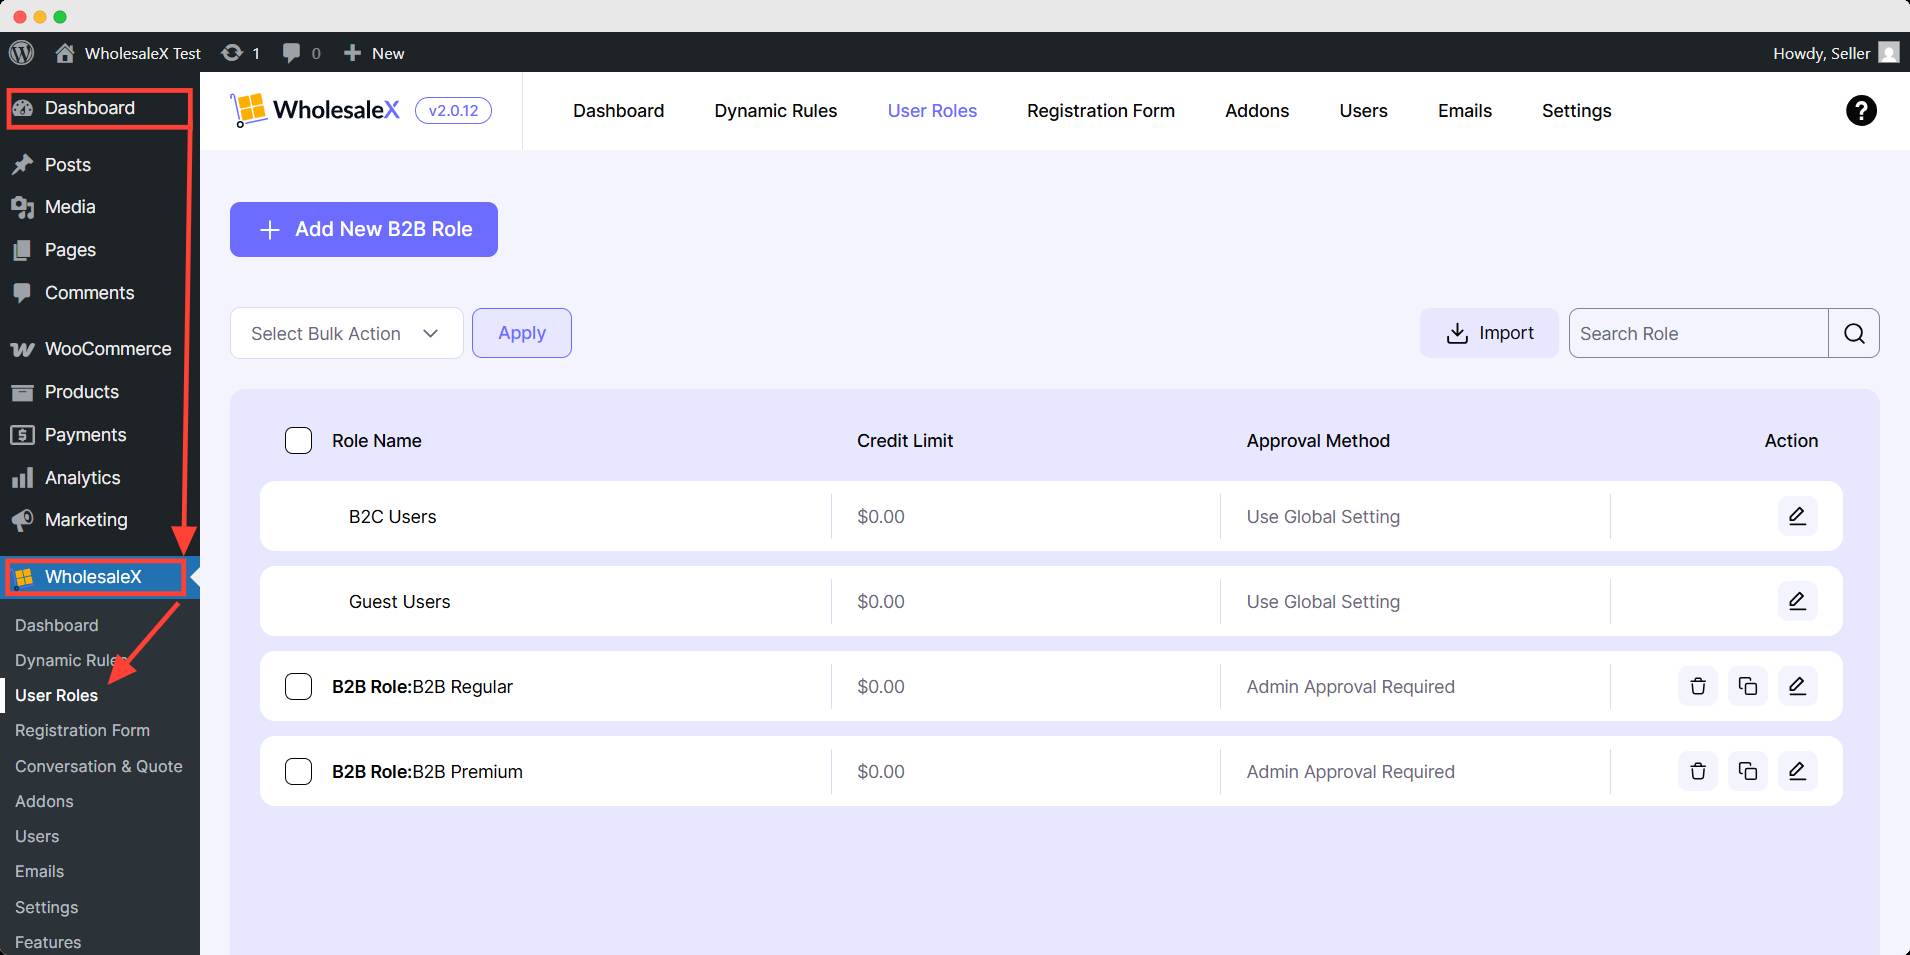
Now you have to create a new user role. Click the Add new B2B Role.
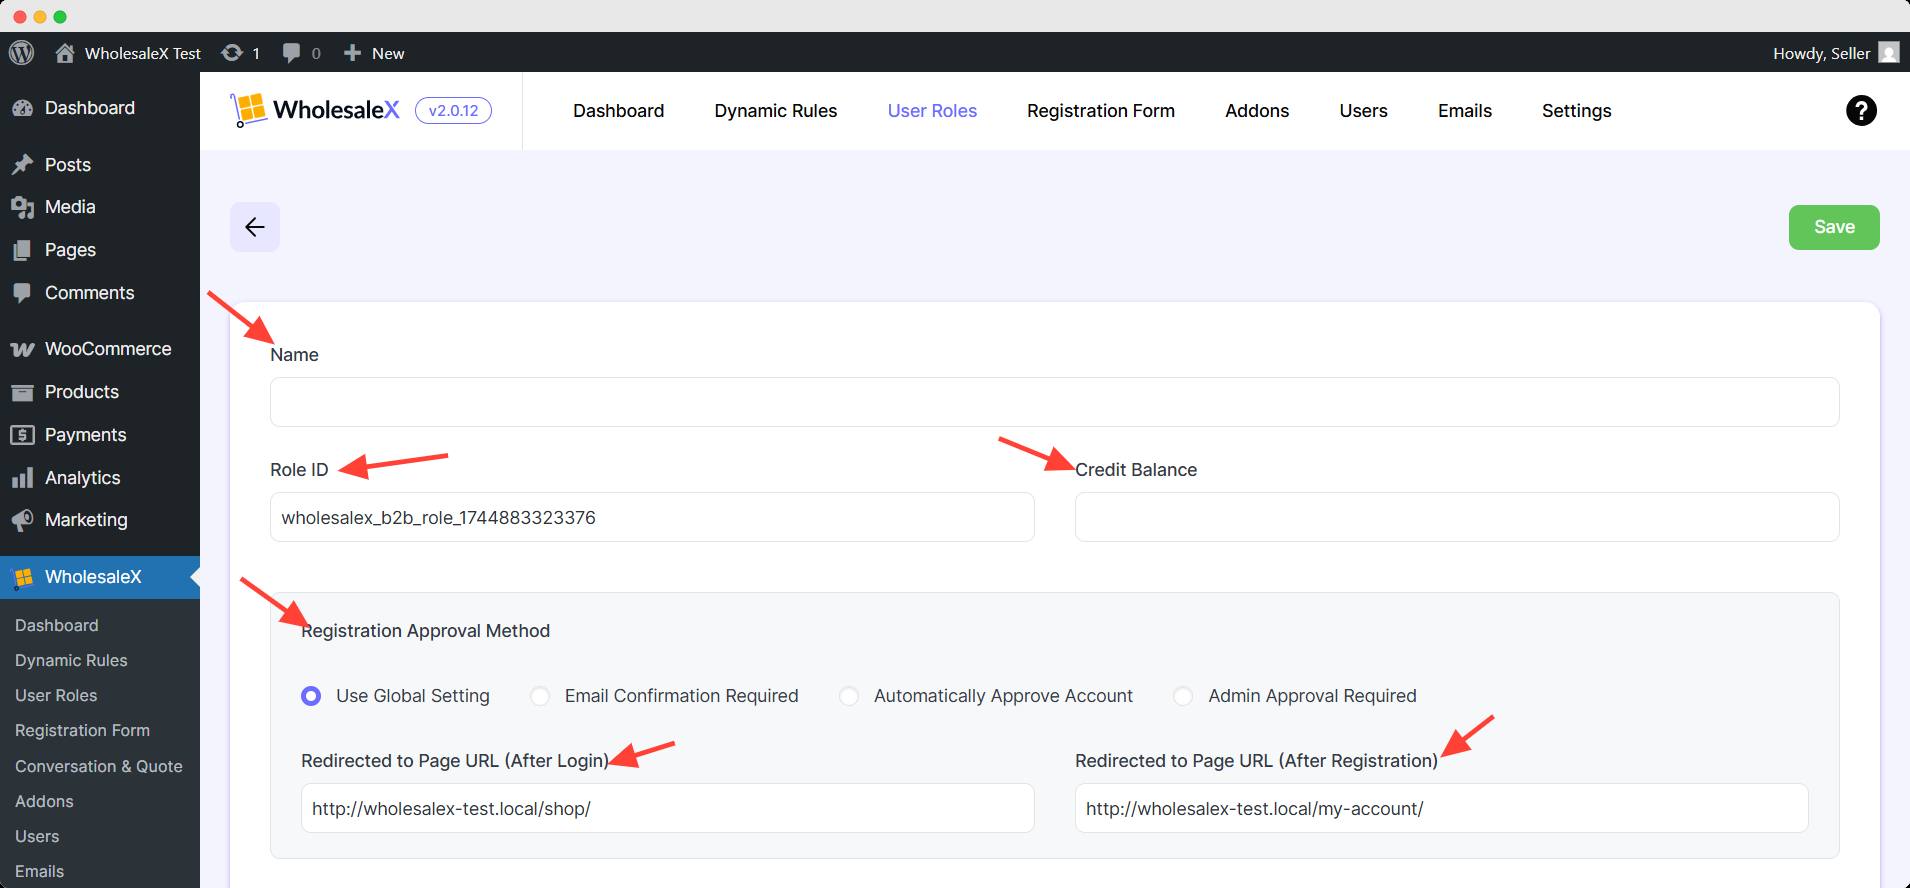
Step 2: Set the Necessary Conditions and Requirements
You need to set multiple requirements & conditions for the role such as:
Name
Set a preferred name for role.
Role ID
You can set a unique Role ID for this role. However, you may leave it, WholesaleX auto generate the ID.
Credit Balance
Set the credit balance of the user role so the customers under this role can expand from given credit.
Registration Approval Method
Here you can set your preferred registration approval method from different options. You can also set the redirect link after login/registration.
Display Price
You can set whether you want the displayed price to include or exclude tax. You can even select the default option.
Payment Method
Select the payment method, your customers under this user role will only see the selected payment method.
Shipping Method
You can offer a flat rate or free shipping based on your shipping zone’s availability from the shipping method option.
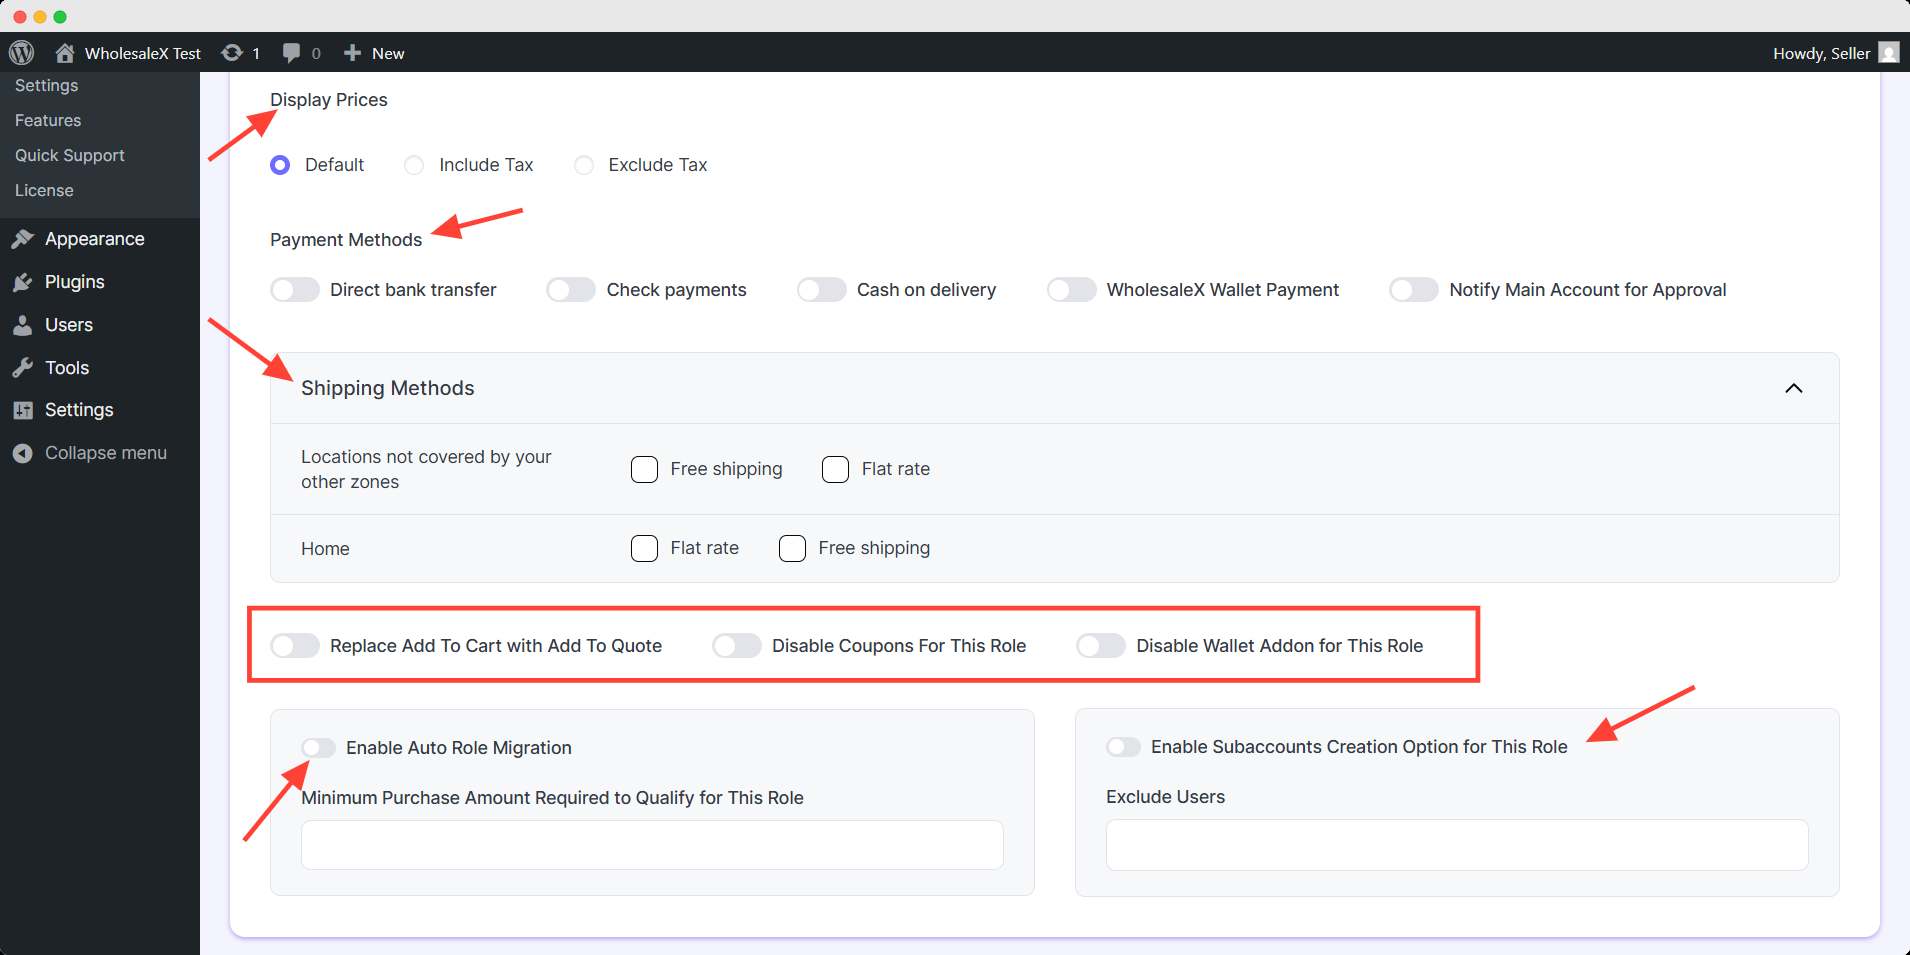
Additonal Settings
Replace Add to Cart With Add to Quote: Change you Add to cart tex to Add to quote.
Disable Coupons for This Role: This role wouldn’t be applicable for coupon.
Disable Wallet Addon for This Role: You can turn off the WholesaleX wallet option for this role.
Enable Auto Role Migration: You can let this user role to upgrade his status automatically based on his expense amount.
Enable Subaccounts Creation Option for This Role: You can let this user role to create a subaccount for his account.
After finishing up all the settings hit the save button to make this user role active. You can further edit any details from user role page.