First, we assume you have already created a custom My account page. Whether you have created the page by yourself or using a third-party plugin doesn’t matter. The process will be the same. But you need to do this only if you change the URL of your new custom My account page.
Follow the below steps to properly set up the new my account page:
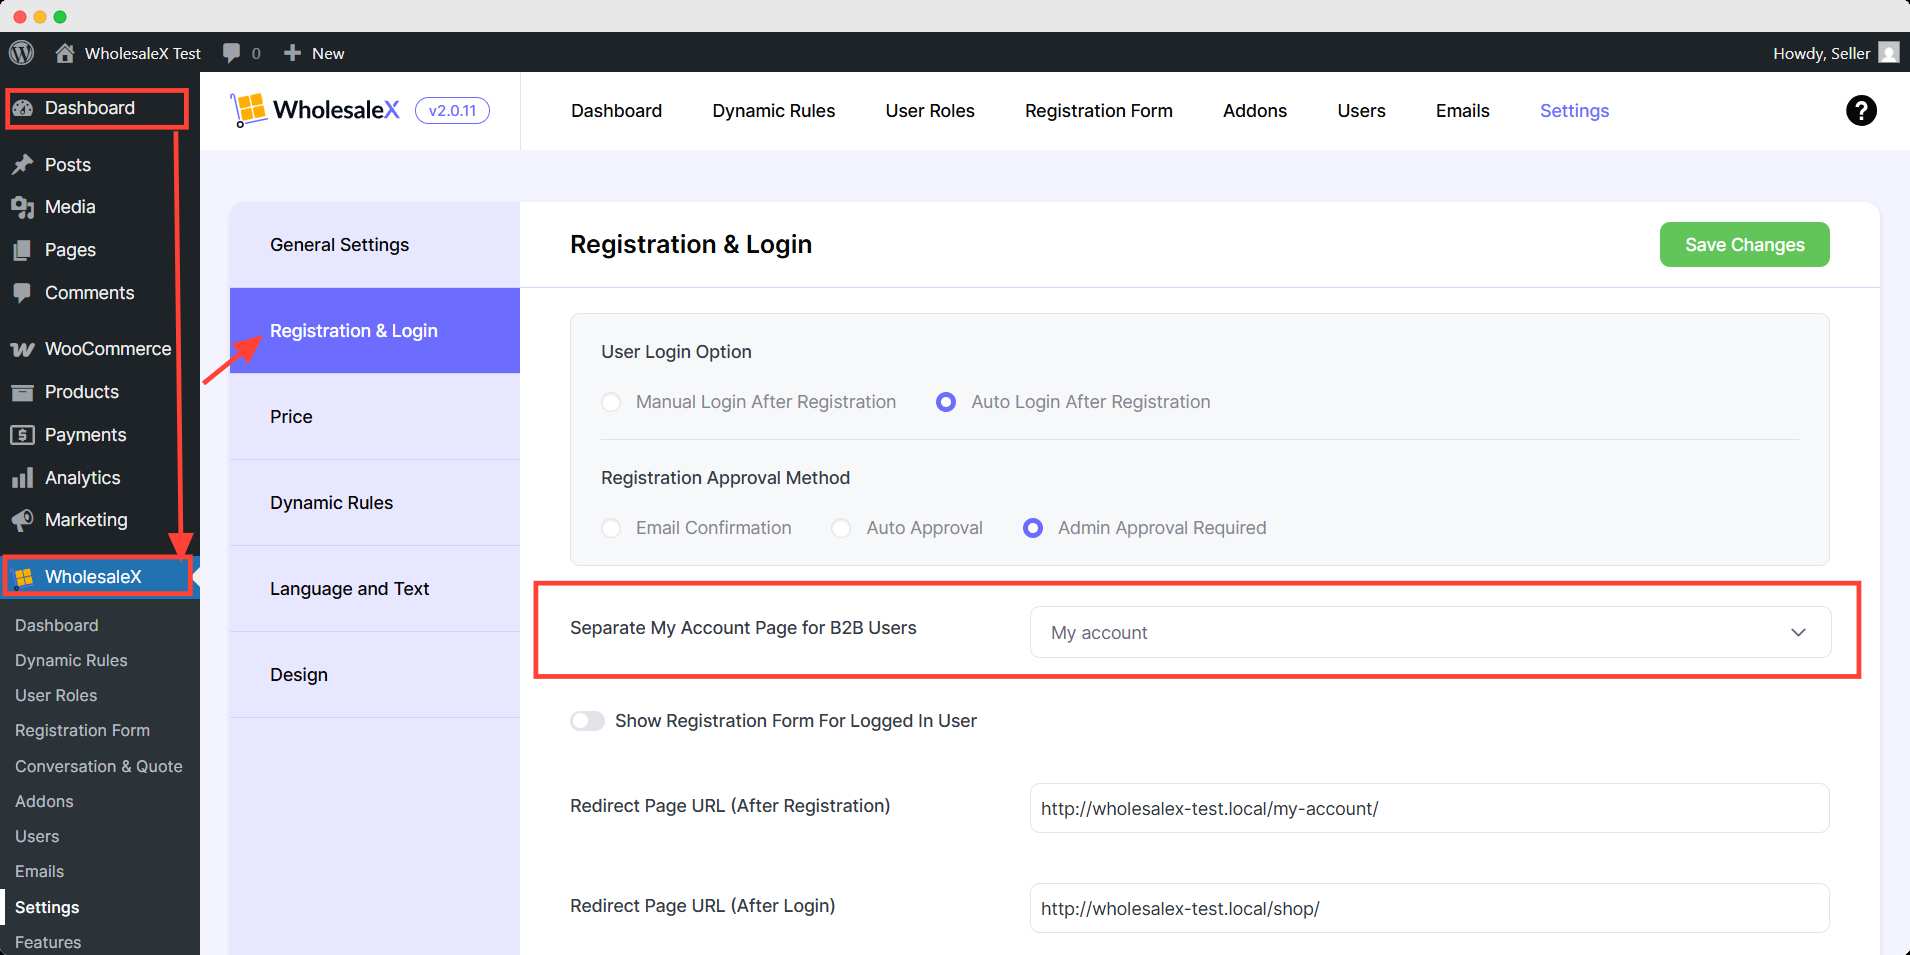
Step 1: Separate My Account Page
First, you have to change the default my account page with the new one you created. Go to WholesaleX >> Settings >> Registration & Login.
Step 2: Select Another Page
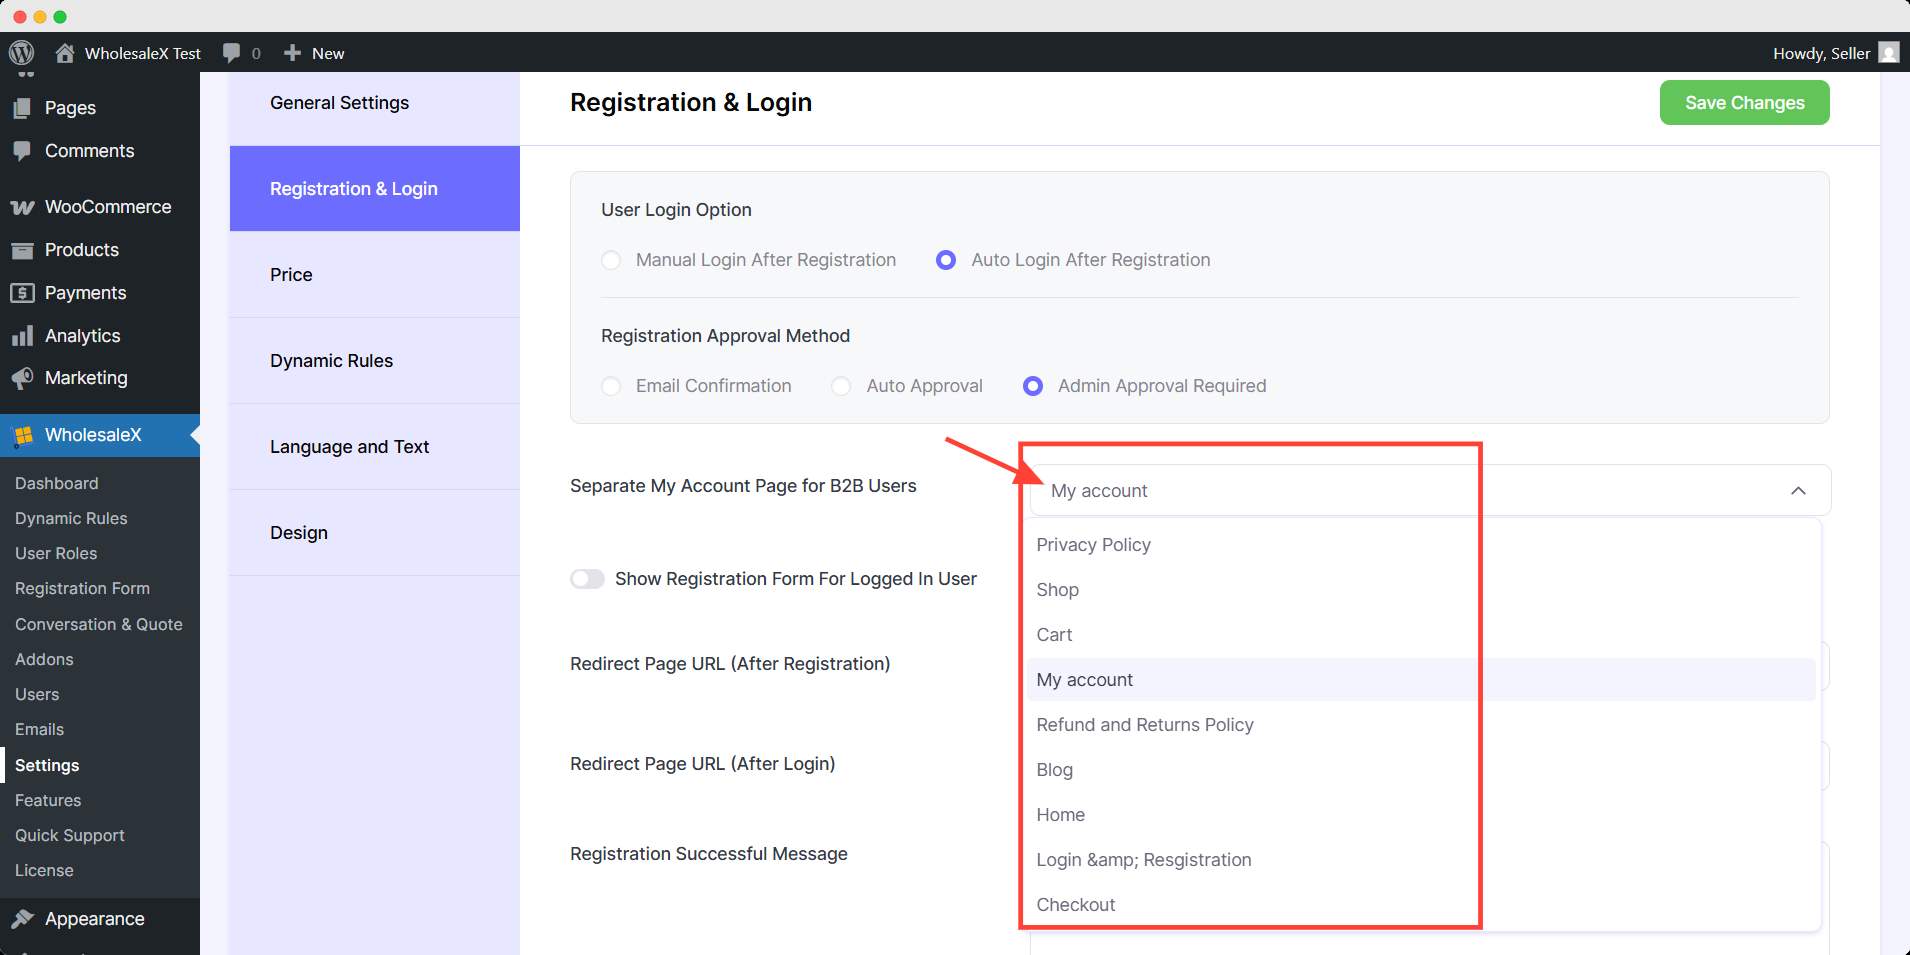
Now, click the dropdown option of Separate My Account Page for B2B Users. There will be all the pages of your WooCommerce store. Select the page which is your custom My Account Page.
After finishing setup, click the Save Changes button to apply the changes you made.