
One of the most useful add-ons of WholesaleX is the Conversations option, which allows customers to communicate directly with the store owner or manager.
This document will provide a step-by-step guide on activating and using the Conversation feature.
Step 1: Activating WholesaleX Conversation
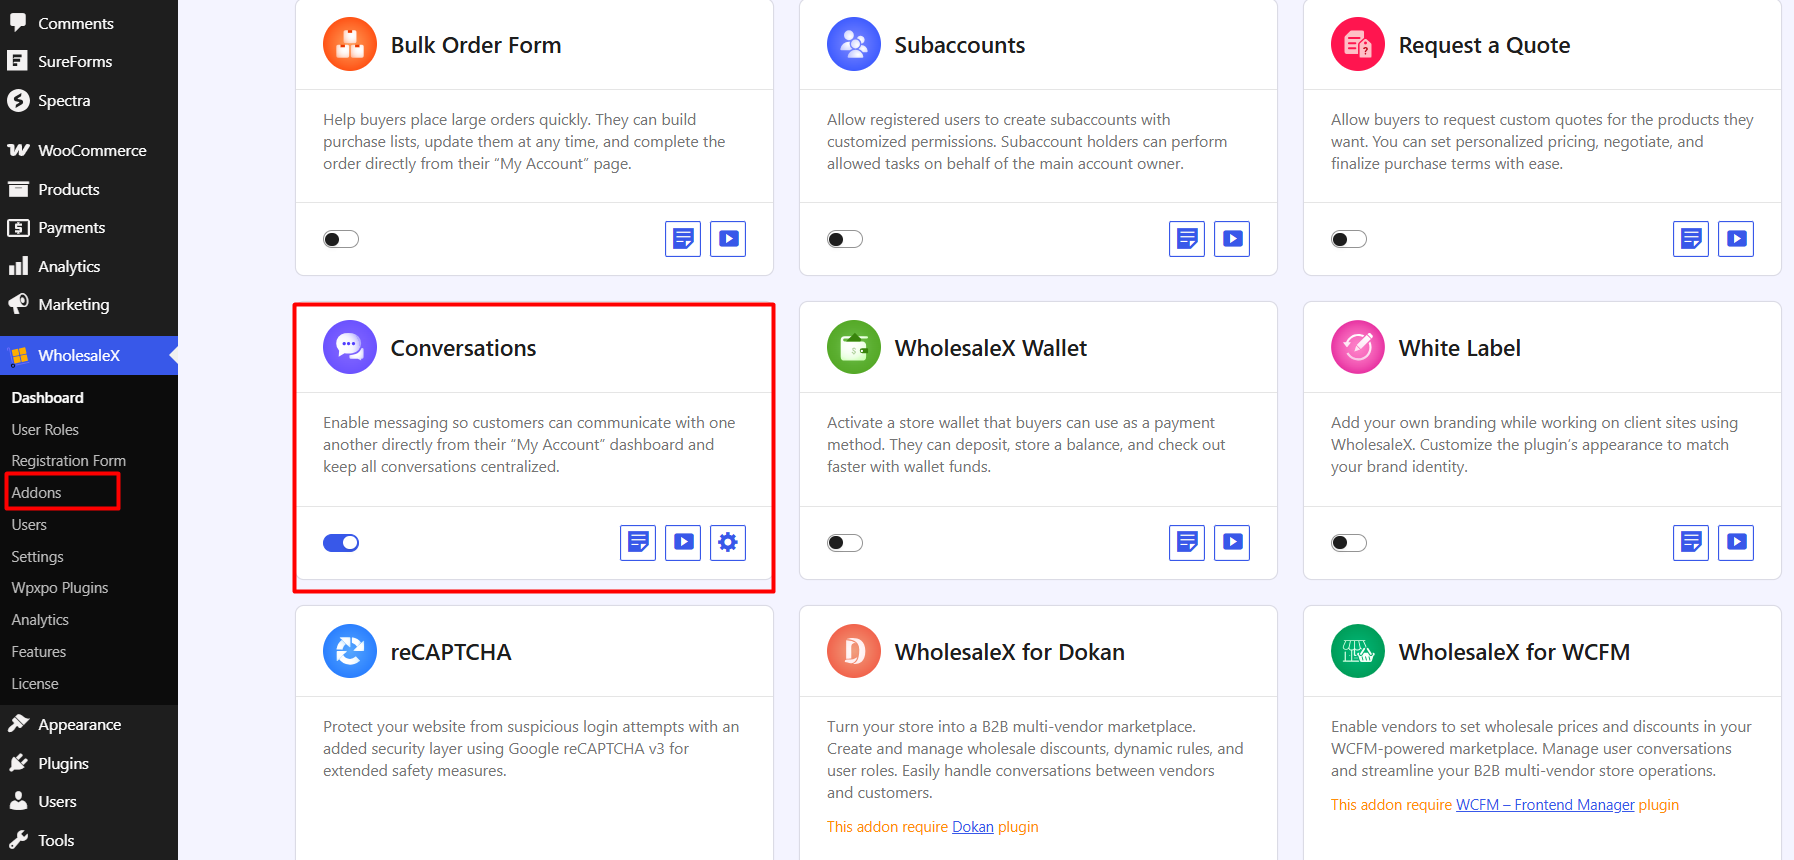
The first step is to activate the Conversation option. To do this, you have to go to the WordPress Dashboard and select WholesaleX. Then, click on Addons and enable the Conversation add-on by clicking the toggle bar.
Step 2: Customizing Core Settings
After enabling the add-on, it should automatically bring up the Settings options. But you can do it manually by clicking the Settings icon beside the add-on to bring up the customization options.
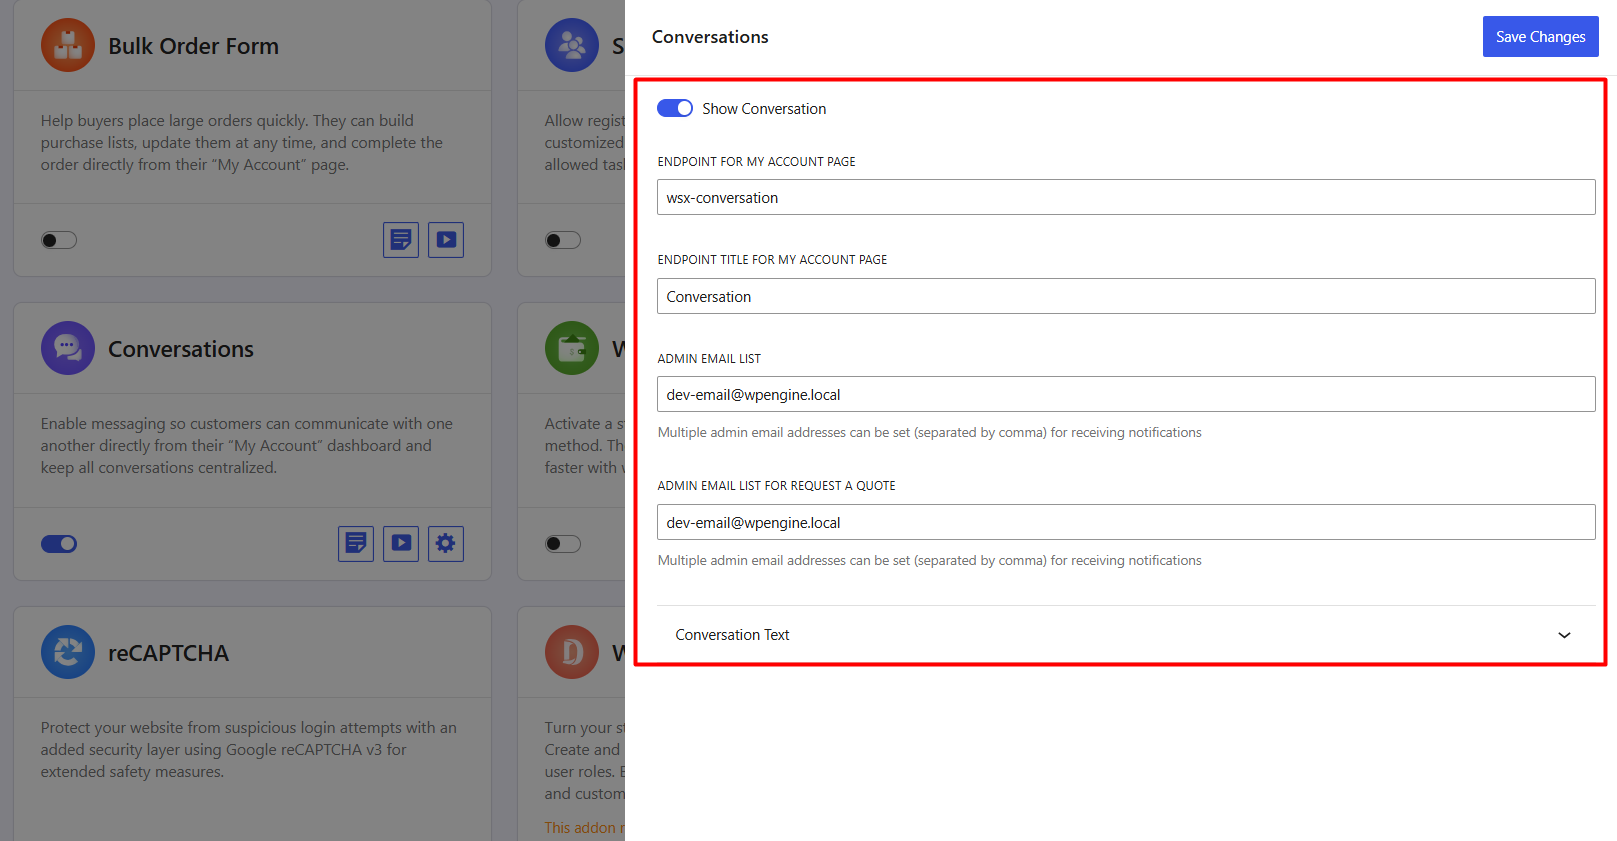
Show Conversation
Enable or disable the Conversation feature.
- Enabled: Customers can access Conversations from their My Account page.
- Disabled: The Conversation section will not be available to customers.
Endpoint for My Account Page
Set the URL endpoint for the Conversation page in the WooCommerce My Account area.
Example:
wsx-conversation
Result:
yourstore.com/my-account/wsx-conversation
Endpoint Title for My Account Page
Set the menu label displayed in the My Account navigation.
Default: Conversation
You can customize it to something like:
- Messages
- Support
- Customer Chat
Admin Email List
Enter the email address(es) of the admins who should receive notifications for new conversations.
For multiple recipients, separate each email with a comma.
Example: [email protected],[email protected]
Admin Email List for Request a Quote
Enter the email address(es) that should receive quote request notifications.
For multiple recipients, separate each email with a comma.
Example:
[email protected],[email protected]
Step 3: Customizing Conversation Texts
In this section, you can customize the text and labels used throughout the Conversation interface.
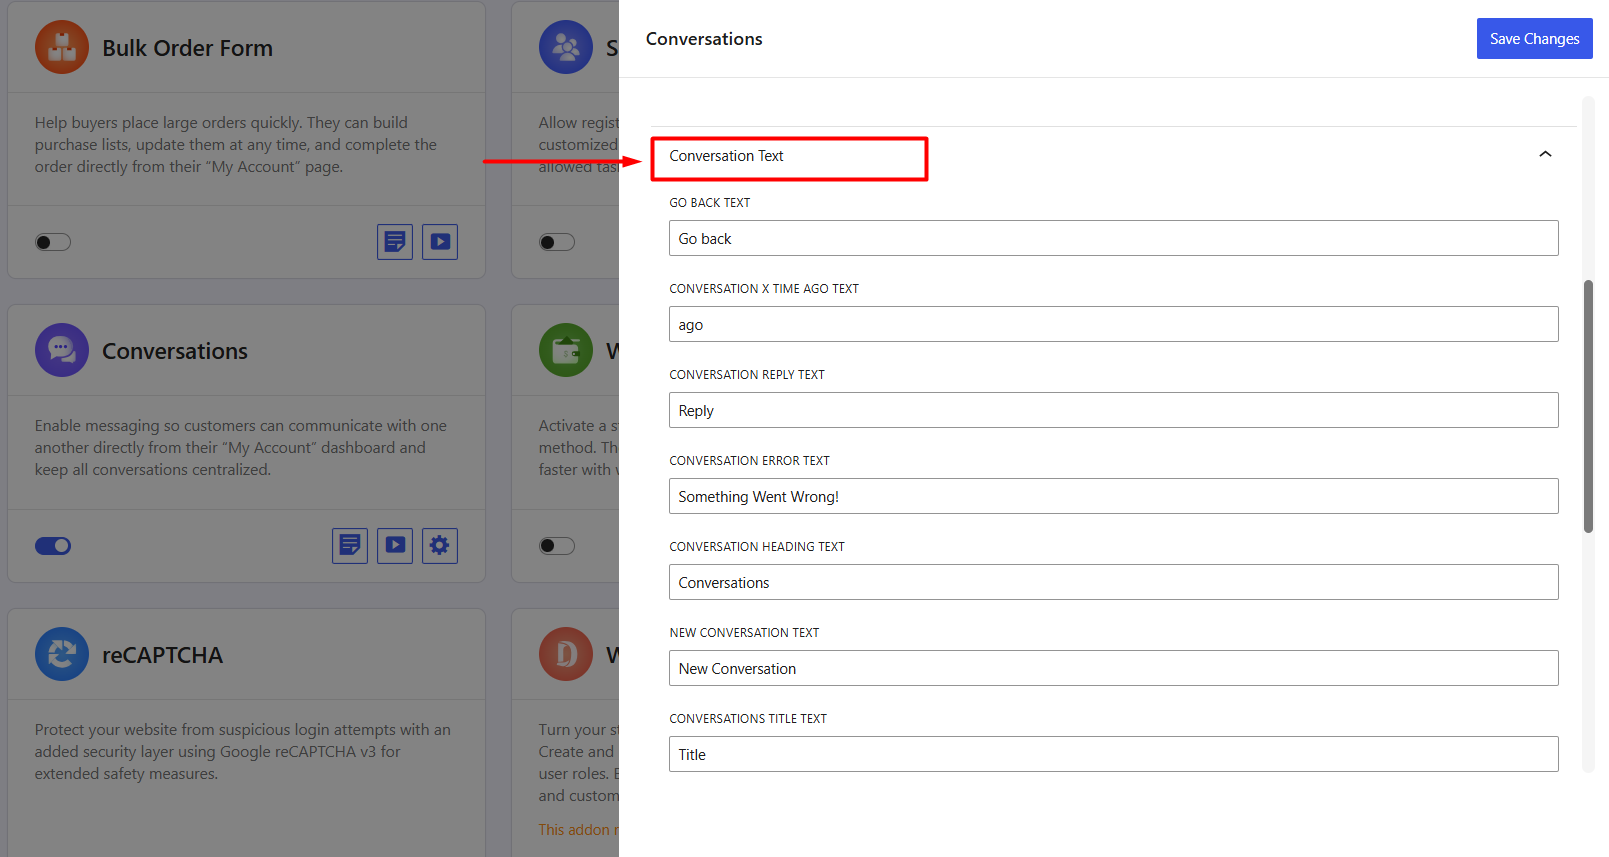
Available text fields include:
- Go Back Text
- Conversation X Time Ago Text
- Conversation Reply Text
- Conversation Error Text
- Conversation Heading Text
- New Conversation Text
- Conversations Title Text
- Conversations Type Text
- Conversations Type Inquiry Text
- Conversations Type Message Text
- Conversations Type Quote Text
- Conversations Last Reply Time Text
- Conversations Action Text
- Start Conversation Text
You can fully modify the default texts for each of these fields to match your preferred language and tone.
How the Conversation Feature Works for Customers & Store Owners
Registered users can use the conversation option from their ‘My Account’ page.
Navigating to My Account → Conversation & Quote, customers can view all existing conversations and start a new one.
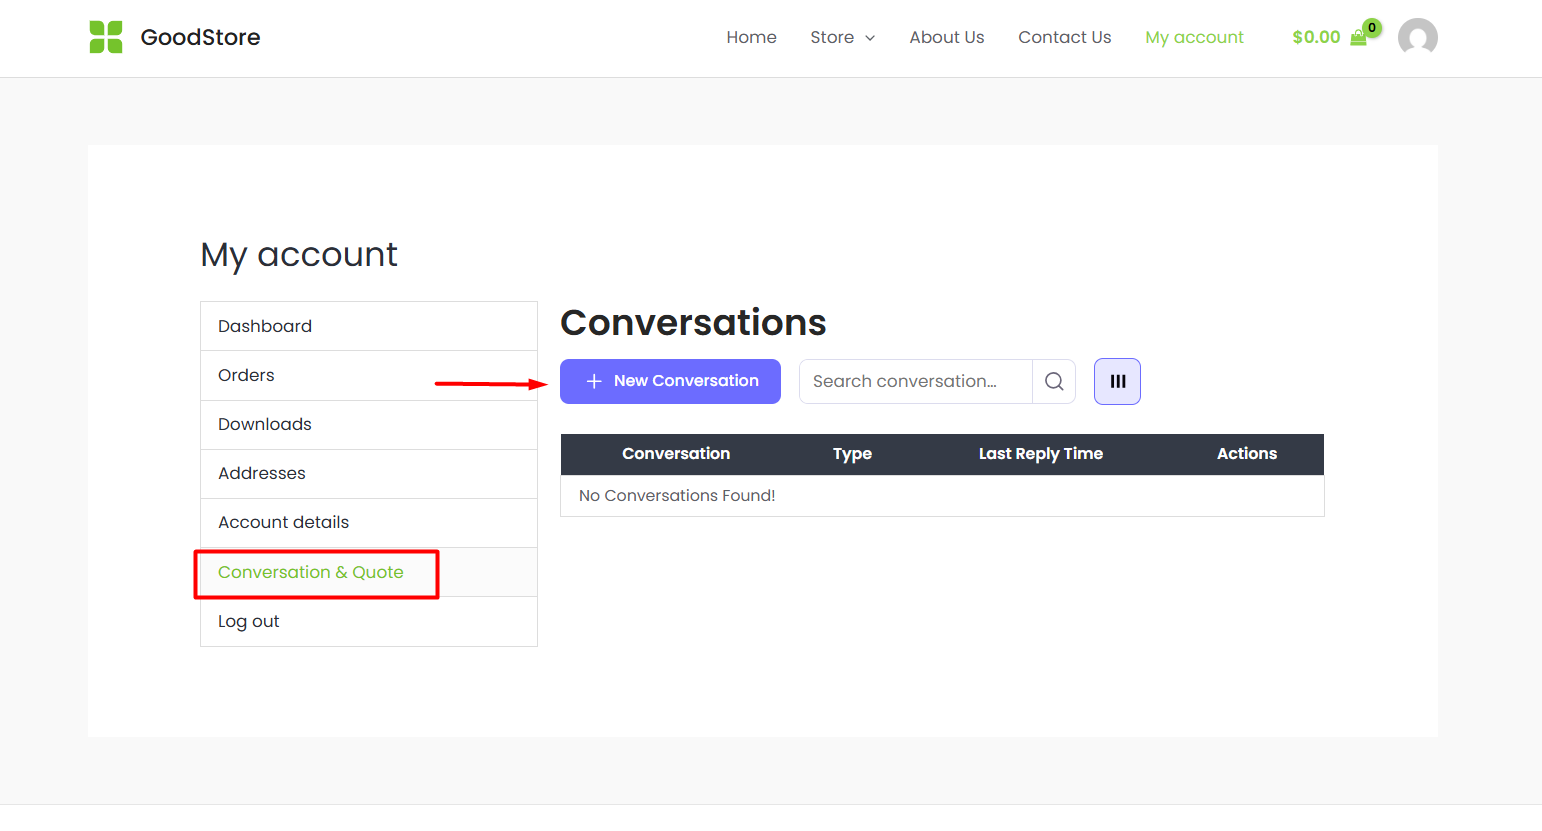
Simply clicking on New Conversation will bring up the message fields.
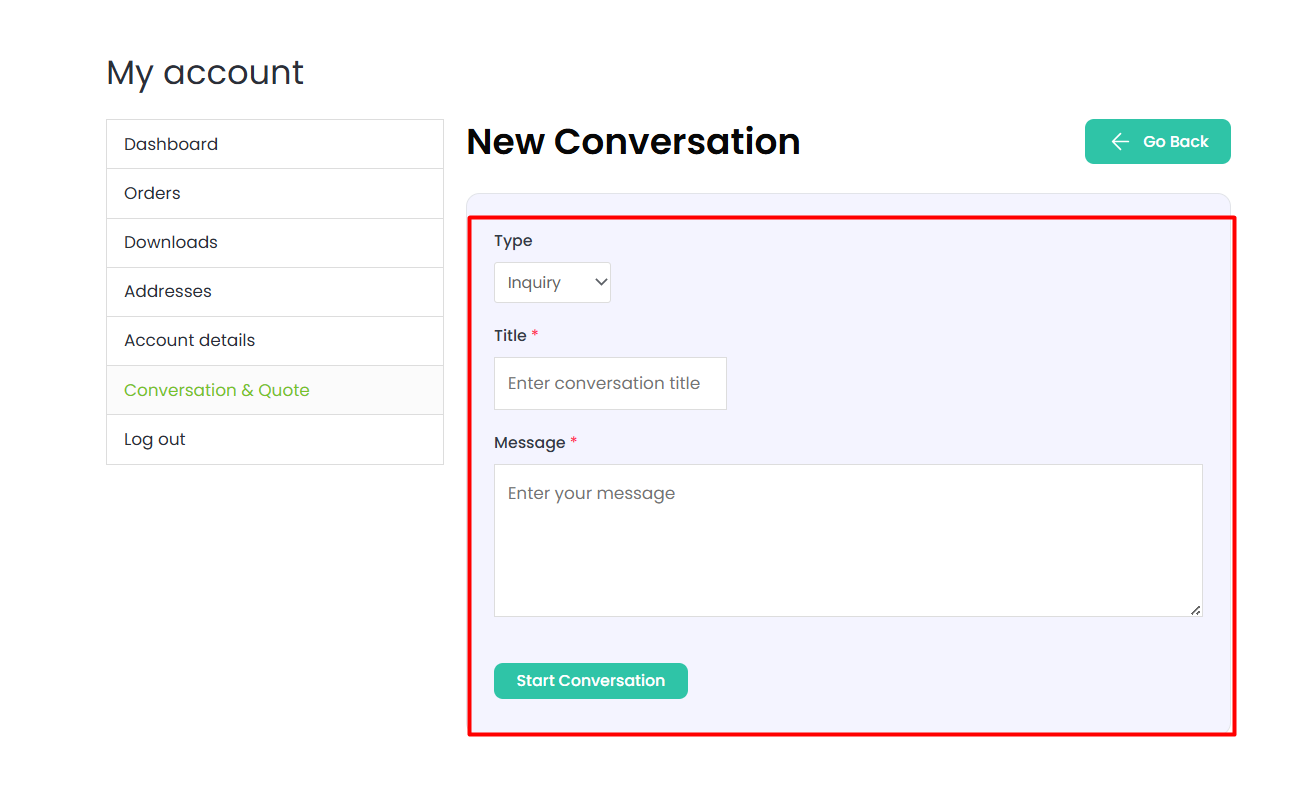
Here, customers will complete the following fields:
- Type – Select the conversation type (e.g., Inquiry, Message, or Quote).
- Title – Enter a subject for the conversation.
- Message – Enter the details of the inquiry or request.
Once a conversation has started, you can view and reply to conversations from the dashboard of WholesaleX.
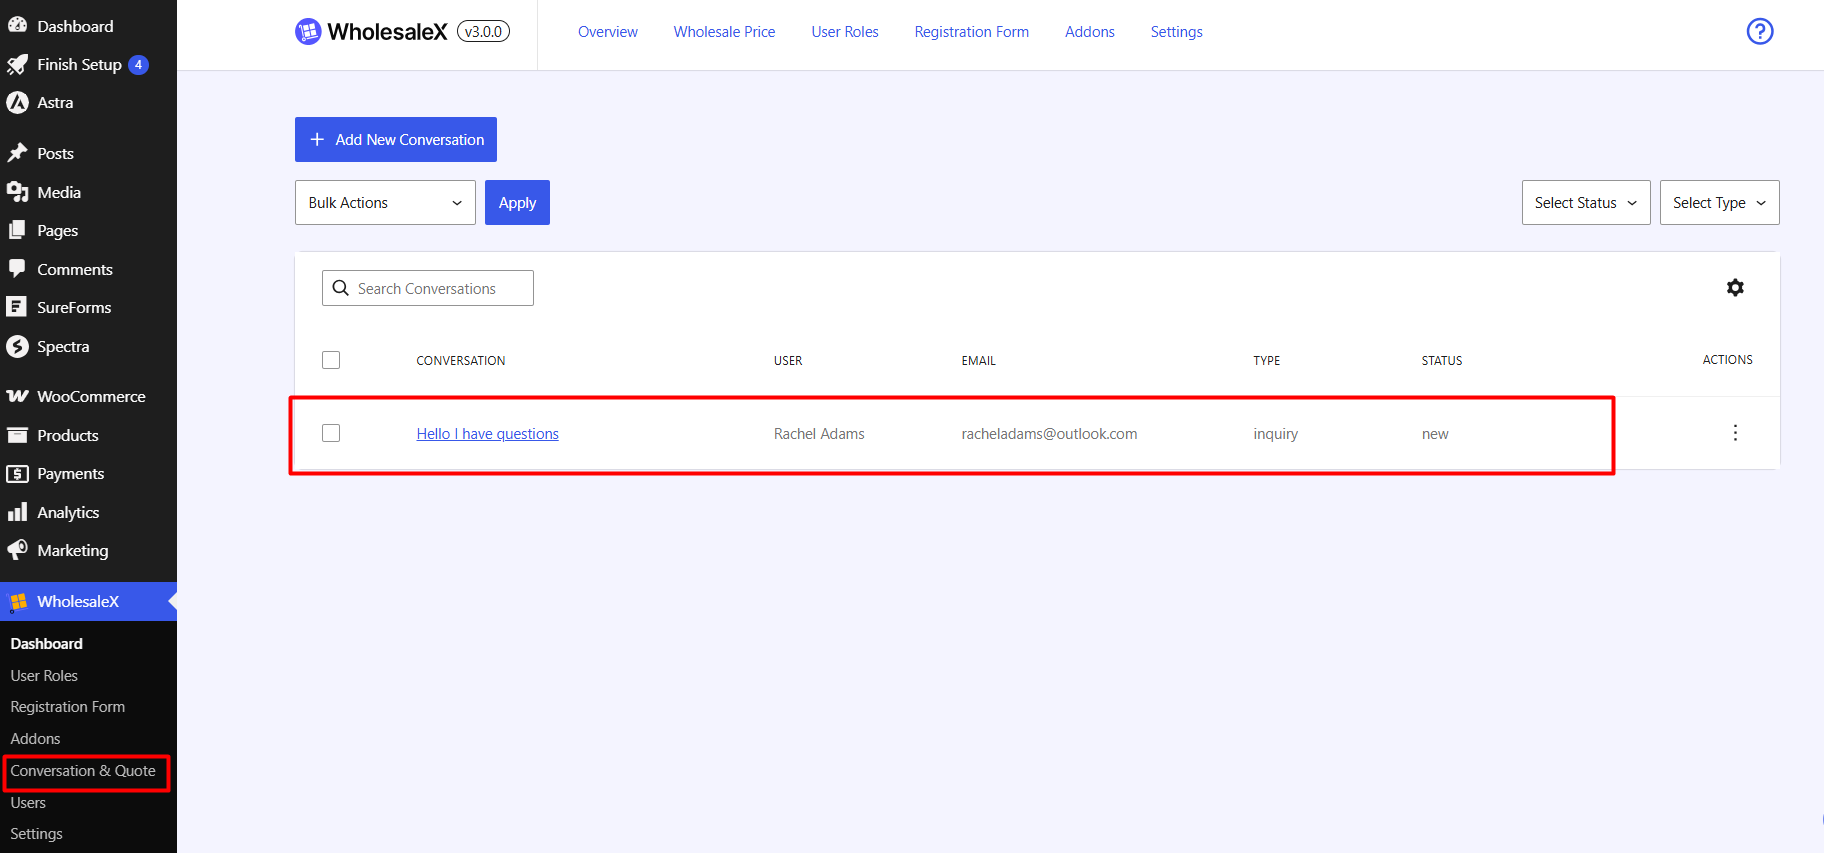
Here, you will be able to view all your conversations. To view a conversation in detail and reply, click on the desired conversation.
You can then type your reply in the text box and click Send Message to send it to the customer.
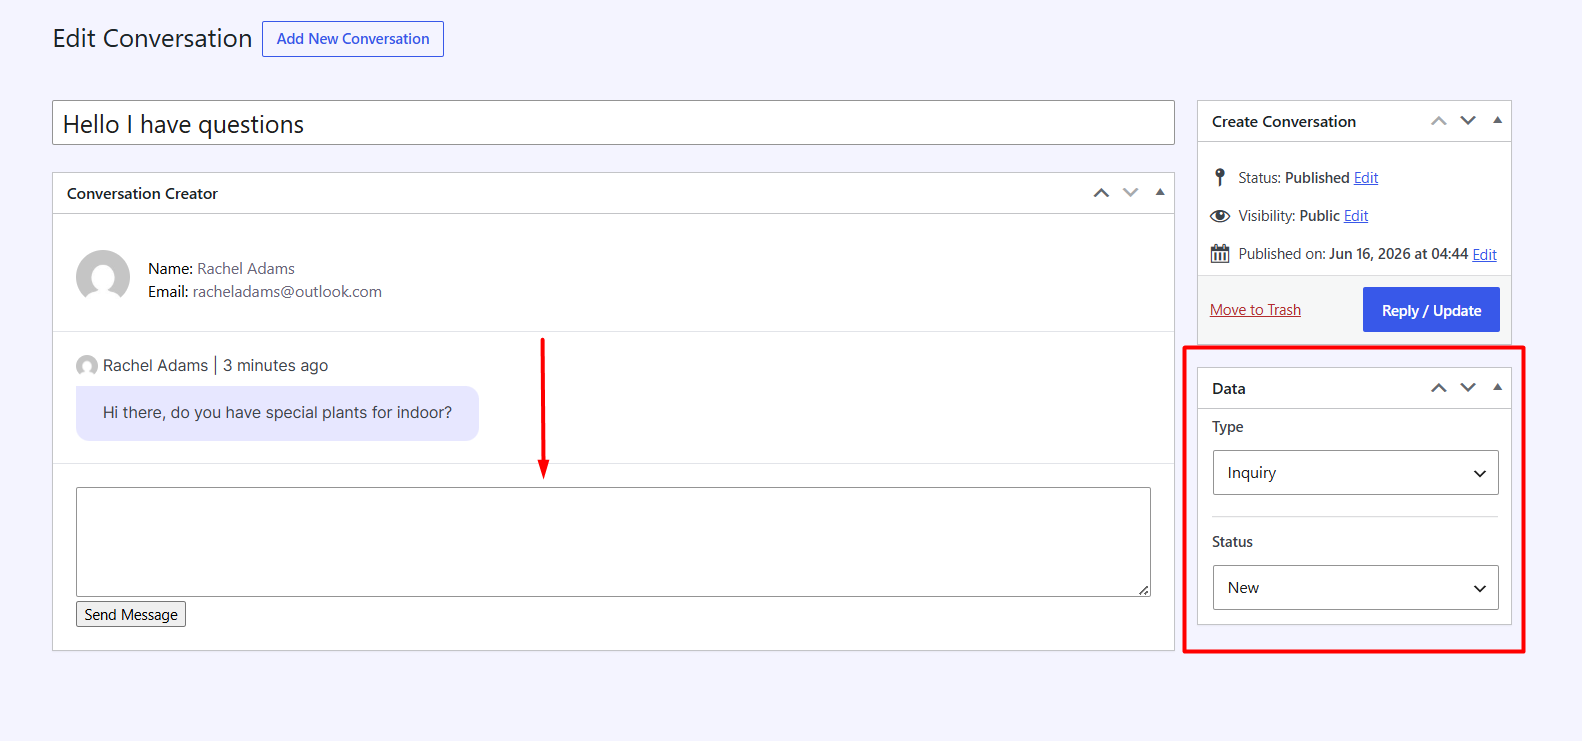
From here, you can also change the Type of Conversation as well as the status. For example, after completing the conversation, you can change the status to Resolved.
The Conversation add-on in WholesaleX is a great way for store owners and managers to communicate directly with customers. It allows customers to ask questions and get answers quickly and easily.