Terms & Conditions
The following are the terms and conditions for using WholesaleX White Label:
- You may use WholesaleX White Label to create and sell end-products such as websites or platforms.
- You may NOT sell WholesaleX itself as a plugin under your own name or brand.
Any violation of these terms and conditions will result in the termination of your license to use WholesaleX White Label.
Disclaimer: WholesaleX only allows the white label feature for the agency bundle (lifetime/yearly).
White labeling is a feature that allows developers or agencies to brand or personalize a plugin’s backend and panels with their own agency’s brand, name, and logo. This allows the agency to offer clients a more customized and branded experience.
The WholesaleX Agency bundle (both lifetime and yearly) includes a White Label addon that allows you to customize the WholesaleX plugin to match your brand. You can change the plugin’s name, logo, icon, description, etc.
Let us show you how WholesaleX White Label Works.
How to Enable White Label?
To use White Label in WholesaleX, you need to activate the White Label addon.
Go to WholesaleX > Addons to see all the available addons. Then, use the adjacent toggle bar to activate the White Label addon.
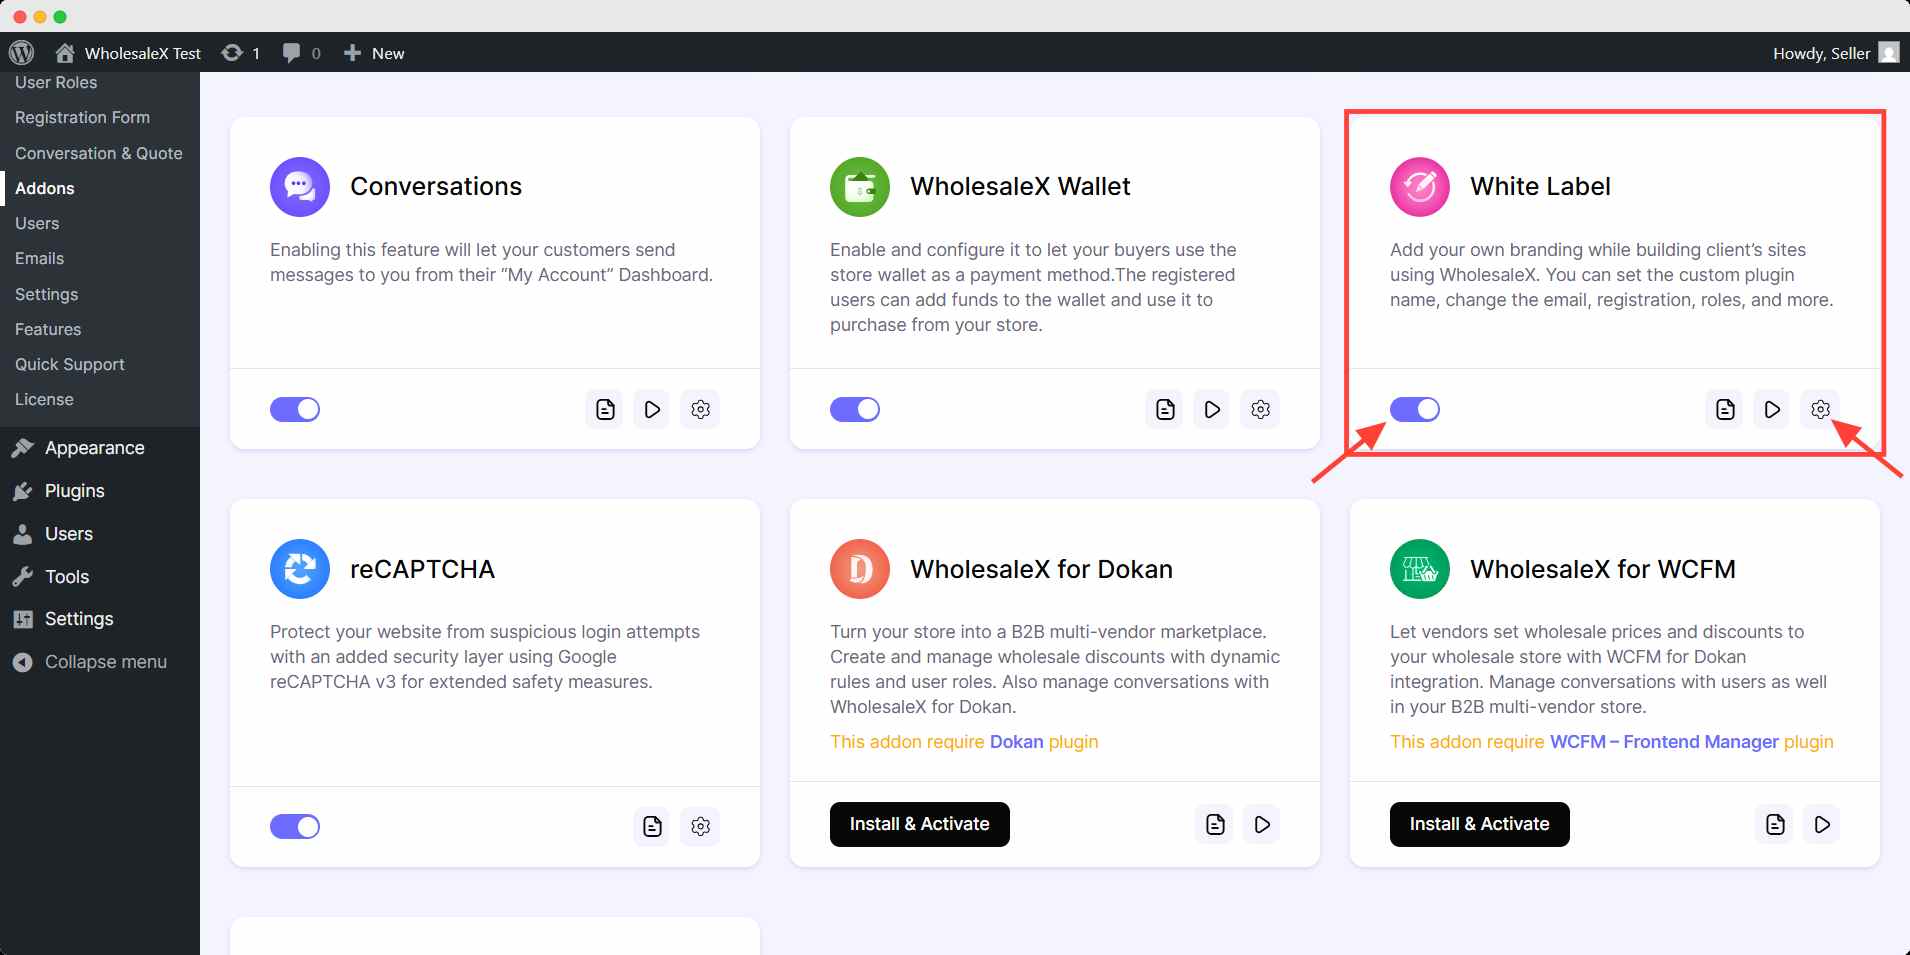
After enabling, click the settings icon to go to White Label settings.
Now, let us explore the White Label options you will have with WholesaleX. And all the things you can change and how to do that.
Change Plugin Menu Name with WholesaleX
Once you are in the White Label settings, you will see all the available options here. Customize it the way you want. Let us see how to change the plugin menu name.
Plugin Menu Name
In the Plugin Menu Name text box, write the name you want to display as your plugin name. For example, we will be using B2B Plugin.
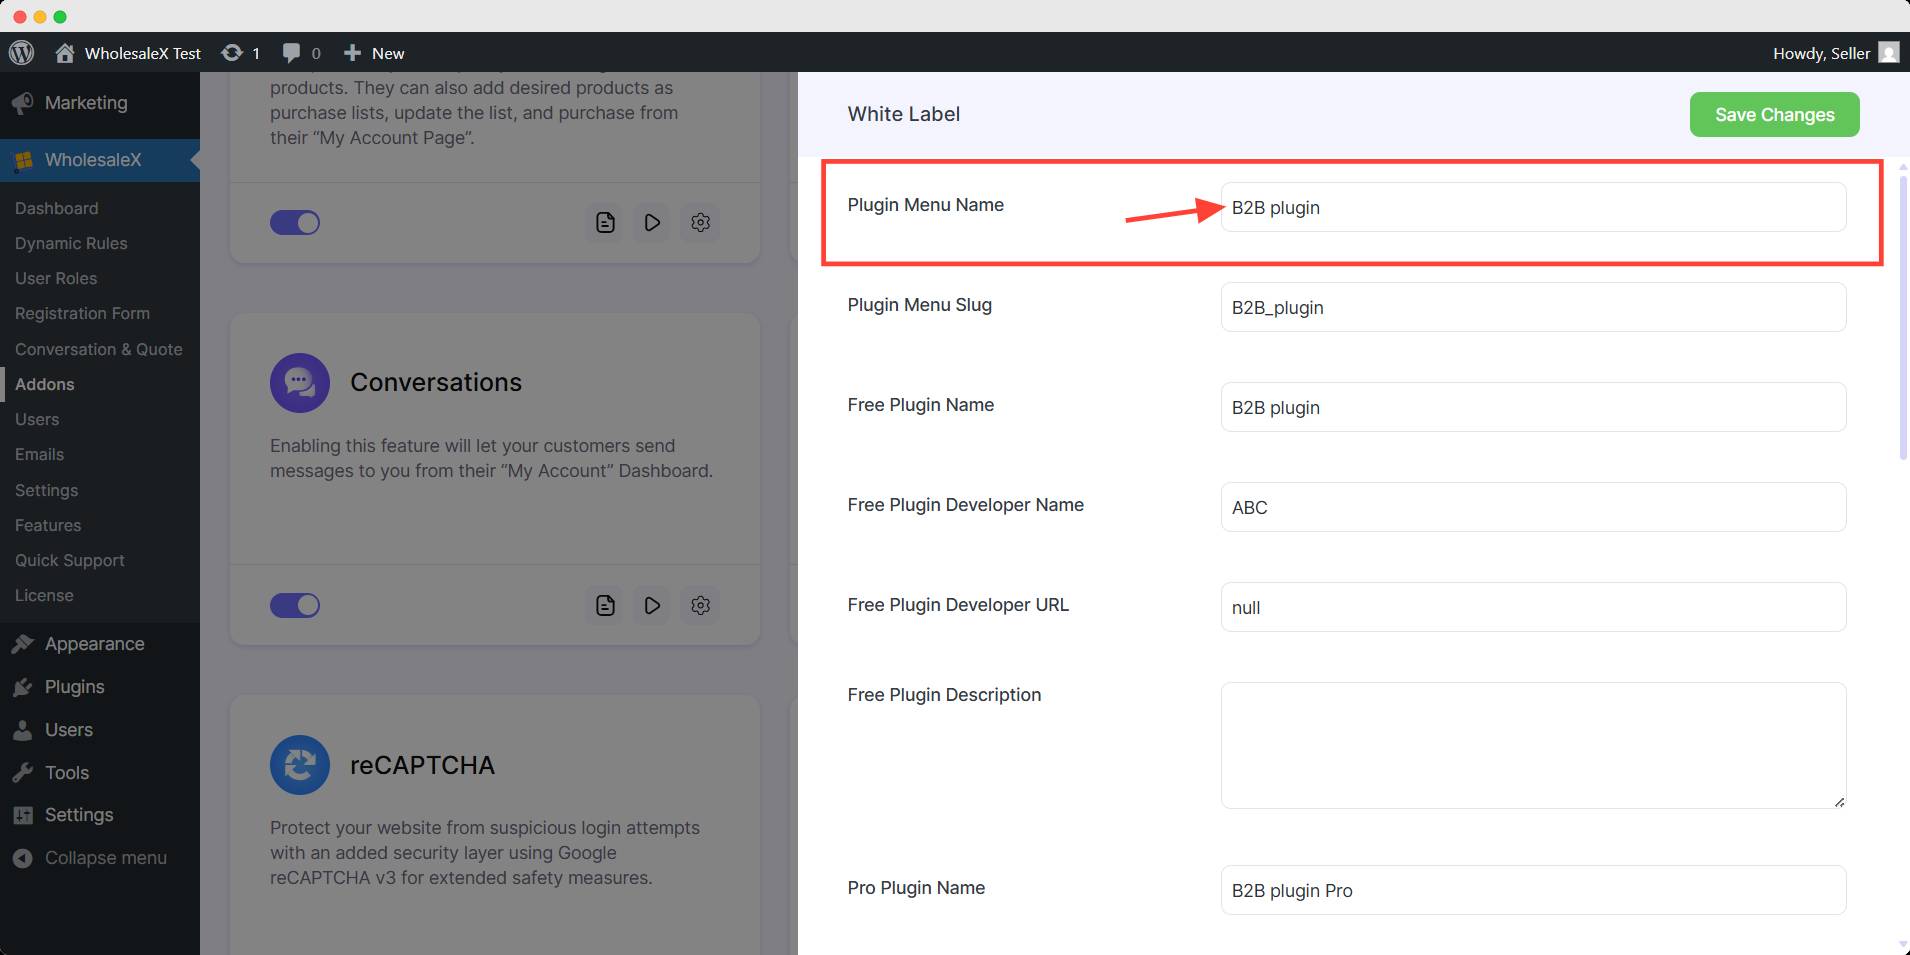
Then hit the Save Changes button and refresh the page to see it take effect. The name changed to B2B Plugin.
Plugin Menu Slug
Slug is the last part of the URL that works as a unique identifier of a page.
In the Plugin Menu Slug text box, write the slug you want to display. For example, we will be using B2B_Plugin.
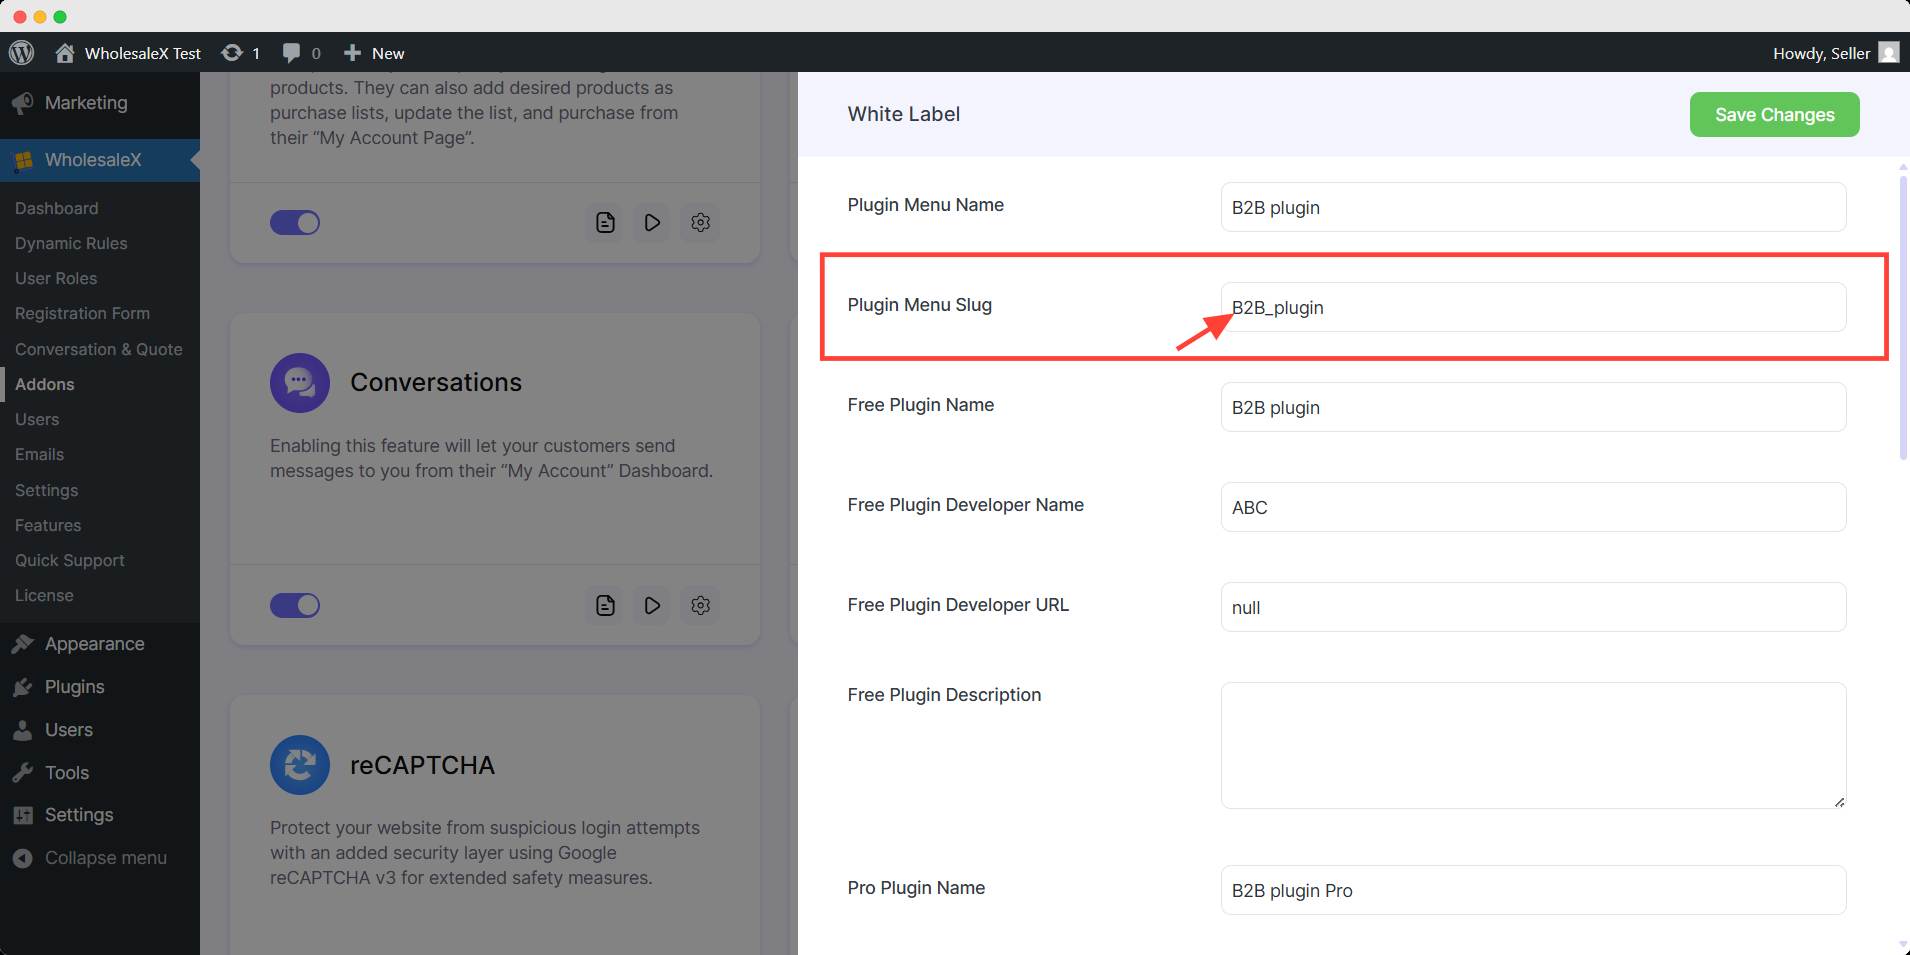
Then hit the Save Changes button to see it take effect. Now you can see the slug changed to B2B_Plugin.
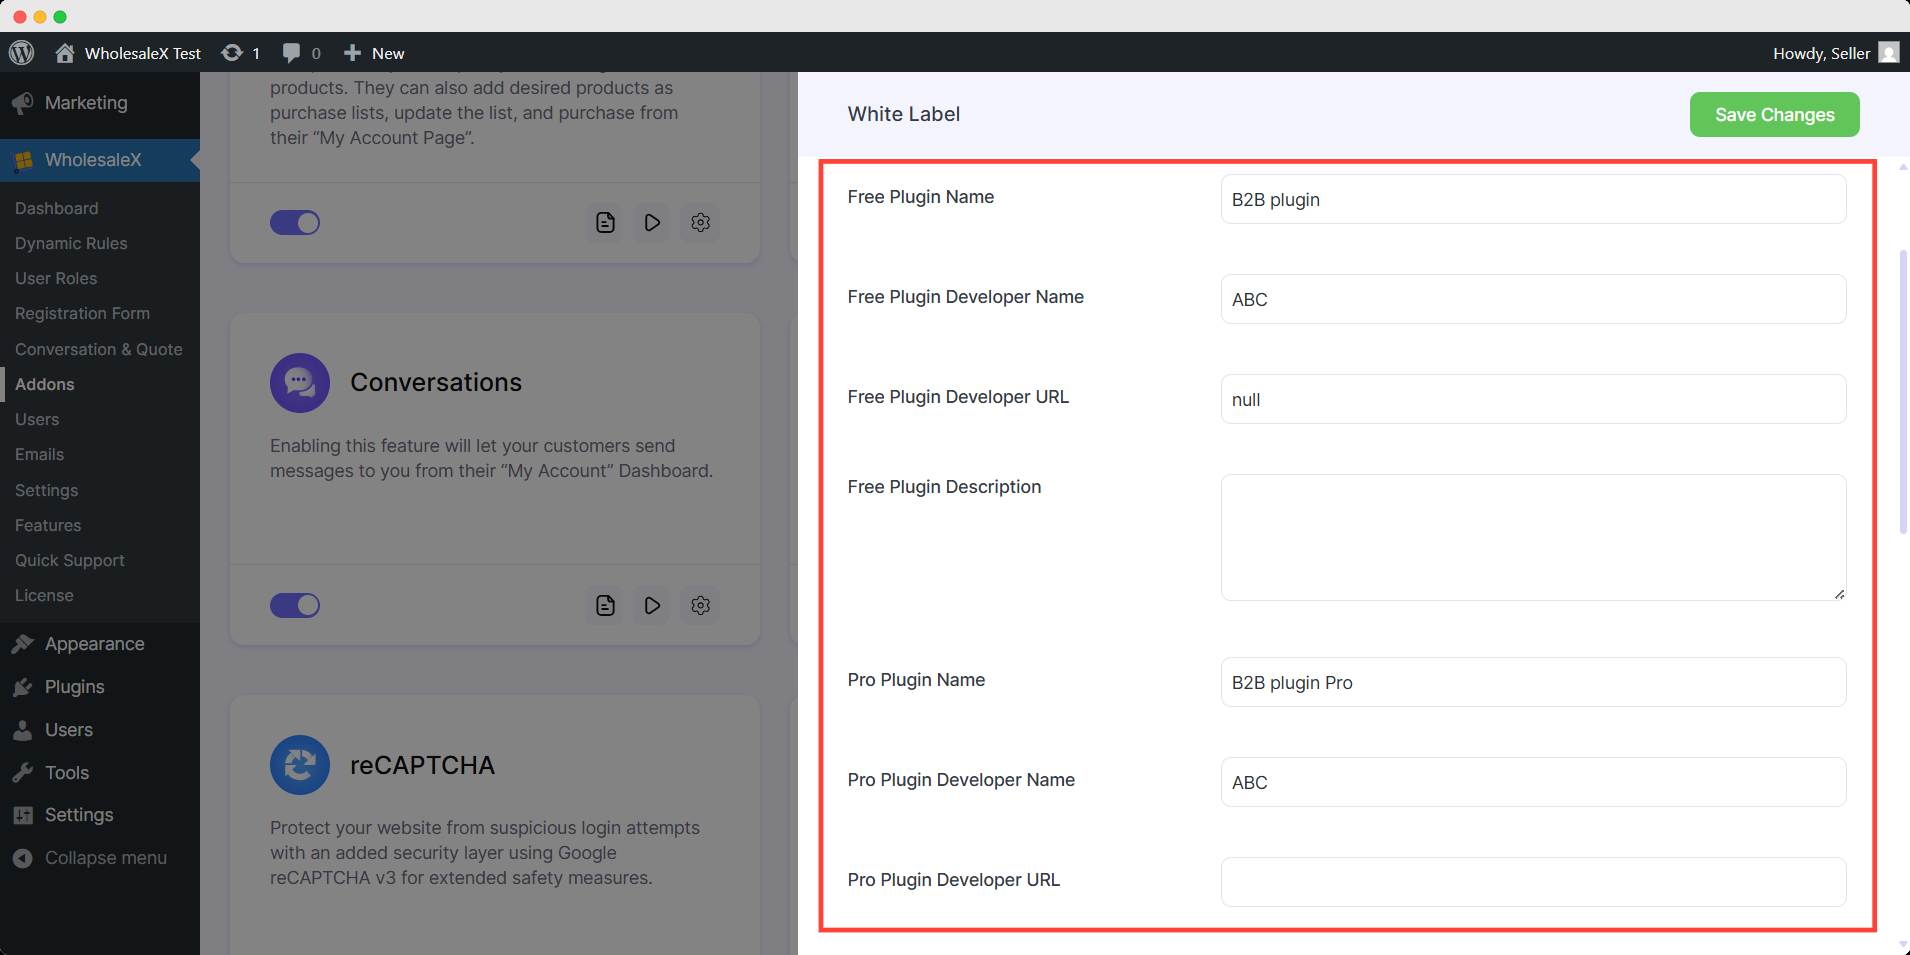
Now in the same way you can change the following items given in the white label setting:
1. Free Plugin Name
2. Free Plugin Developer Name
3. Free Plugin Developer URL
4. Free Plugin Description
5. Pro Plugin Name
6. Pro Plugin Developer Name
7. Pro Plugin Developer URL
8. Pro Plugin Description
9. Plugin Logo URL
10. Plugin Icon URL
11. Bulkorder Form Shortcode
12. Wallet Payment Gateway Title and
13. Wallet Payment Description

After saving all the changes you will find a complete new identity for your client. You can further change the white label setting in the same procedure.