To run your business, you need to follow the taxation laws of the region. With WholesaleX, you can override the default taxation settings of WooCommerce to meet your needs.
Tax Rule
WholesaleX’s dynamic rule feature allows you to be more dynamic with taxation. You get to control which products or users’ taxes will be exempted or not.
In this guide, we will show you how to set the tax rule on your website using the dynamic rule feature of WholesaleX.
Step 1: Create a New Rule
From your WordPress dashboard, click on WholesaleX. Now go to dynamic rules to create a new rule and set the name for this rule.
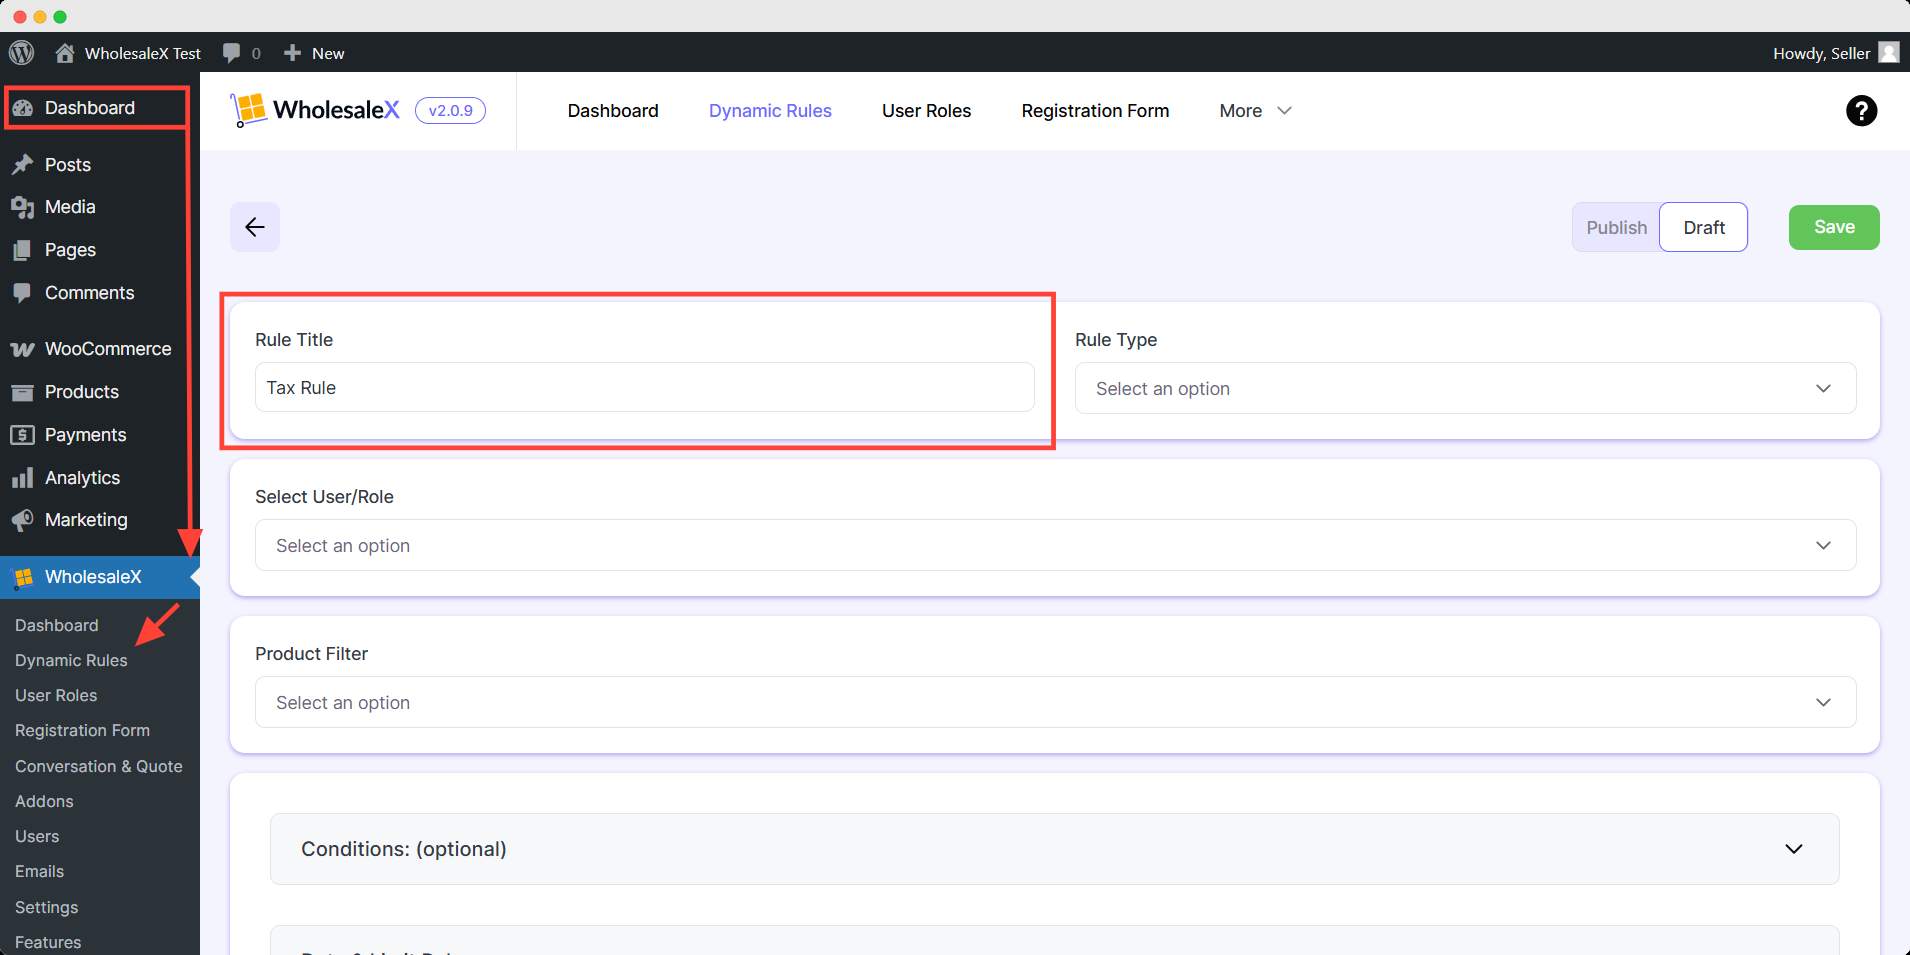
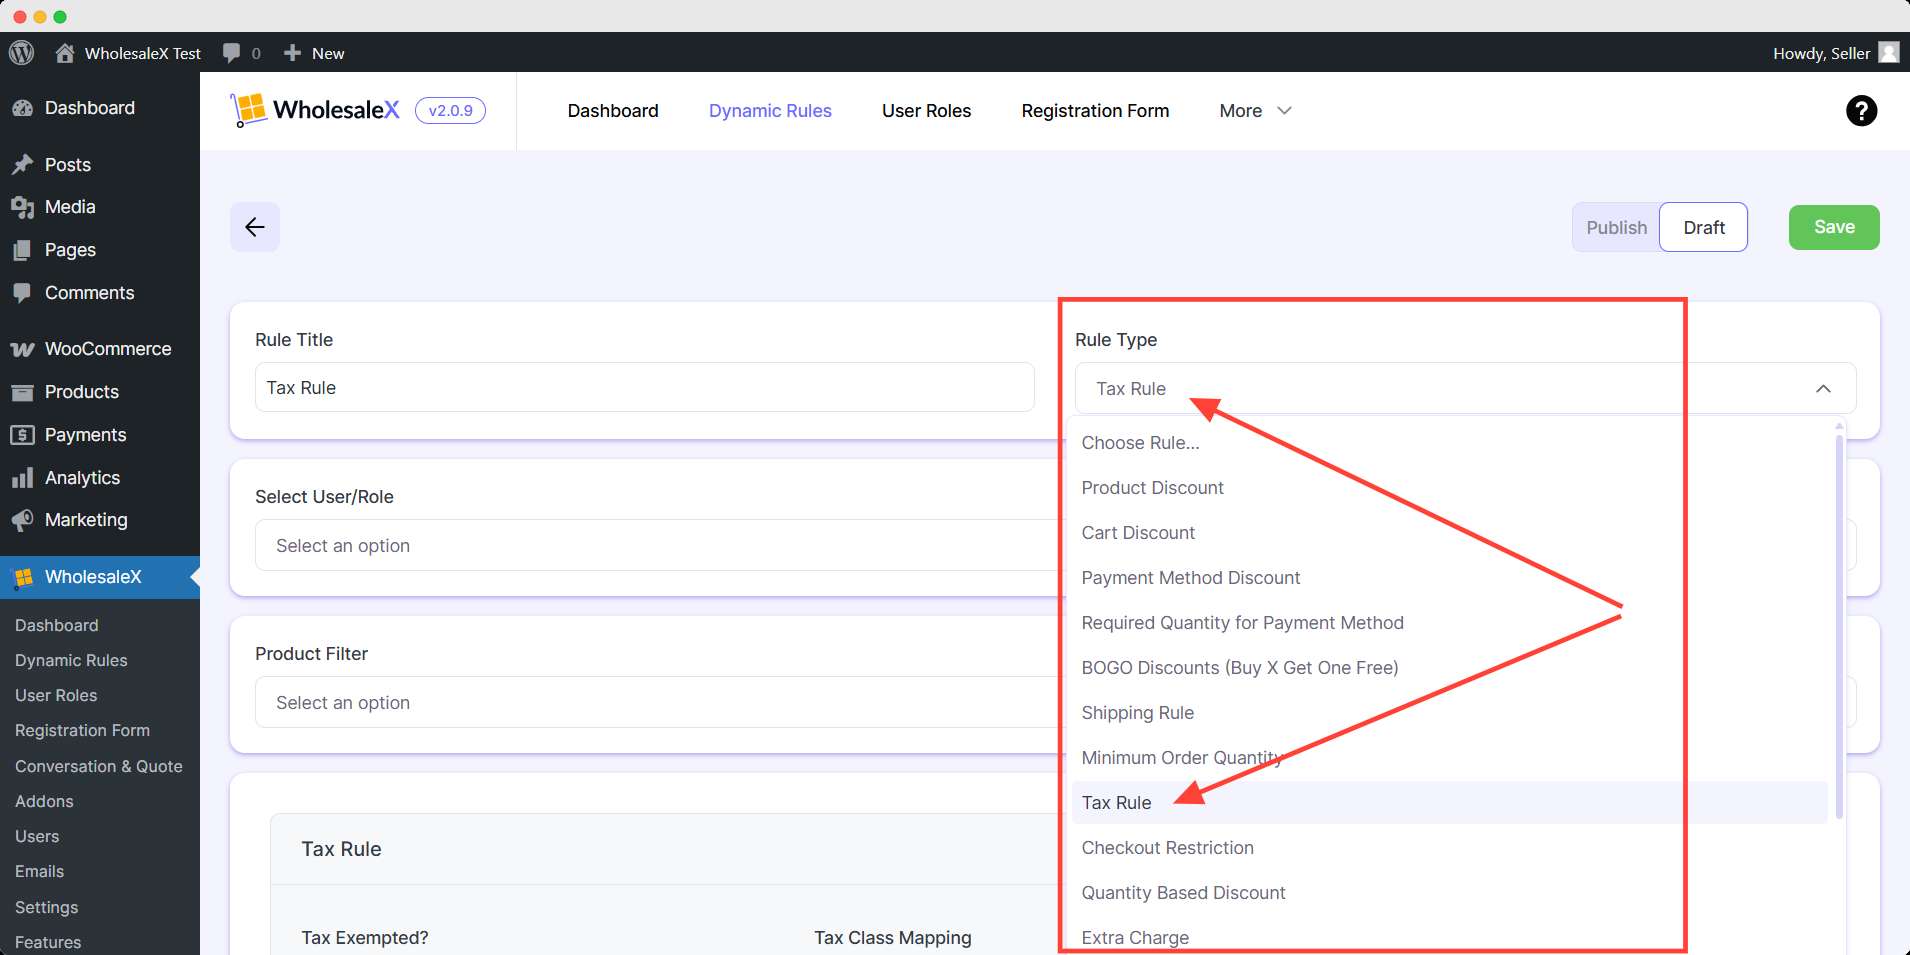
Step 2: Select Rule Type
WholesaleX offers various functionality features for your store. This guide is about Tax Rule, so select it from the Rule Type dropdown menu.
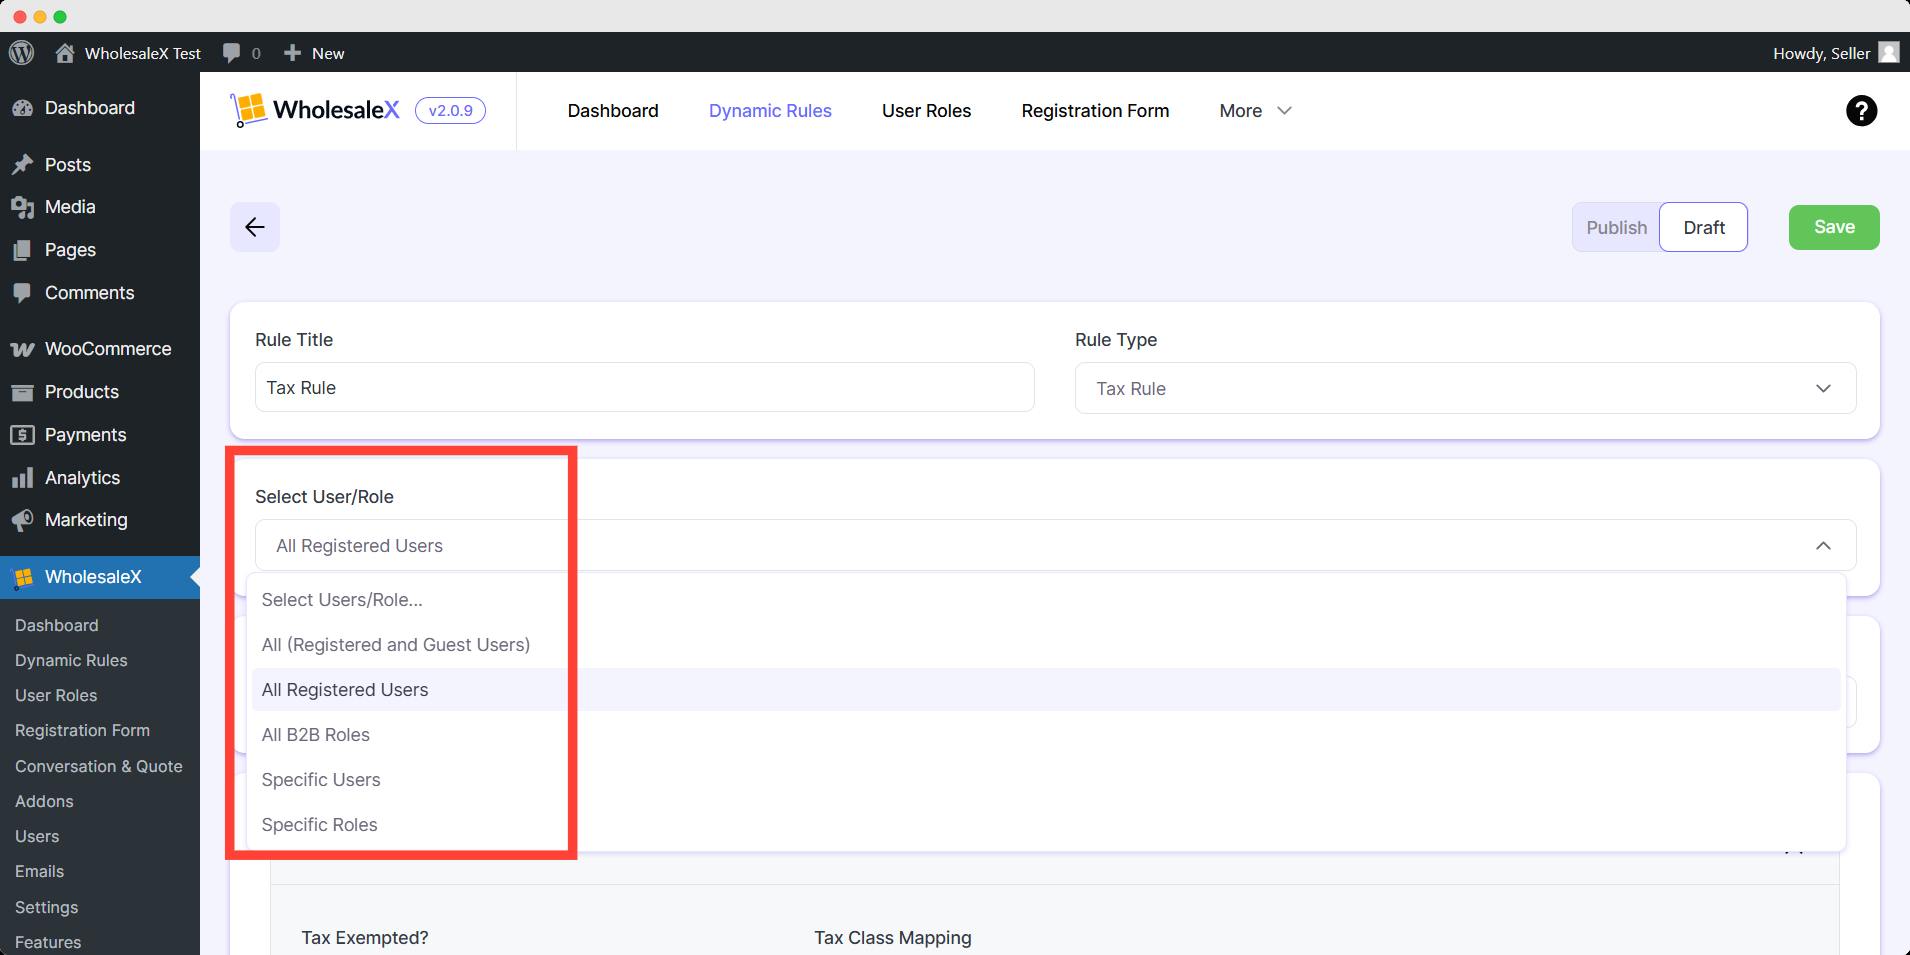
Step 3: Select User/Role
Now, from the dropdown menu, select the option which best meets your requirements. WholesaleX lets you select All Users, All Roles, Specific Users, or Specific Roles.
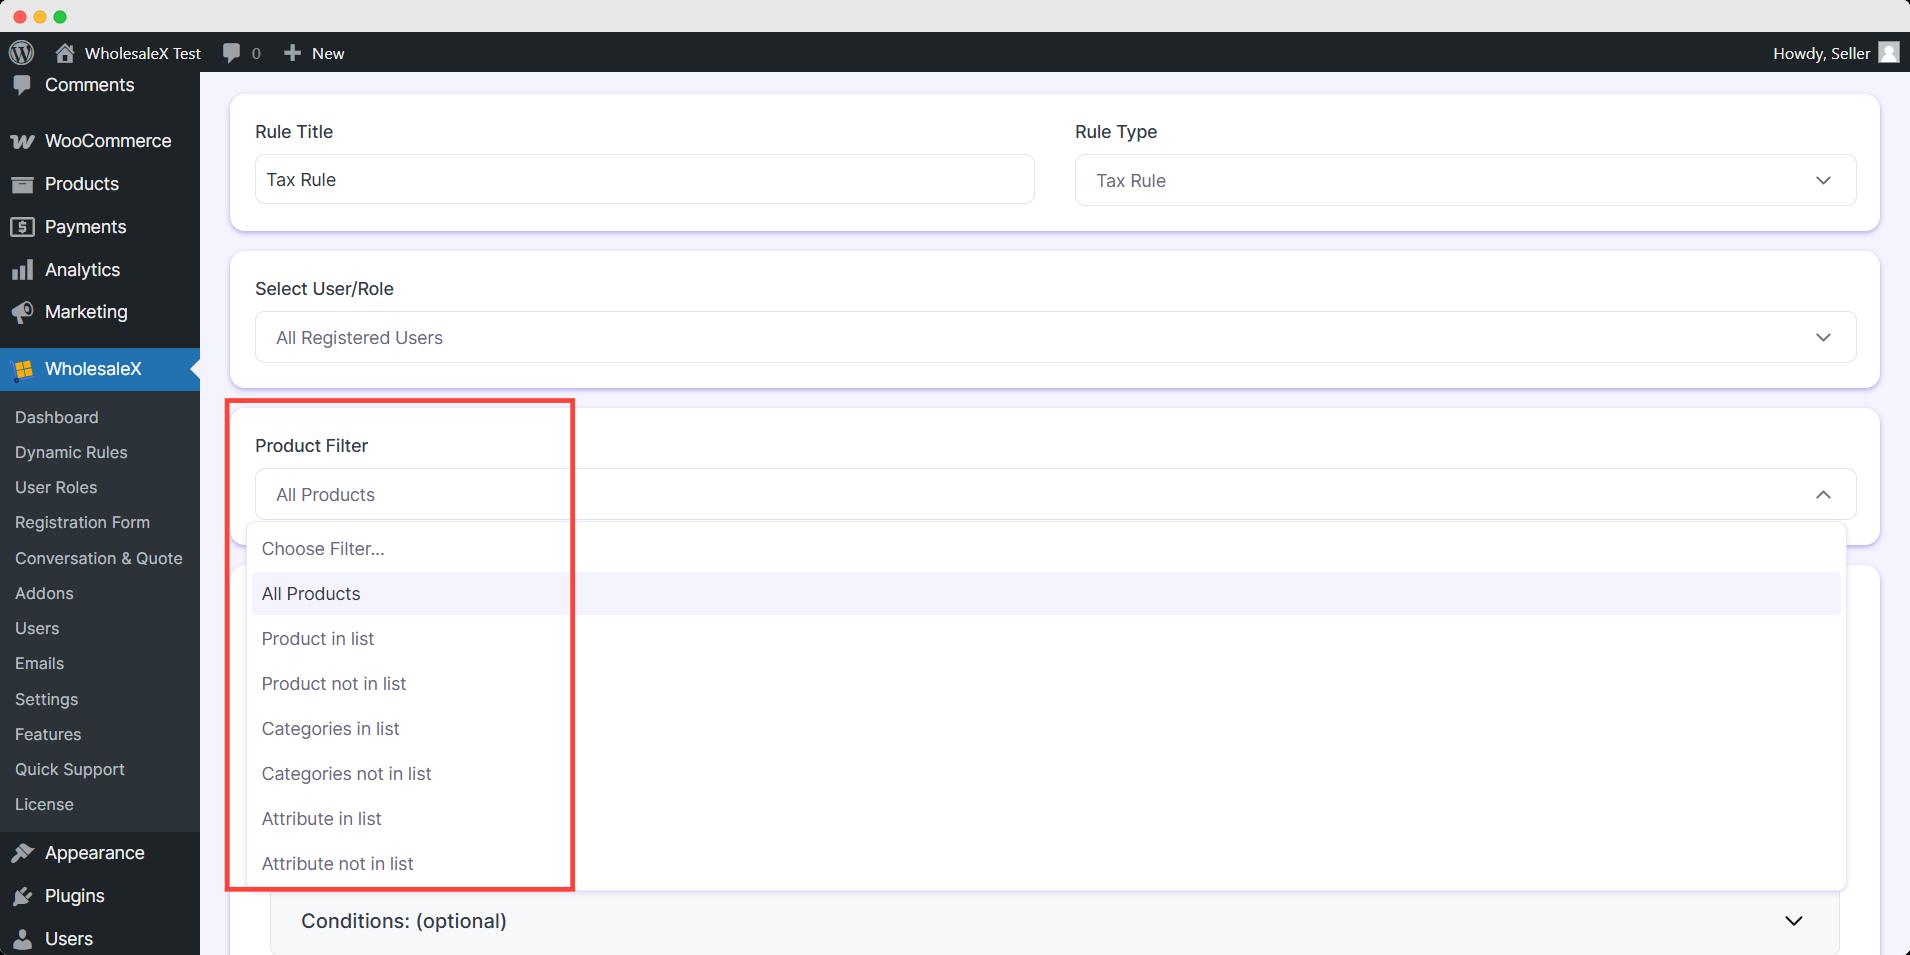
Step 4: Select Product Filter
From the dropdown menu, select the product filter to which you would like to apply the rule.
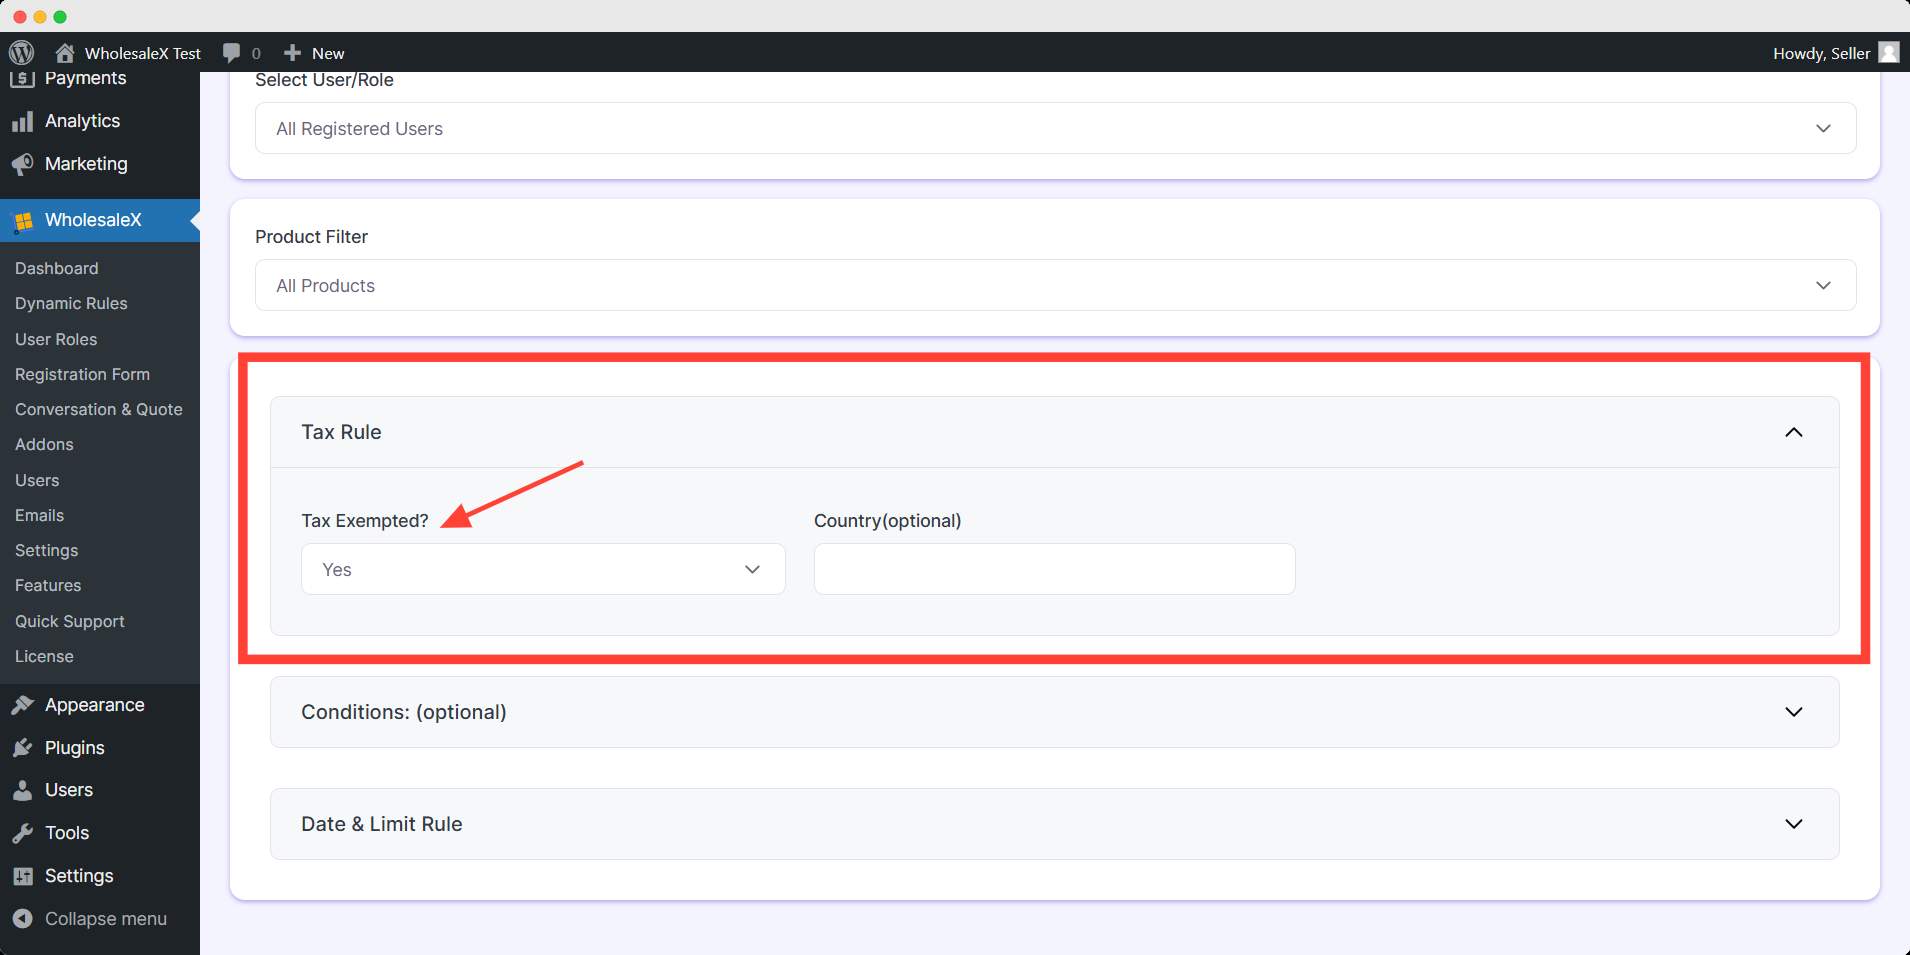
Step 5: Tax Rule Setting
Now you need to decide whether to exempt the tax or not. Select Yes if you want to exempt the tax, or select No if you don’t.
After selecting yes, you can specify the country from the option. However, this is optional, you can leave it blank if you don’t want to specify.
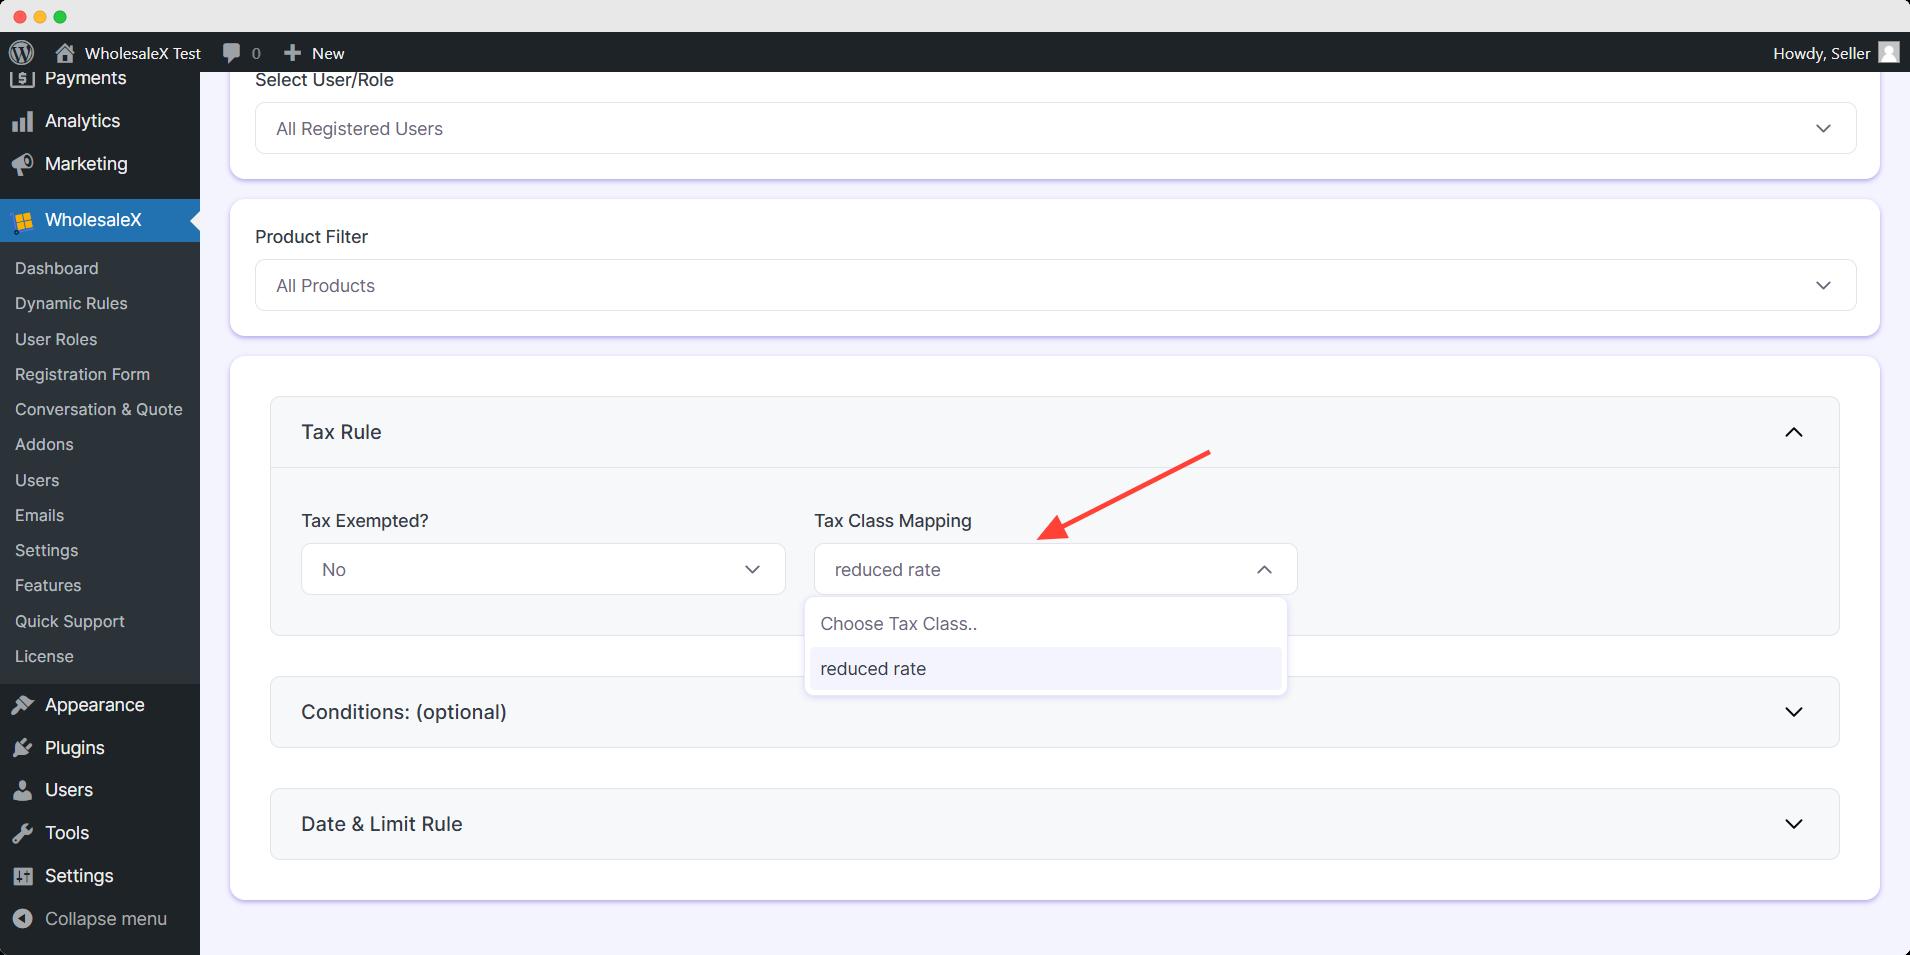
On the other hand, if you select No, you will have to choose which tax class you want to imply. The tax classes are set from the woocommerce tax setting. Choose your preferred tax class here.
Step 6: Set Optional Settings
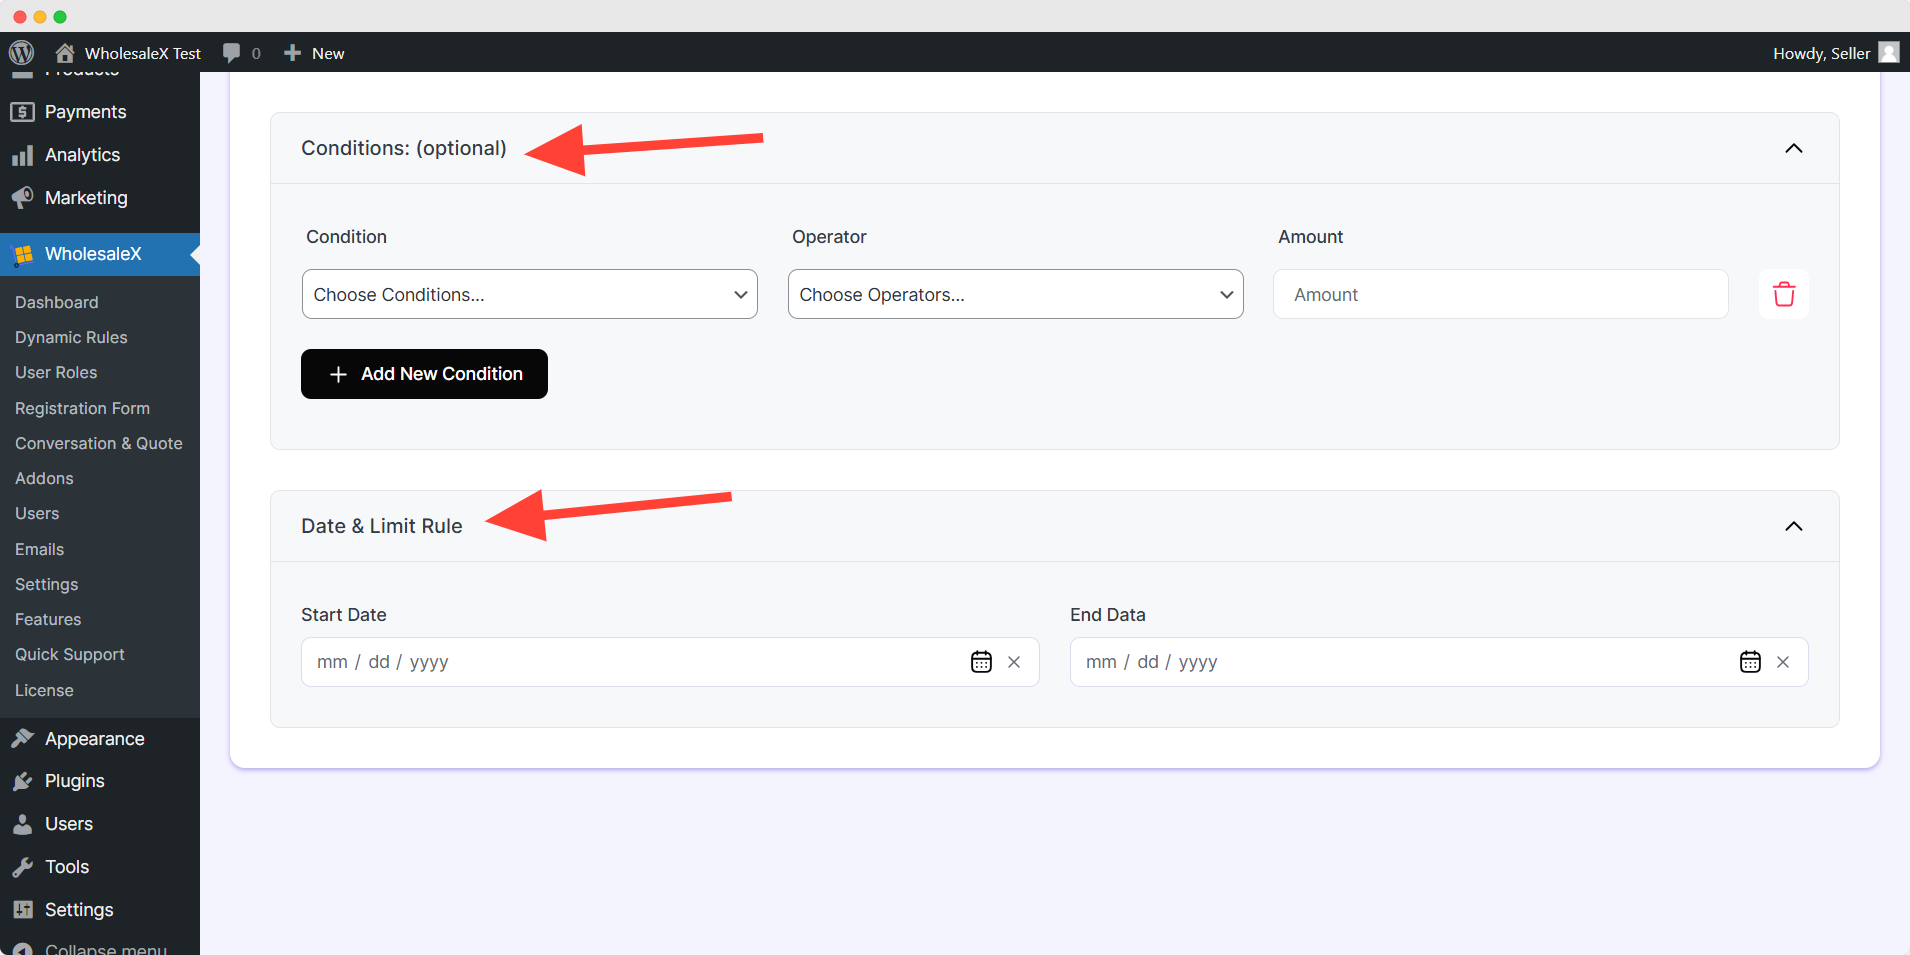
You can also add Condition and Date & Limit Rule if you want. It’s an optional setting, it won’t change any core function of your dynamic rule.
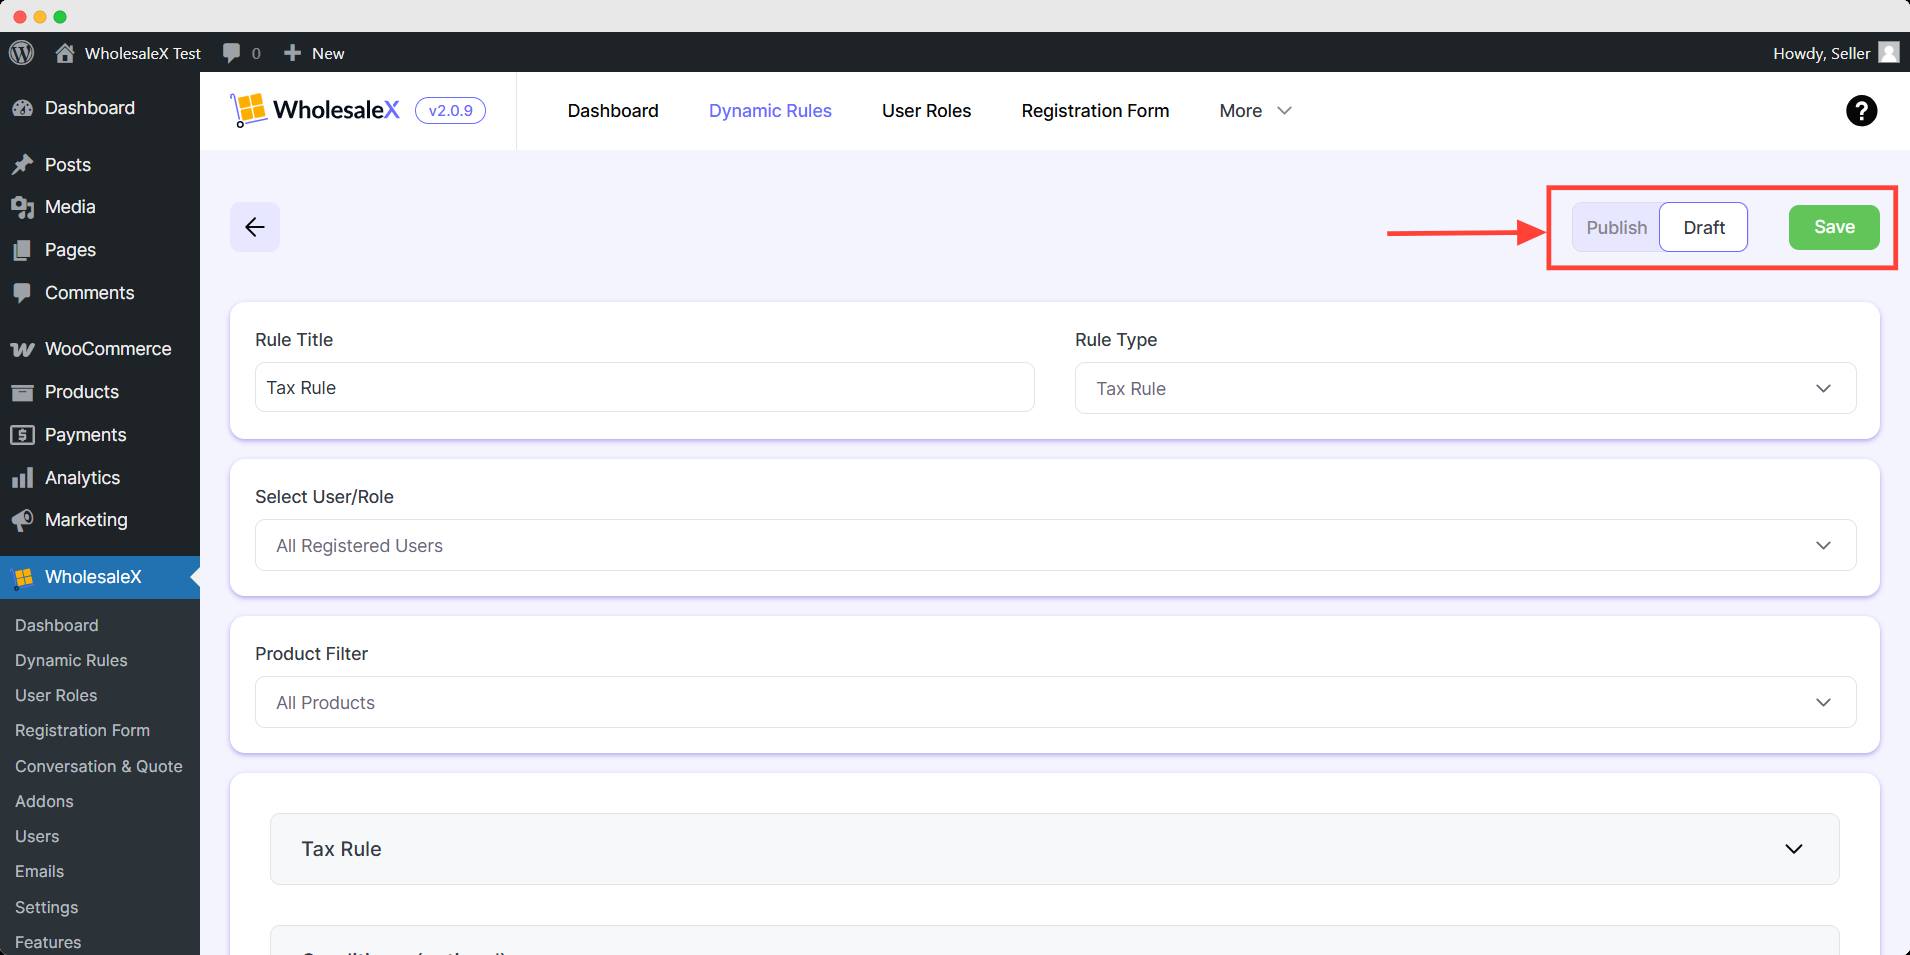
After you finish your tax rule setup, you need to save and publish it. Simply toggle publish button and hit save to activate your tax rule.
You can further update the Tax Rule at your convenience with WholesaleX.