As we have created the custom registration form, now it’s time to use it to create a Separate Registration & Login page. For that, just follow the below steps.
Step – 1. Create a New Page
First of all, hover on the “All Pages” option and click on the “Add New” page button to create a new page that will be your custom registration page.
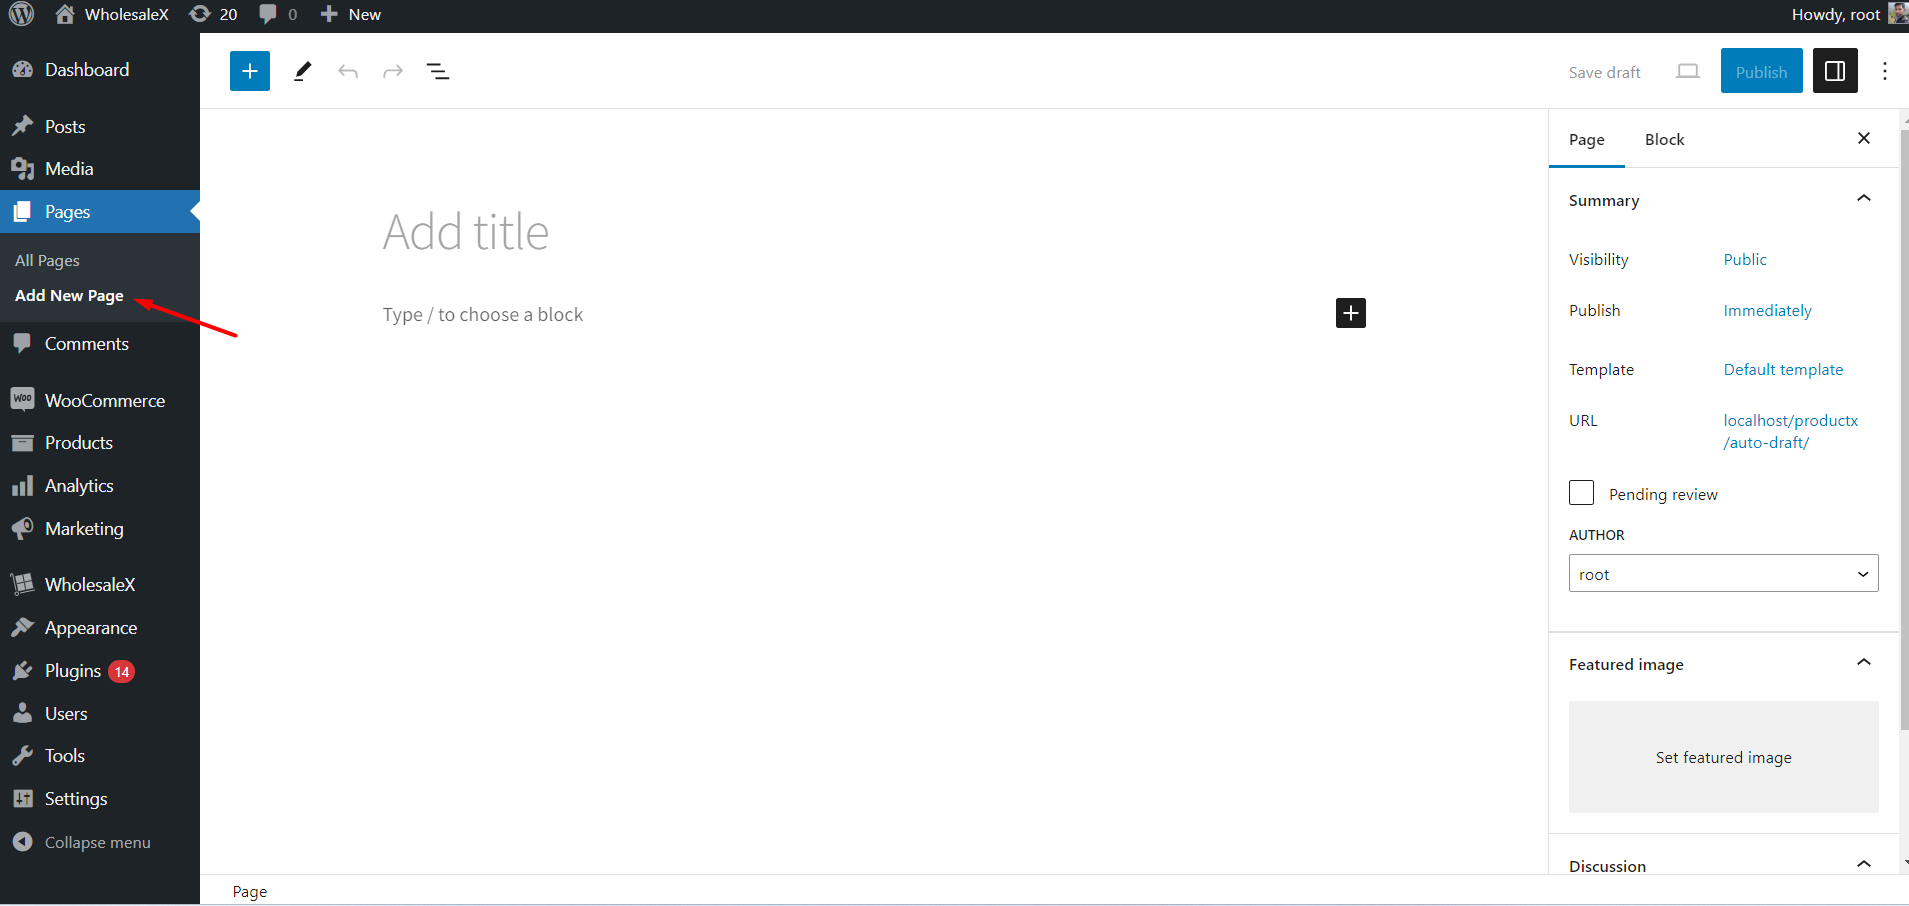
Now add a name to the page, for example, I am adding the name “Registration & Login.”
Step – 2. Add WholesaleX Forms Block
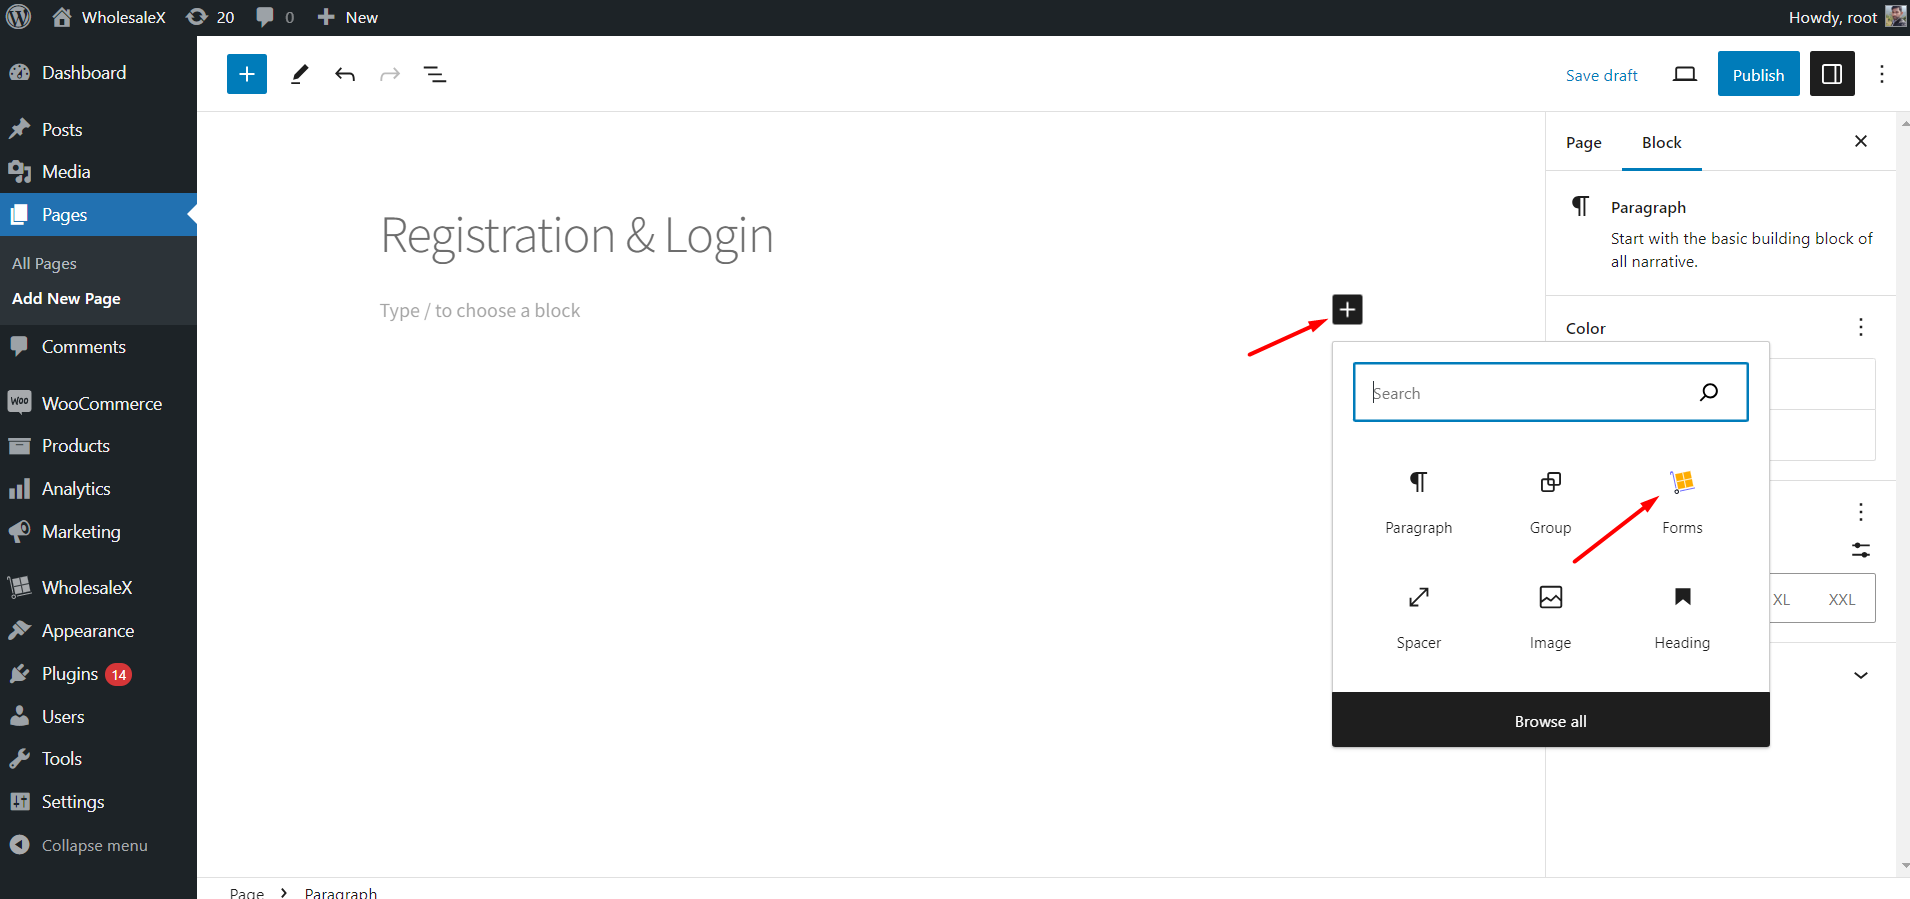
Then, click on the “+” and select the WholesaleX “Forms” blocks to add the form to the page.
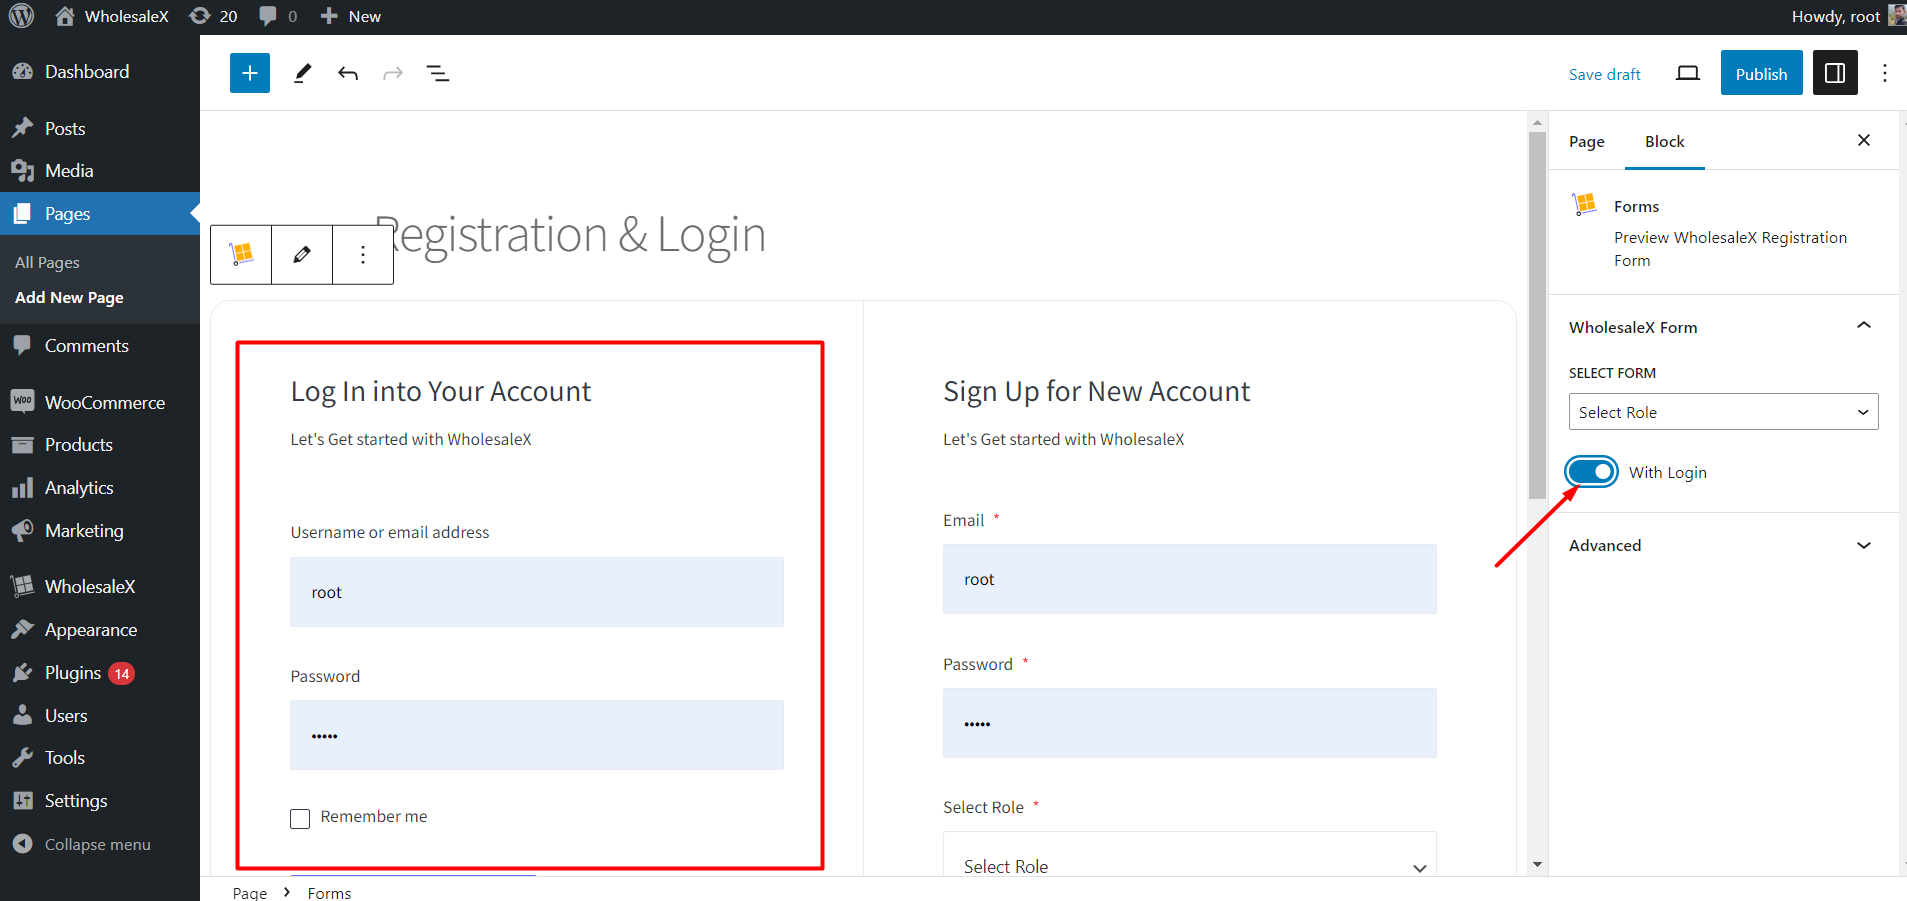
After adding the form to the page, you need to enable the “With Login” option, if you want to add the login form along with the registration form.
Moreover, you need to select the type of form between Global, B2C, and B2B roles that you have created using the WholesaleX role creation feature.
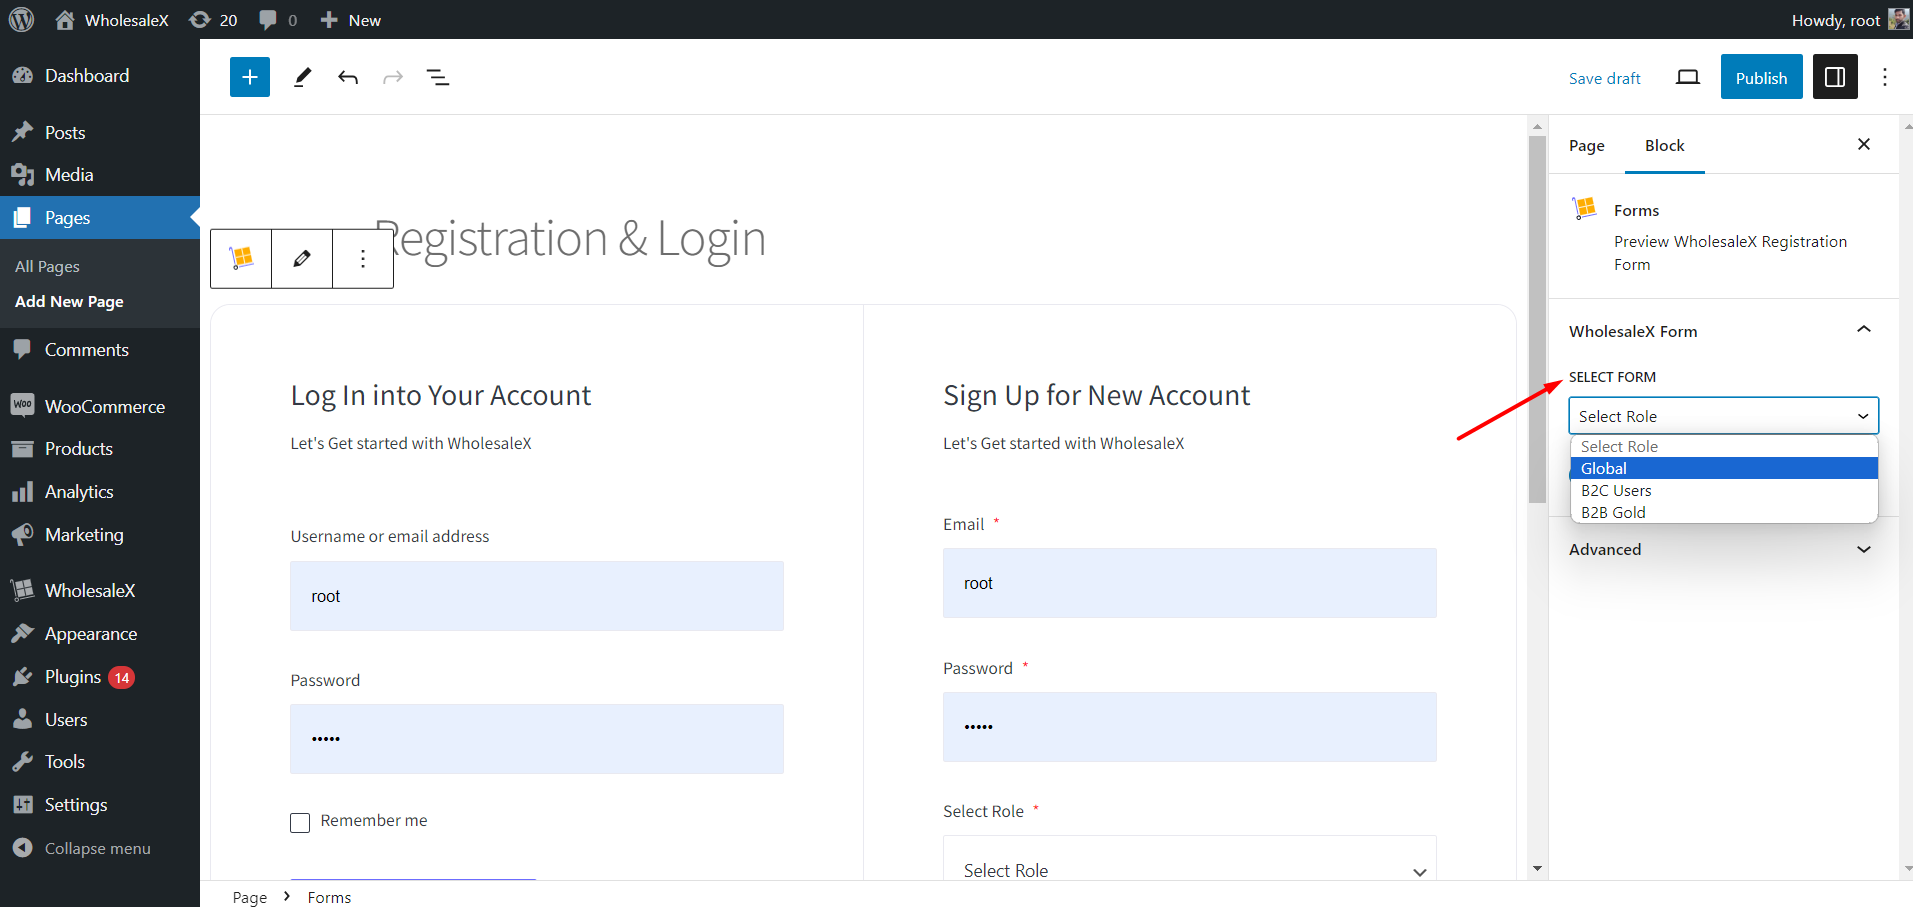
Selecting the Global option will allow all types of users (B2B and B2C) to use the form. You need to select other available options if you want to create separate registration forms for a specific user type.
Note: All of your B2B user roles will be available here, so you can create separate login forms for each of your B2B user roles if required.
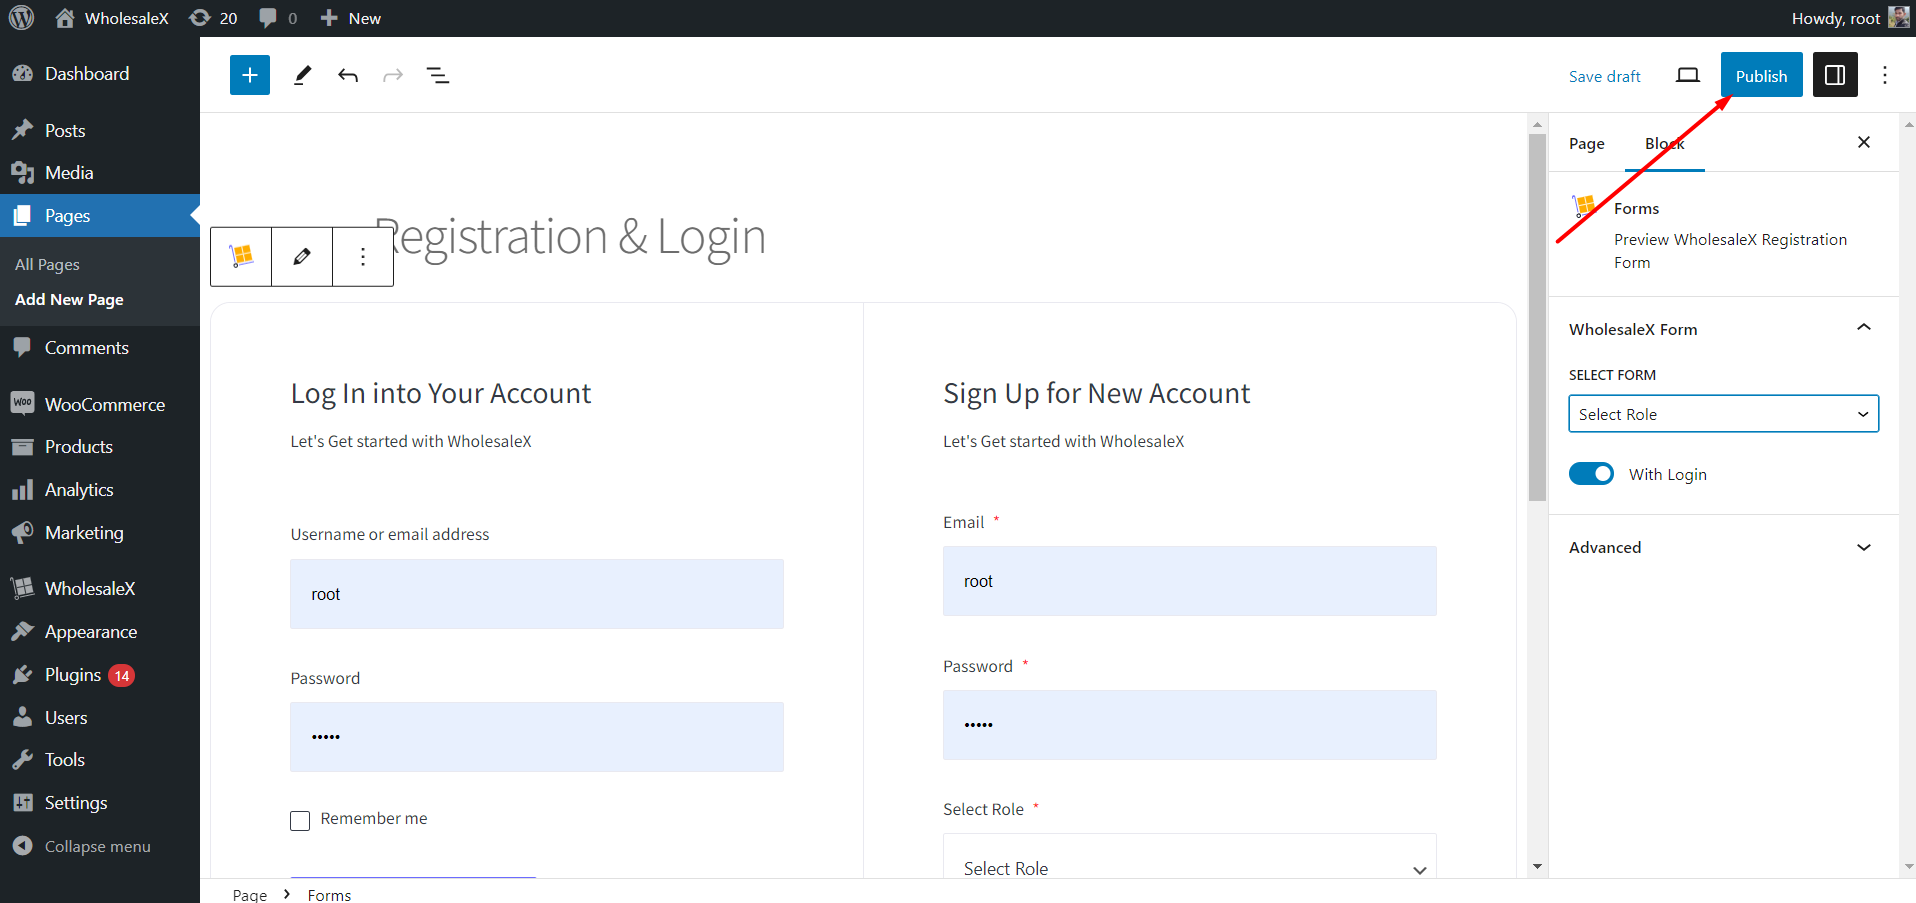
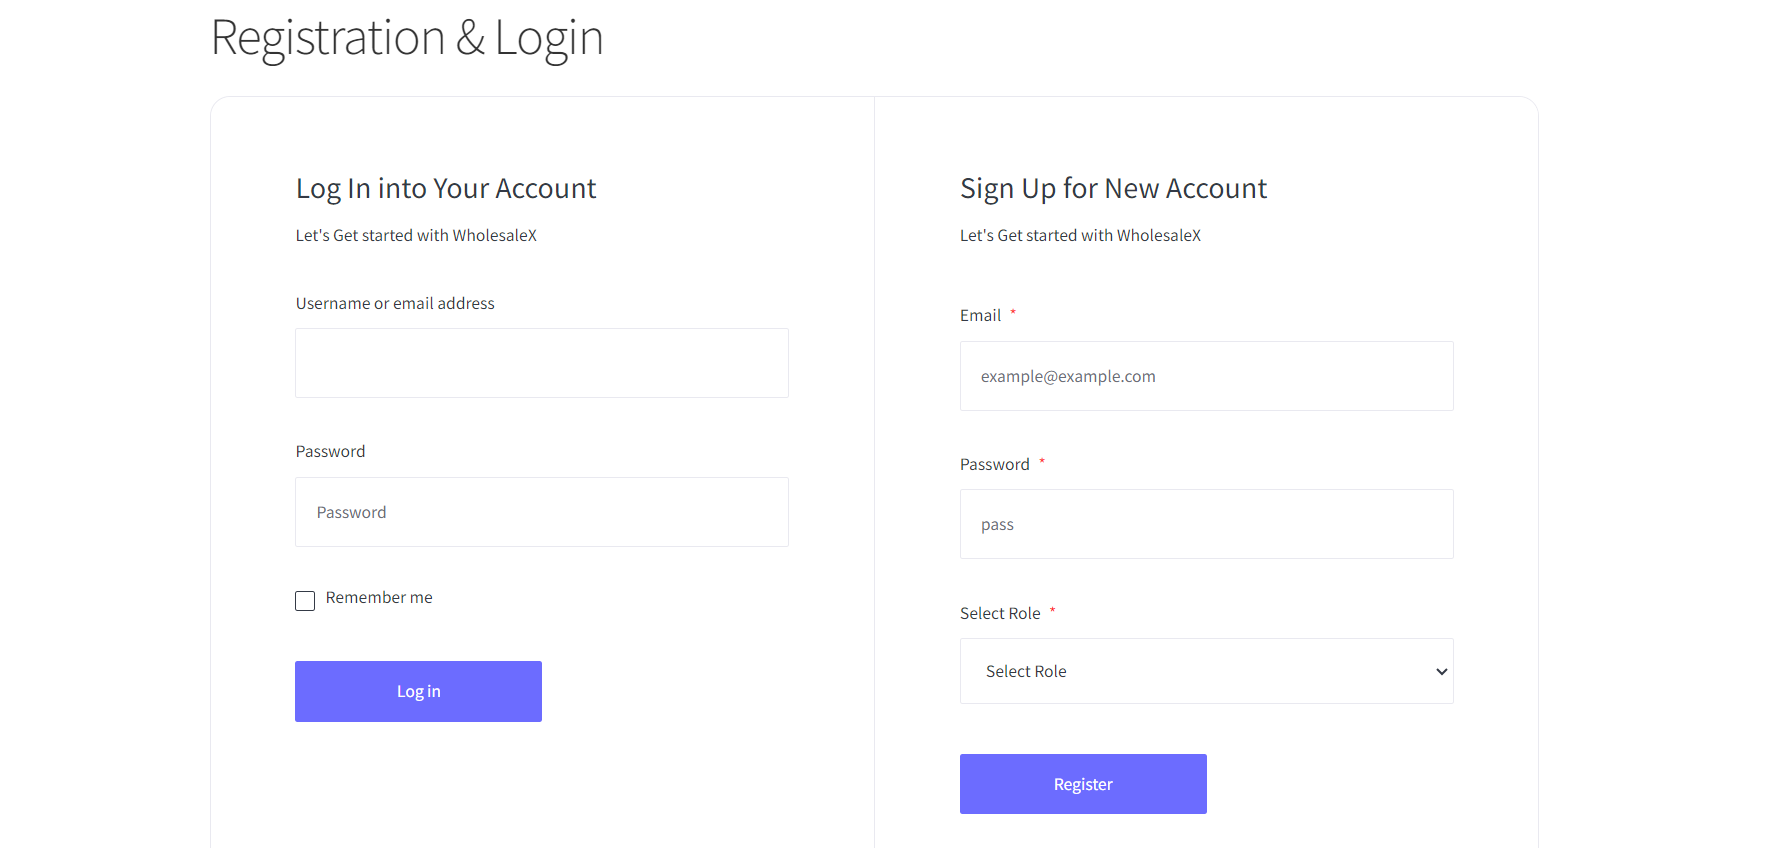
Once you are done with the configuration you can click on the Publish button to make it live. Then you can check it from a user perspective to make sure everything is working perfectly.
Create a Separate Registration & Login Page Via Shortcode
Creating a separate registration page using a shortcode use for the users who don’t use Gutenberg. It is very effective if you have a third-party builder like Elementor.
So let’s explore the steps for that.
Step – 1. Copy Shortcode
First, go to the Registration Form builder and click on the “Get Shortcodes” button. Here, you can see all available options.
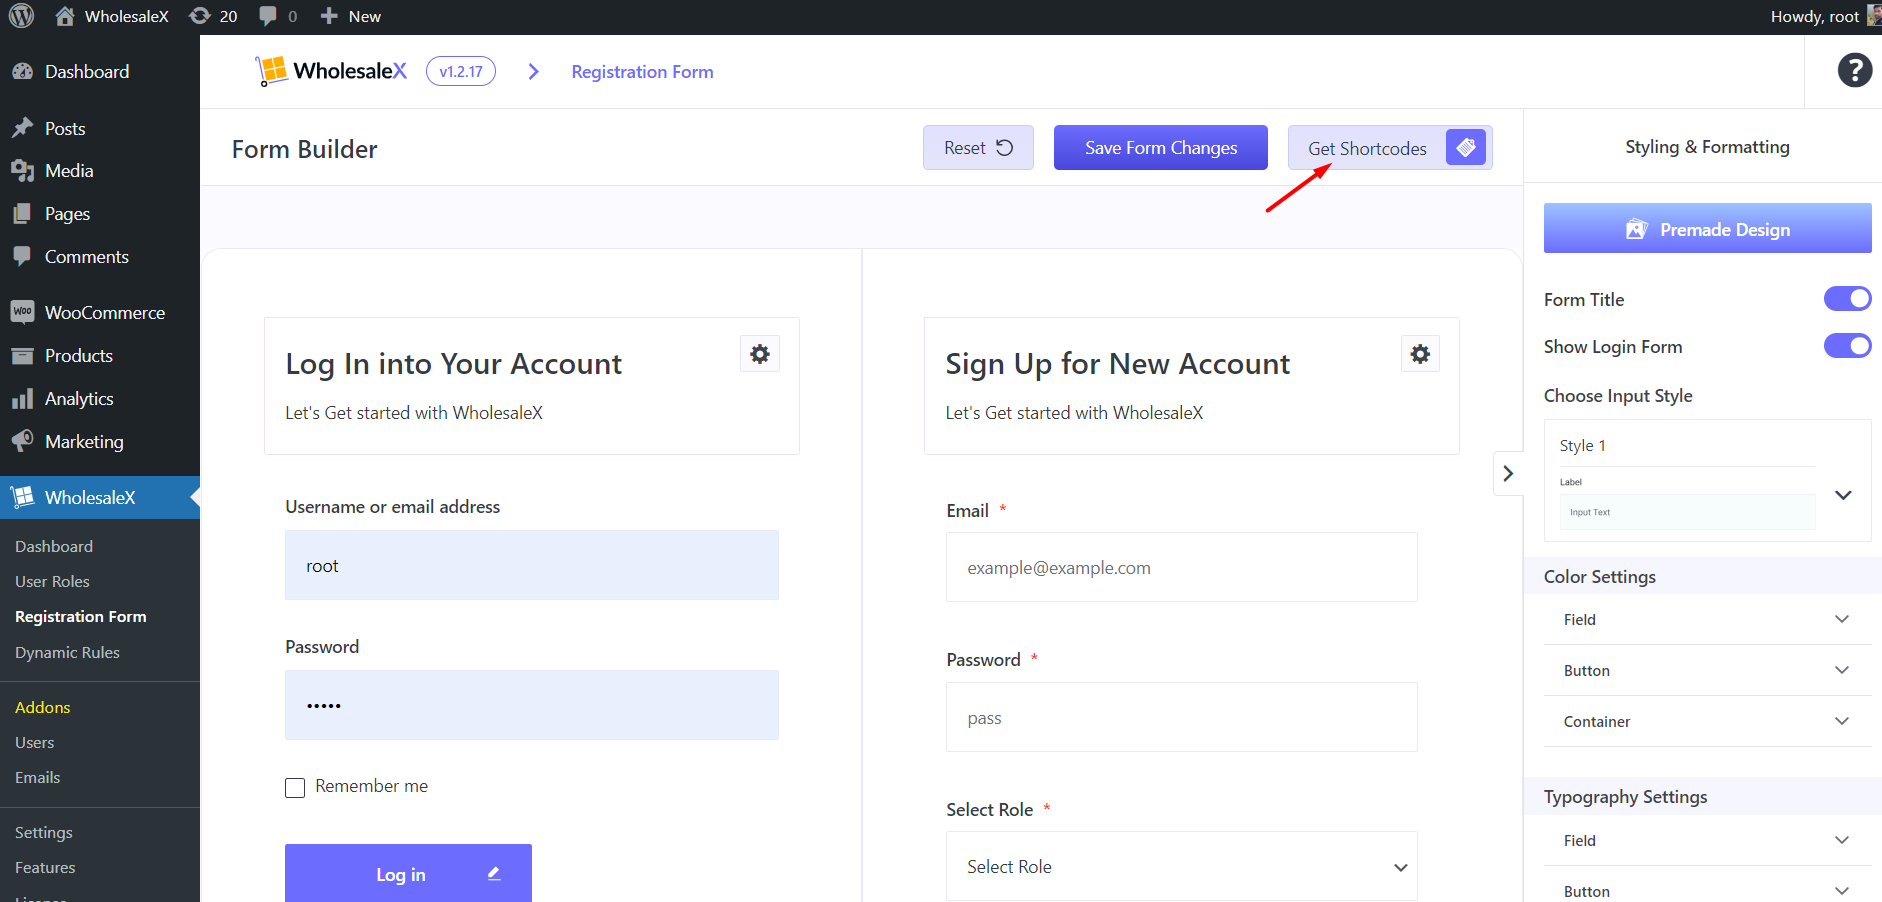
As I told you before, you can choose the global form for making one registration page for all types of users and choose other options to make specific forms.
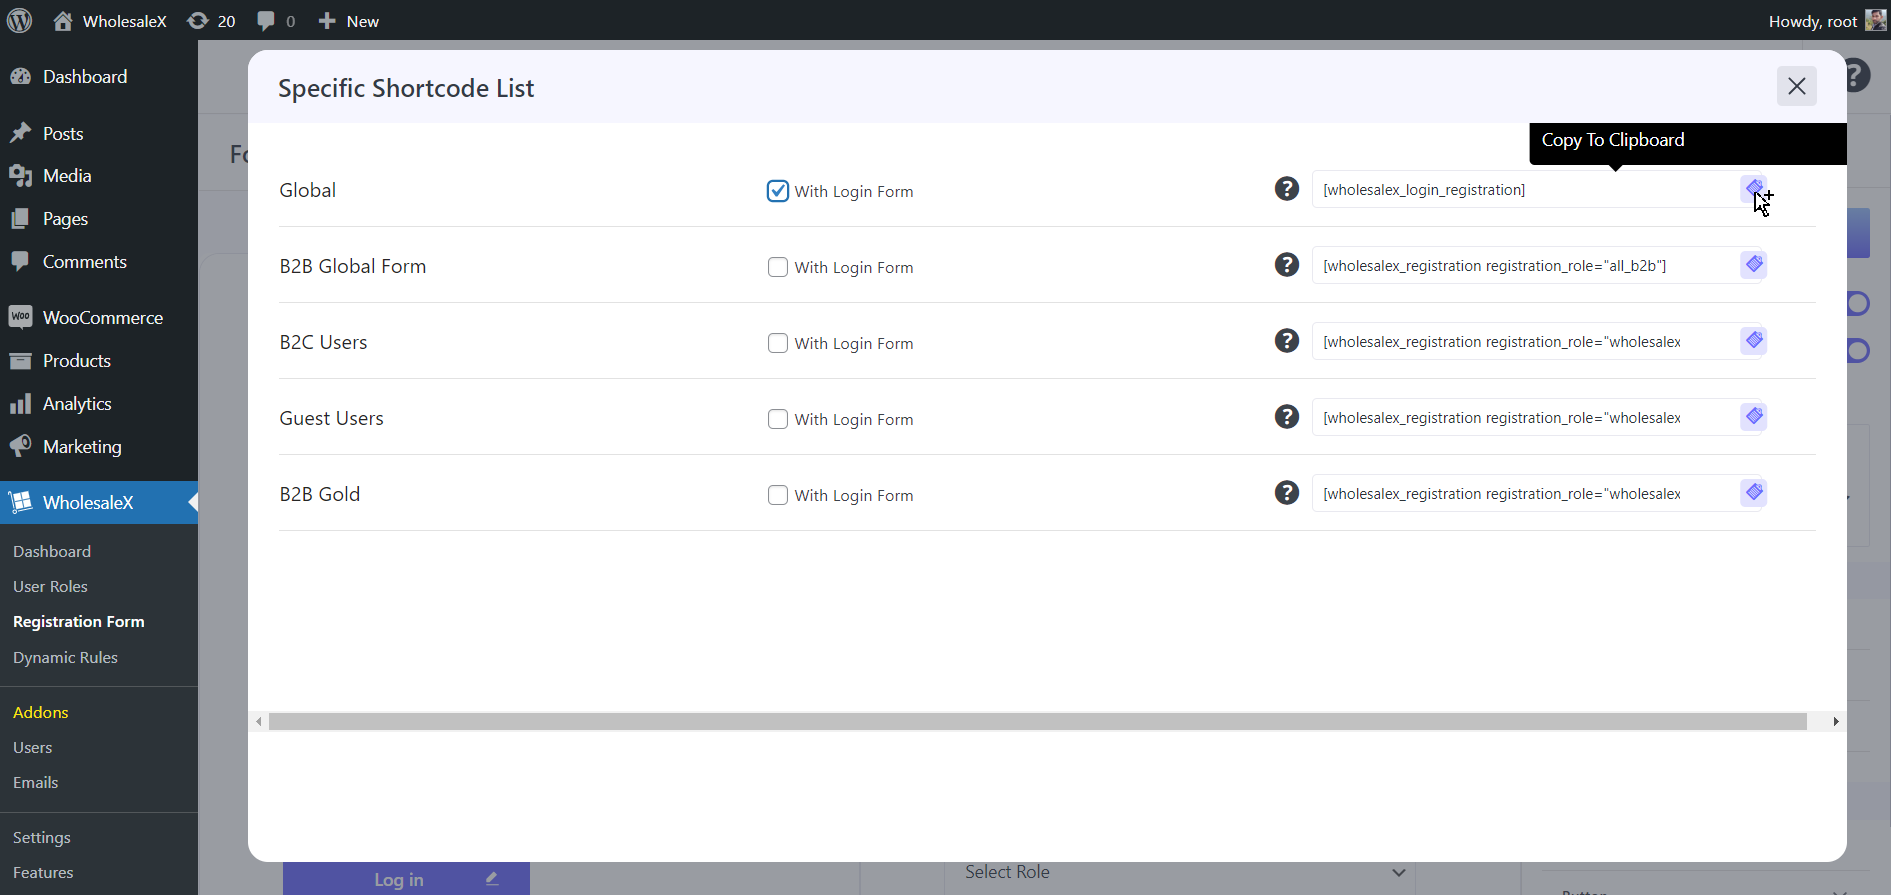
For now, let’s go with the Global form option by clicking on the Copy Button. Don’t forget to click on the “With Login Form” checkbox to make it available along with the registration form.
Step – 2. Paste the Shortcode
Now, go to the page where you want to add the registration & login form. Then you can paste the shortcode in the editor and the form will be added to the page if you are using Gutenberg.
However, the process is a bit different if you use any third-party builder. If you are using any of the builders like Elementor, add the “Shortcode” widget and then paste the shortcode. That’s all the form will be available on the page.