Customers can pay through various methods like Cash on delivery, Credit Cards, Checks, PayPal, etc. As a business owner, diverse payment options can be a nuisance to you.
Extra Charges on Payment
WholesaleX lets you add an extra charge on certain payment gateways so you are compensated for your inconvenience. Adding an extra charge to a certain payment option can also make your customer opt for another payment gateway.
This step-by-step tutorial will show you how to add extra charges to payment methods.
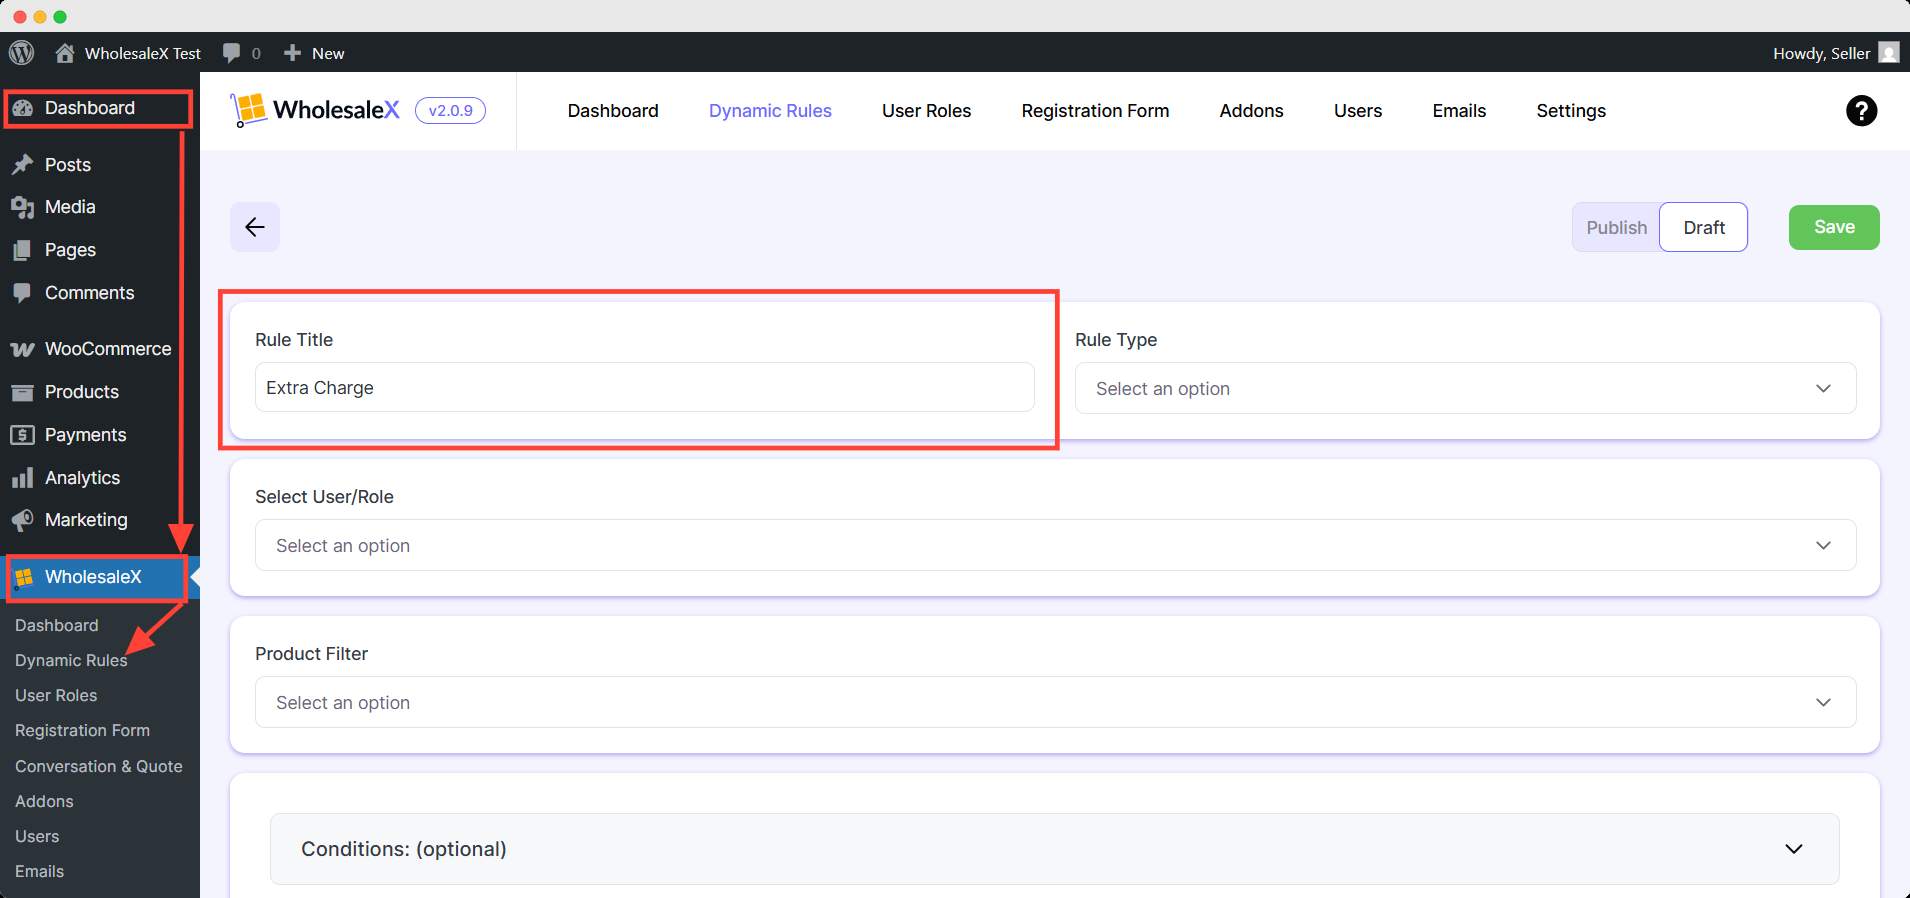
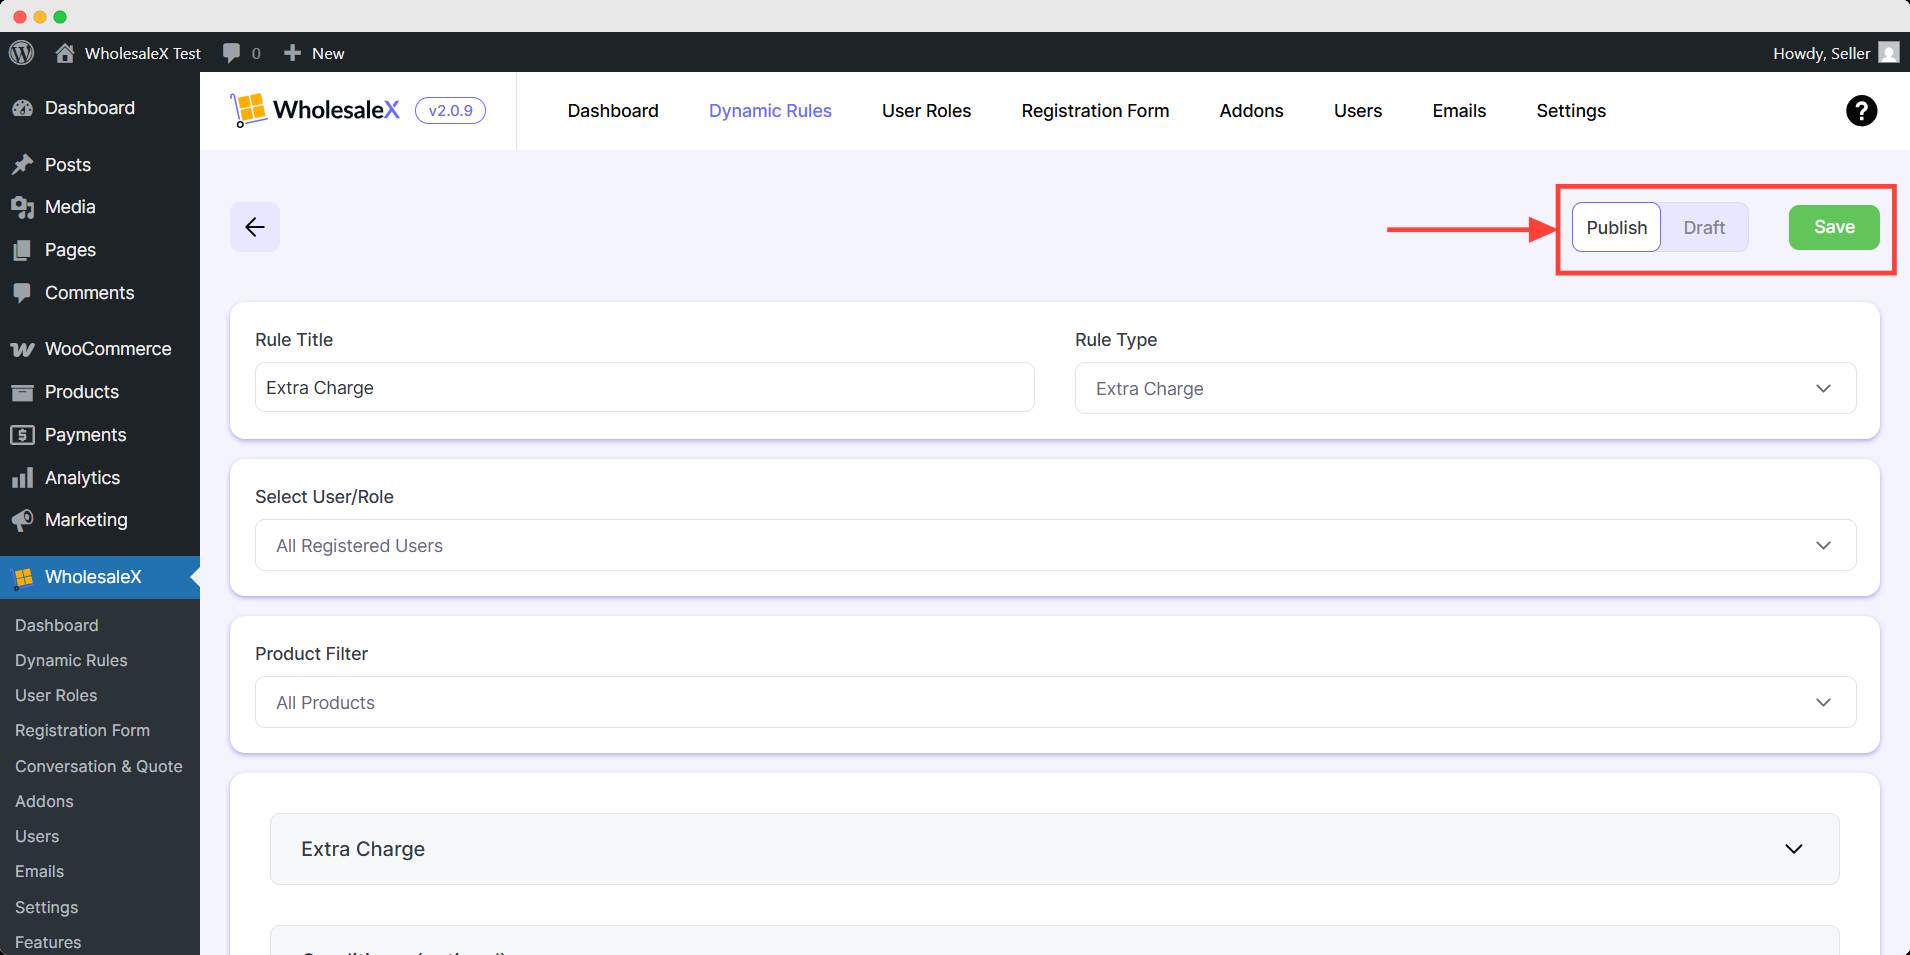
Step 1: Creating a New Rule
First, go to the WordPress Dashboard and select WholesaleX. Now go to dynamic rules to create a new rule and set the name for this rule.
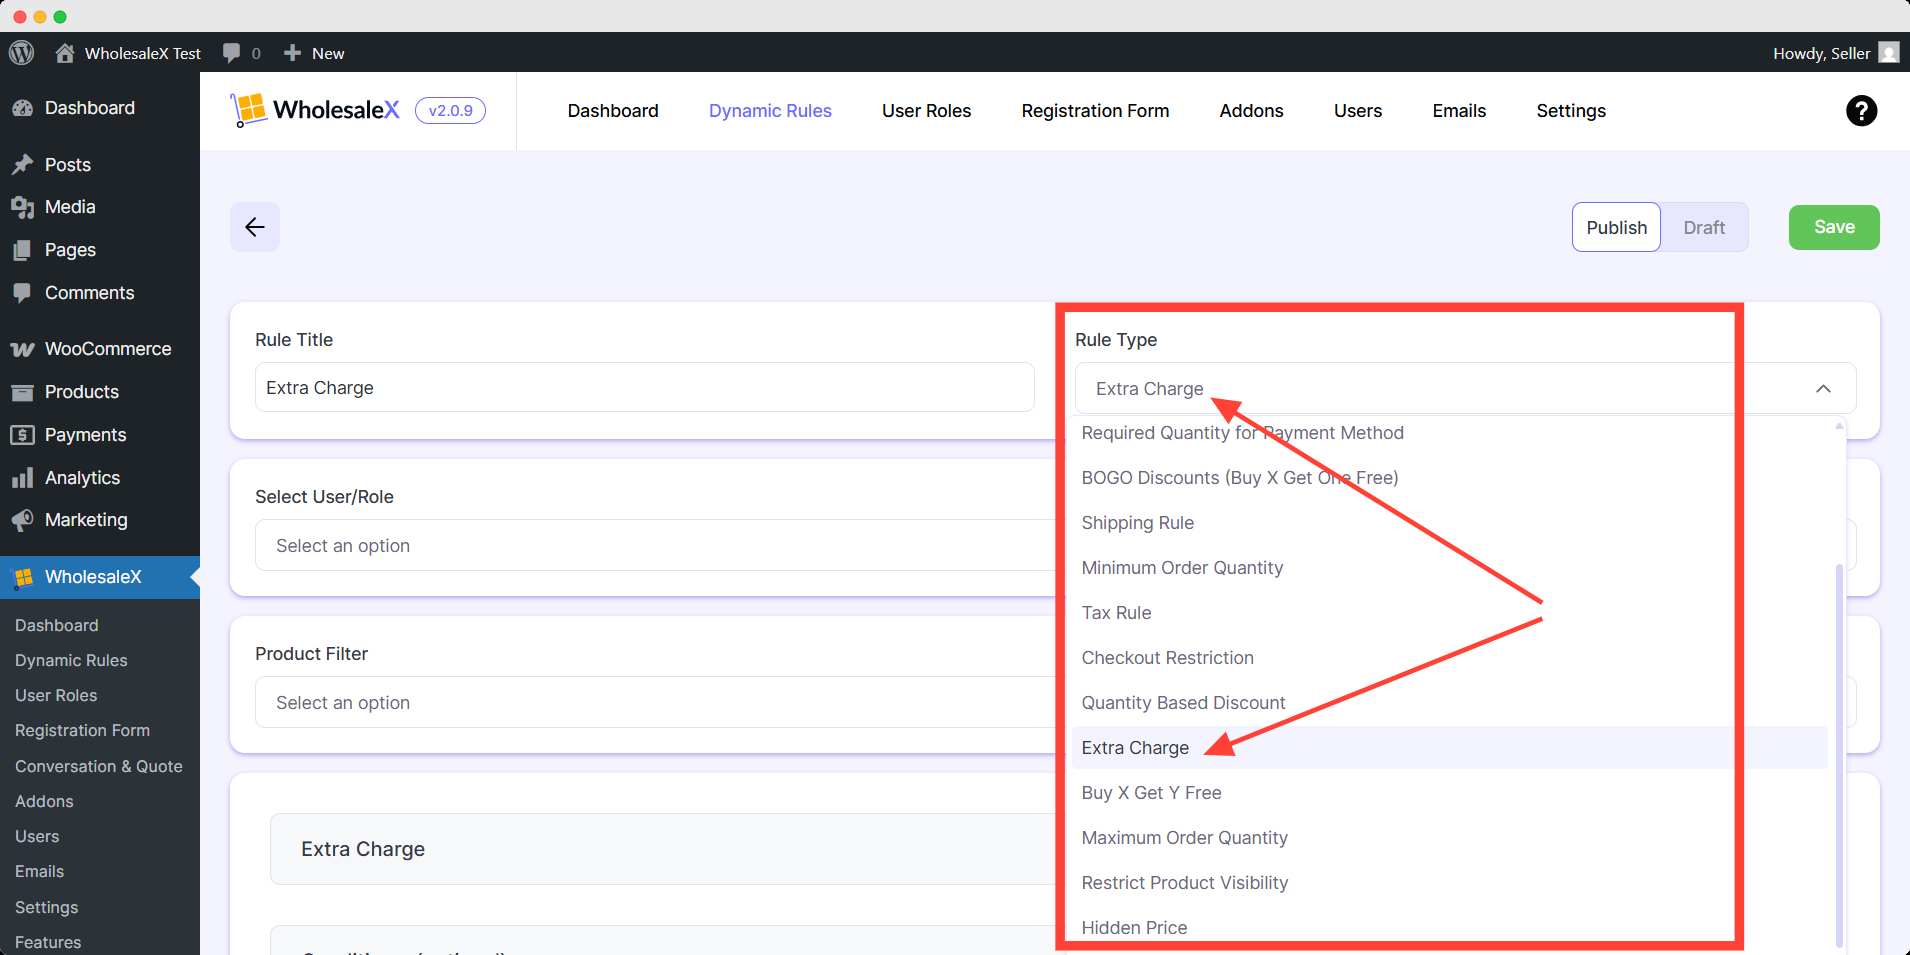
Step 2: Select ‘Extra Charge’ Rule Type
Now, you have to select the Rule Type. WholesaleX offers a wide range of payment-related options for your store, but as we are discussing Extra Charge, we will select it from the Rule Type dropdown menu.
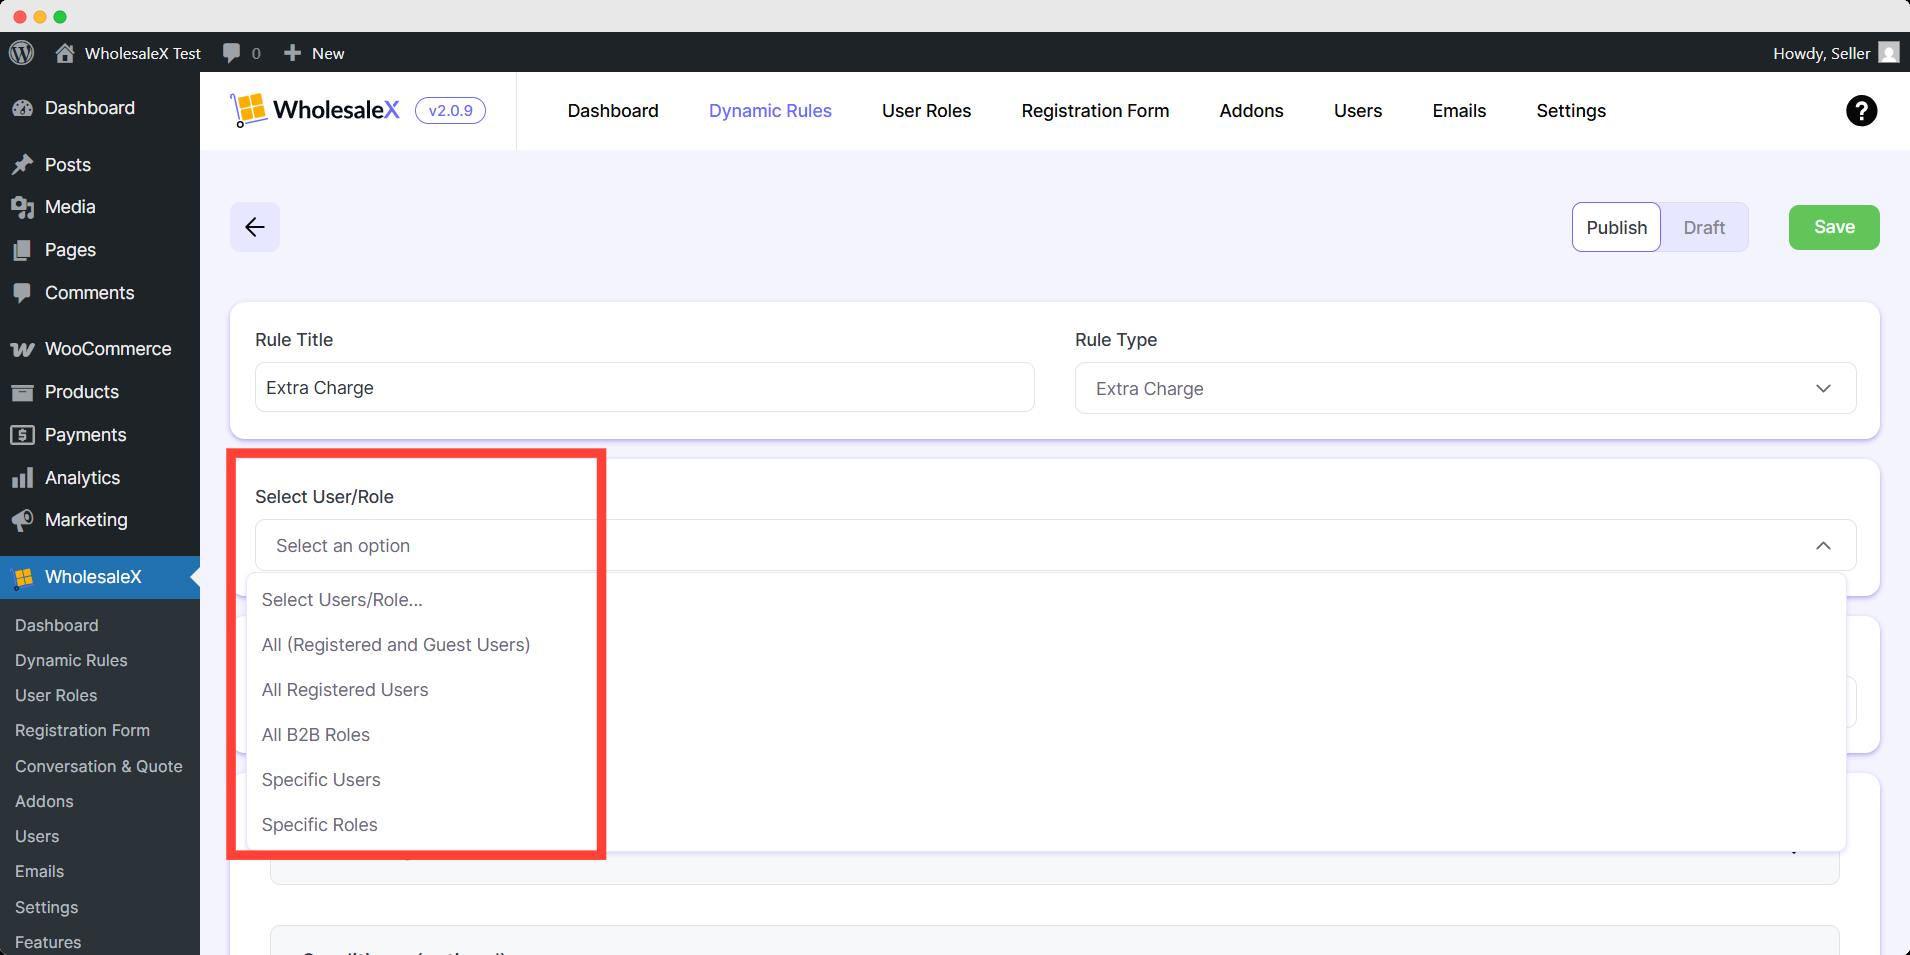
Step 3: Select User/Role
Now, choose which type of user or role you want the Extra Charge to apply to. WholesaleX lets you choose All Users, All Roles, Specific Users, or Specific Roles.
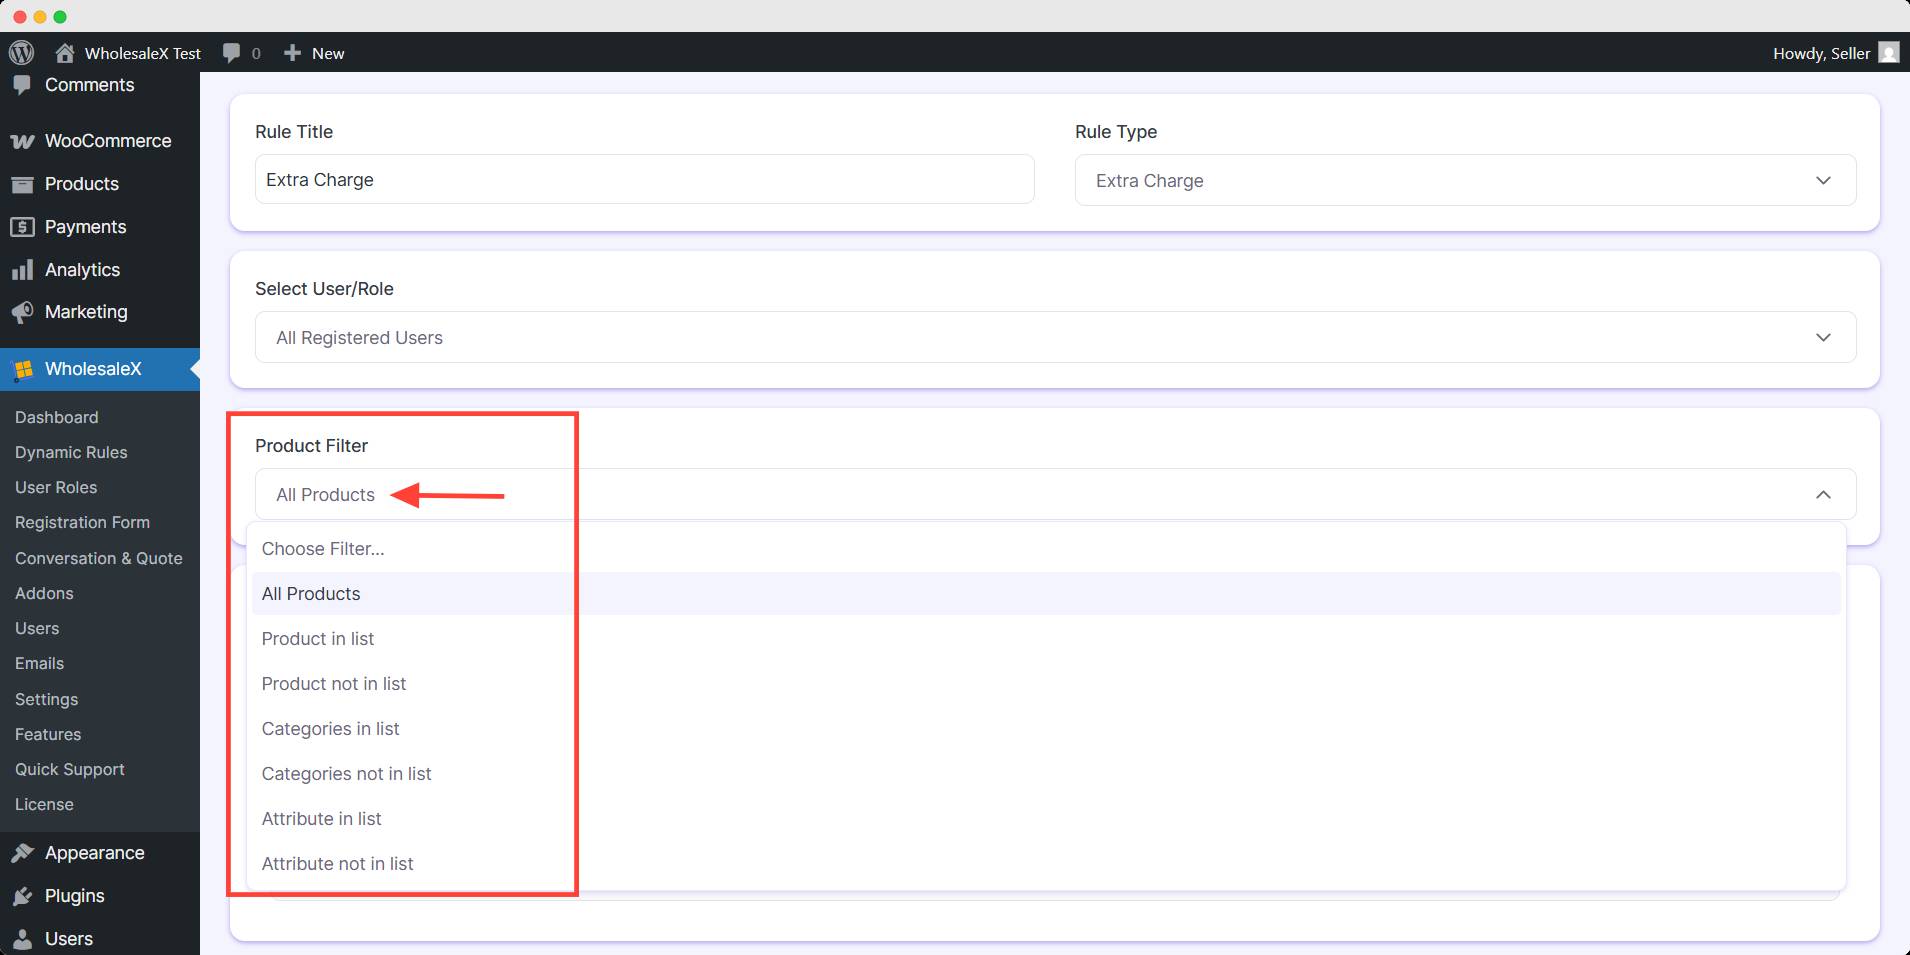
Step 4: Select the Product
After this, select the product filter from the dropdown menu to which you would like to apply the discount. Because not just users and user roles, your discount can be product specific, so you need to select them for better discount processing.
Step 5: Configure Extra Charge Rule
Now you need to choose which payment gateways the extra charges will be applied. You can select multiple gateways that are available in your online store like payment through credit card, check, WholesaleX wallet, cash on delivery, etc. For this tutorial, you will be selecting Check payments.
Then choose what type of charge you will apply. Here I selected the Amount type.
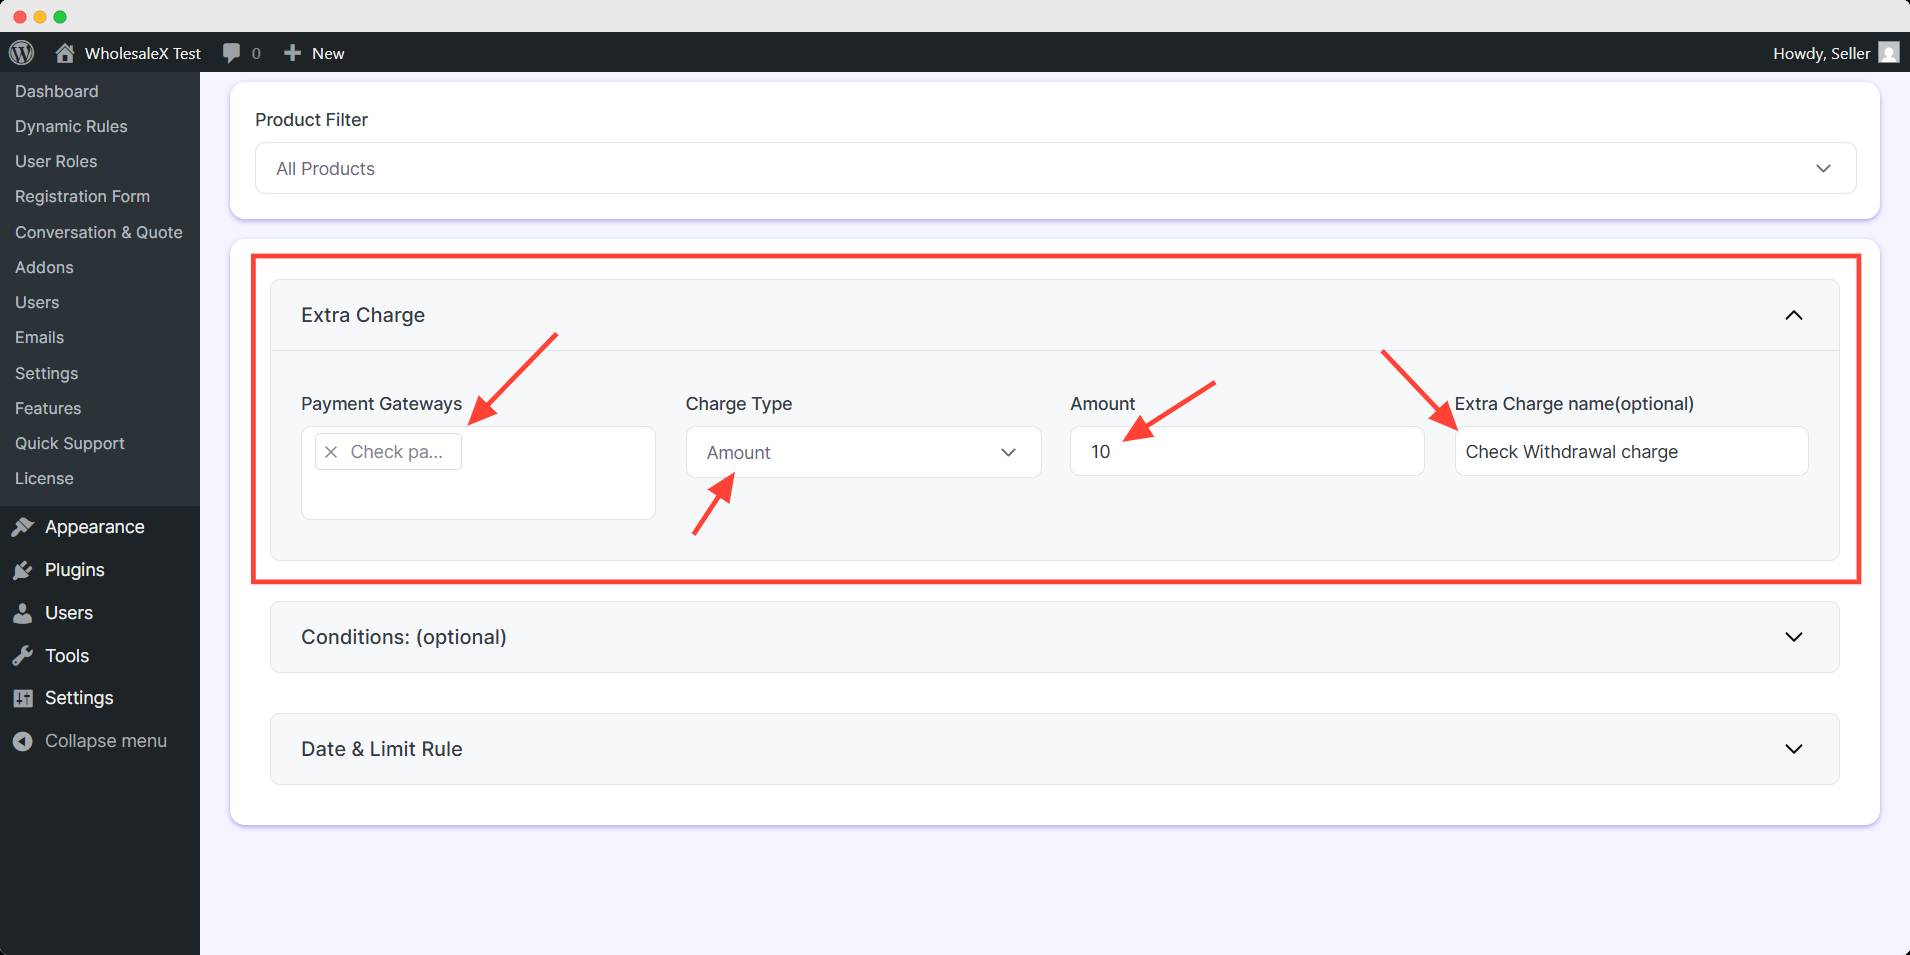
Next you have to set the value. I set the $10 charge for every check withdrawal. You can also add a name if you want.
Step 6: Set Optional Settings
WholesaleX offers optional conditions to customize your charges. Like, you can give extra charges based on specific cart quantity, value, weight, user order count, and total purchase amount. Also, you can use multiple optional conditions for much more specific charges.
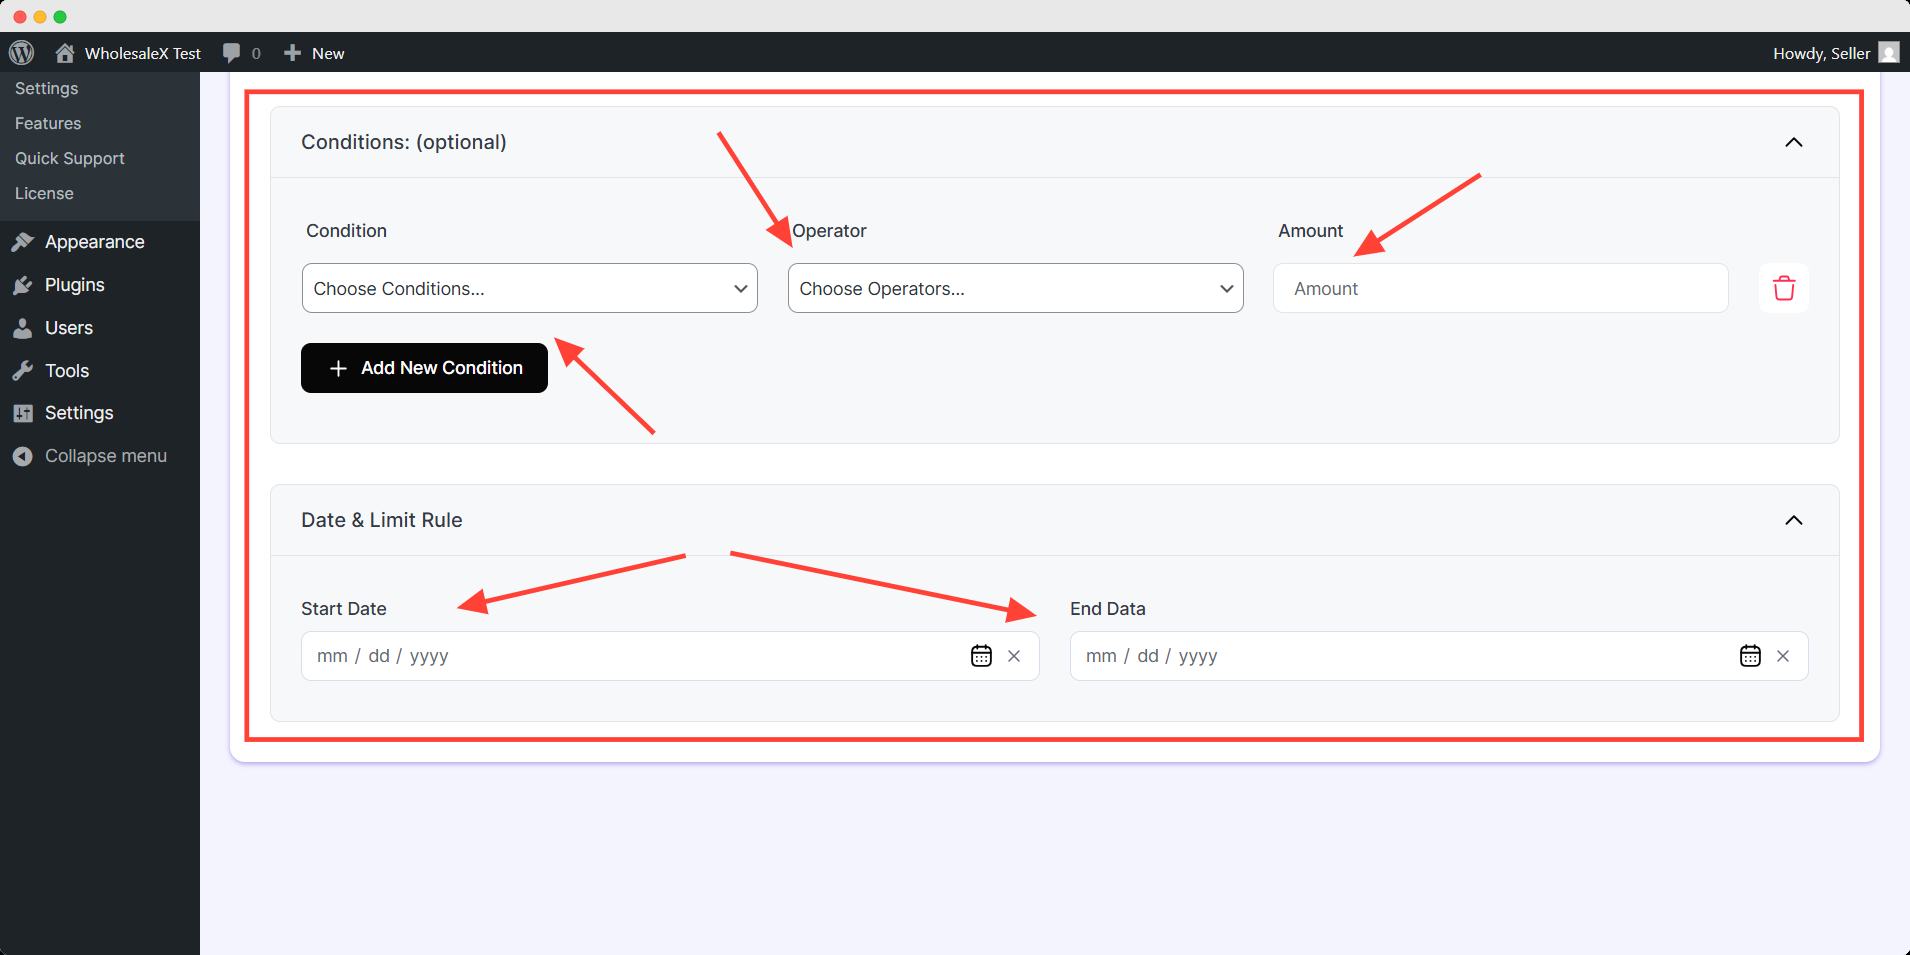
You can limit the schedule of this dynamic rule by Date & Limit rule. These are optional setting you can leave it blank unless you want to apply these customization.
After you’re done with your extra charge setup, you need to save & publish it. Simply toggle the publish button and hit save to activate your dynamic rule.
You can edit the Extra Charge rule anytime with WholesaleX.