With WholesaleX’s Dynamic Rules, you can easily set up a Checkout Restriction. It ensures that the customer cannot proceed to checkout without meeting certain requirements.
Checkout Restriction
To apply checkout restriction, you have to use the Dynamic Rule feature of WholesaleX. Follow these instructions step by step to set the checkout restriction.
Step 1: Create a New Dynamic Rule
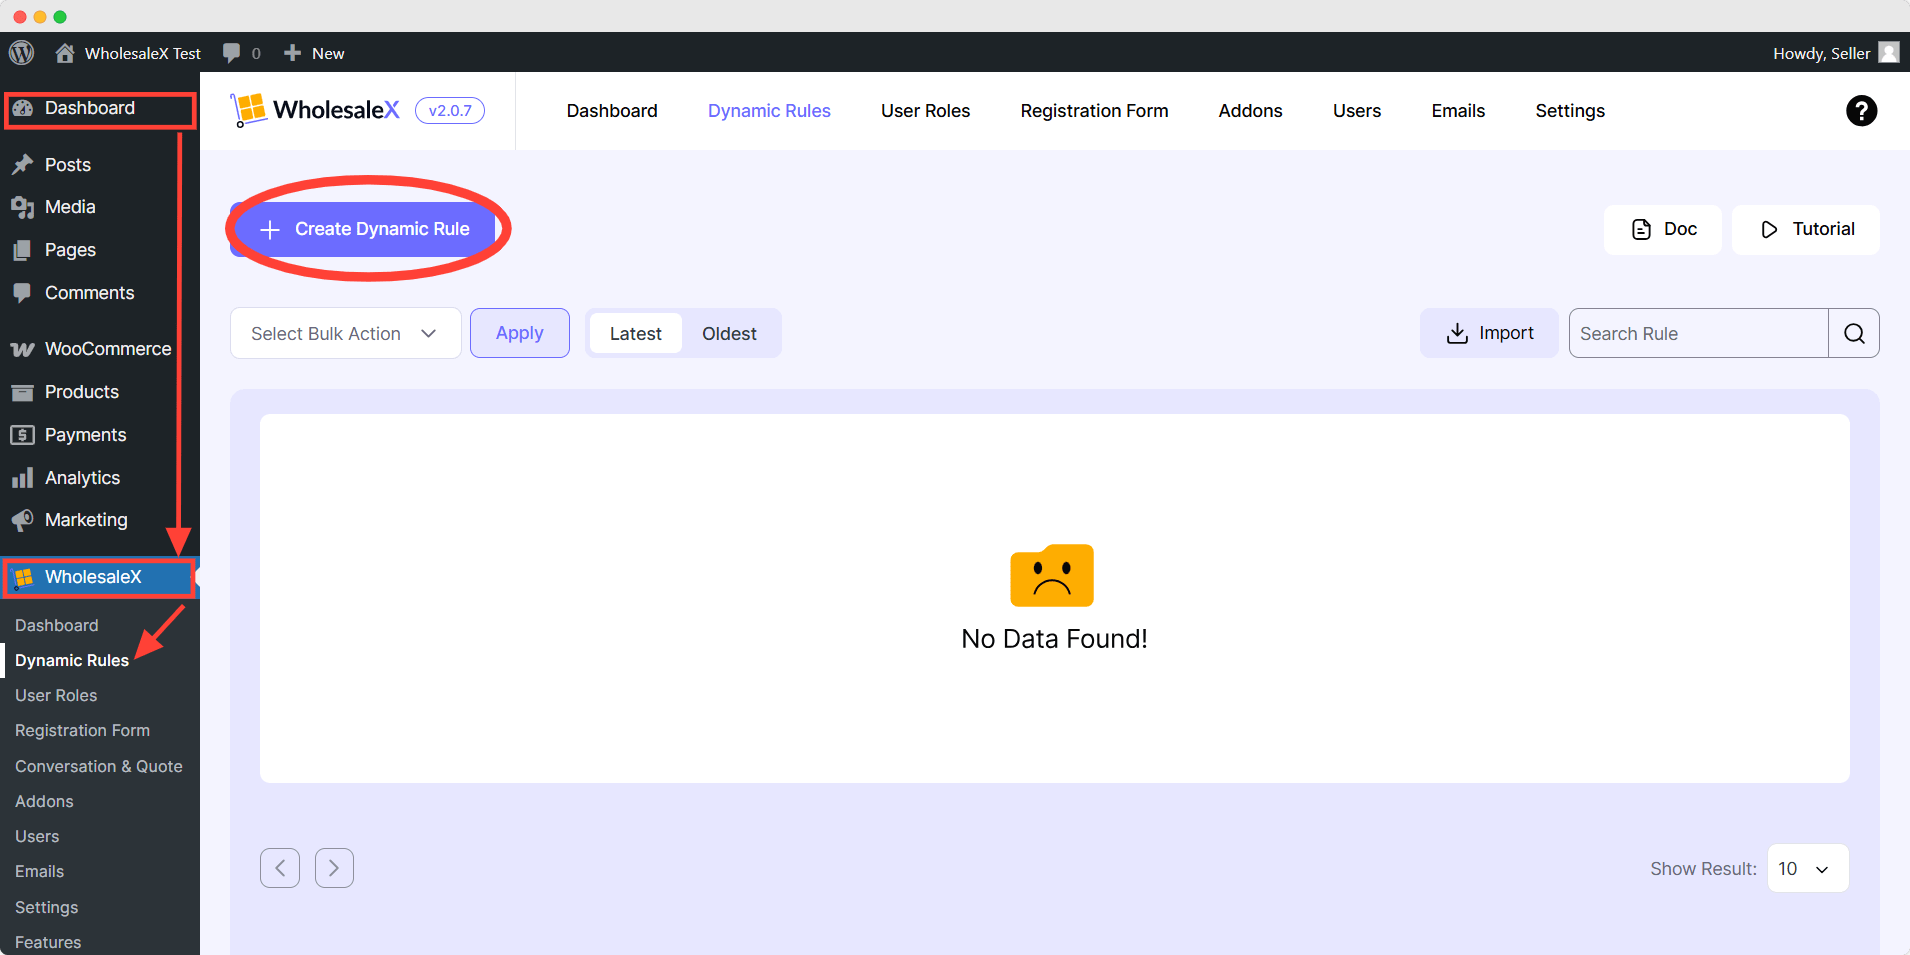
To start, you have to go to the WholesaleX tab from your WordPress Dashboard. Here, you will see the dashboard view of WholesaleX’s performance on your site. Then, follow these instructions:
- Go to the Dynamic Rules from the dashboard
- Click the Create Dynamic Rule button
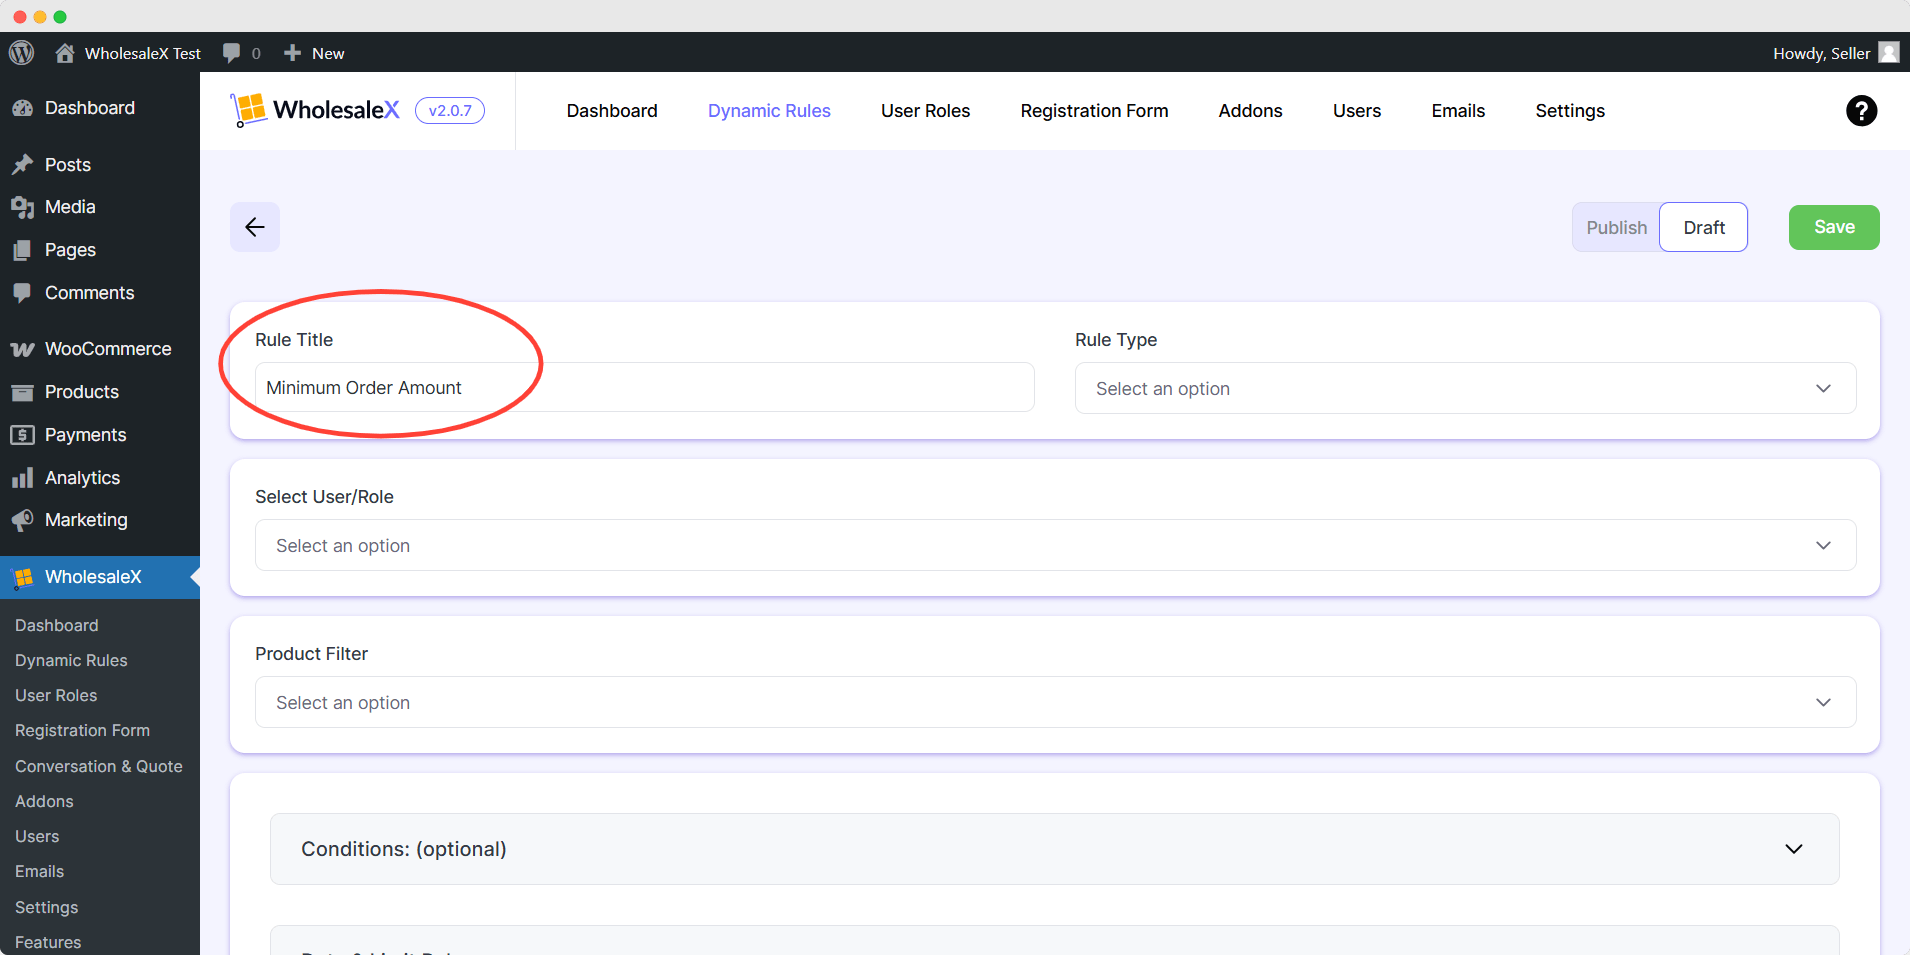
It will open an interface where you can add a name for this new dynamic rule. To do this:
- Click the Rule Title box
- Type in your preferred title
Step 2: Choose Rule Type
Now, you have to choose your preferred rule type among all the dynamic rules.
- Click the Rule Type box. It will open a dropdown box.
- Scroll down and find the Checkout Restriction
- Select Checkout Restriction

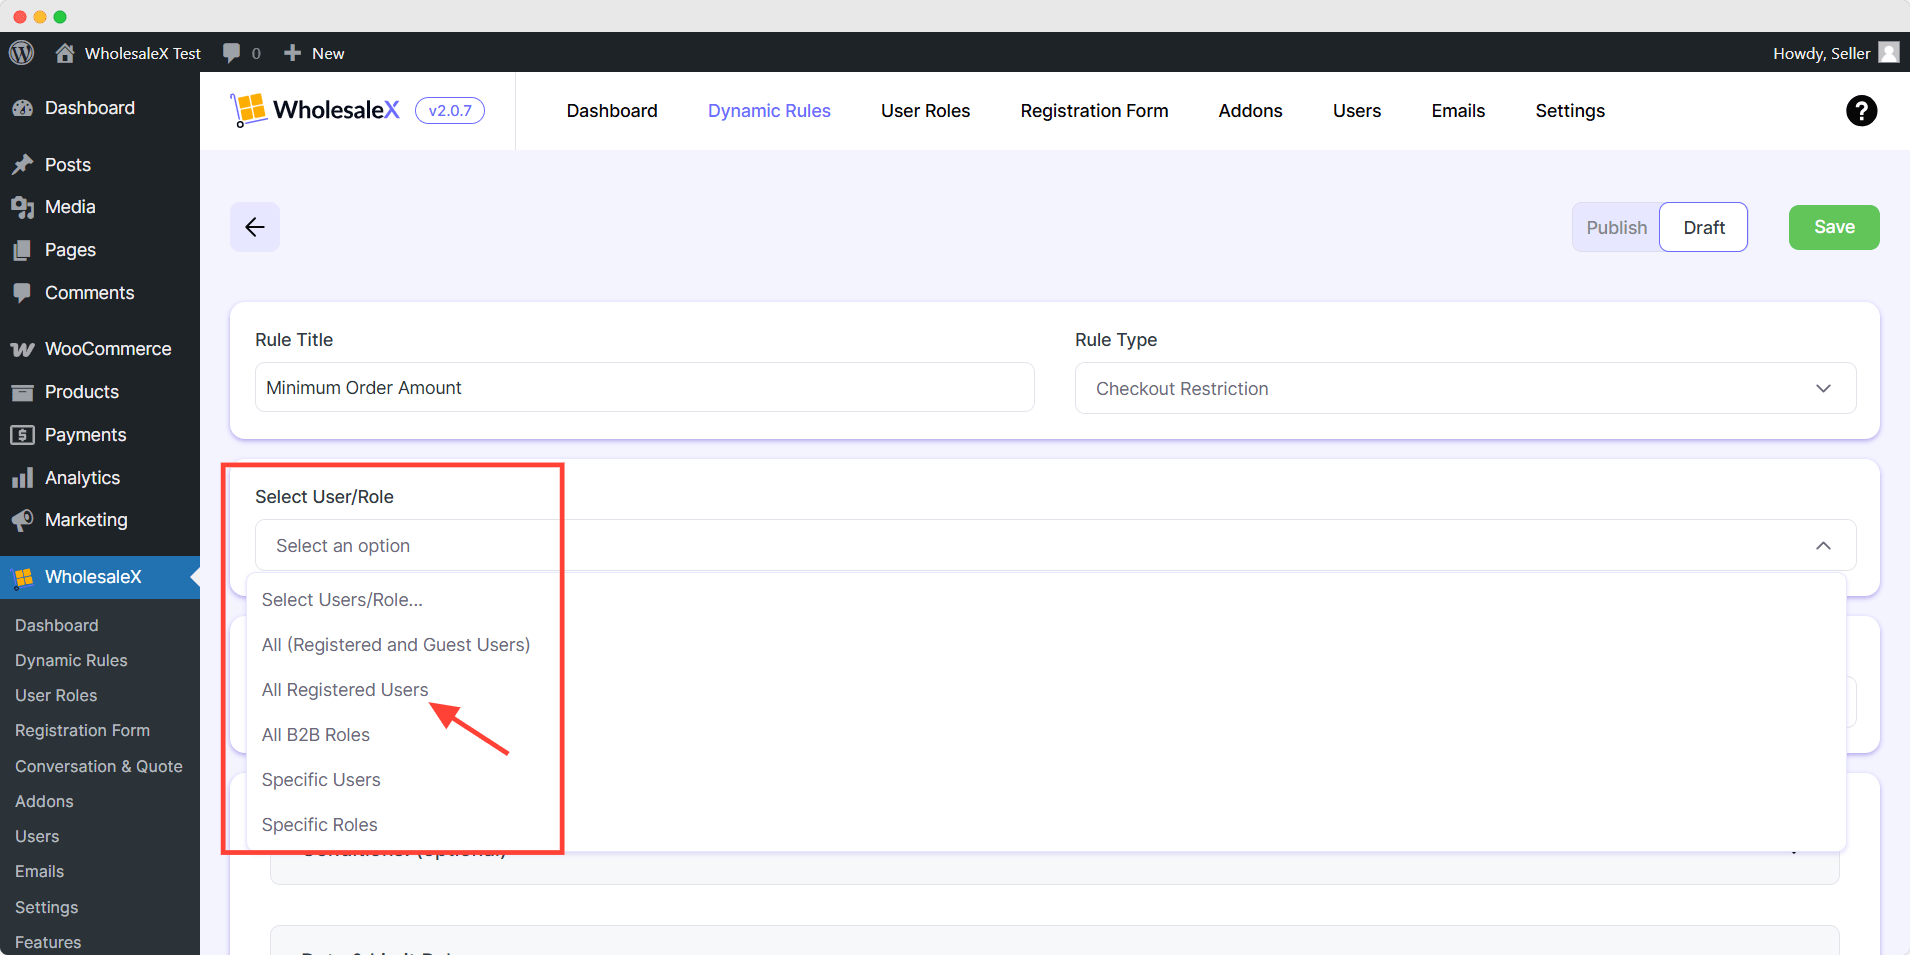
Step 3: Select User/Role
In the User/Role selection box, you will find all the users and roles you created for your store. You can select specific users/roles or all the users/roles. To do this, simply click and open the User/Role dropdown box. After that, select your preferred User/Role from all the options.
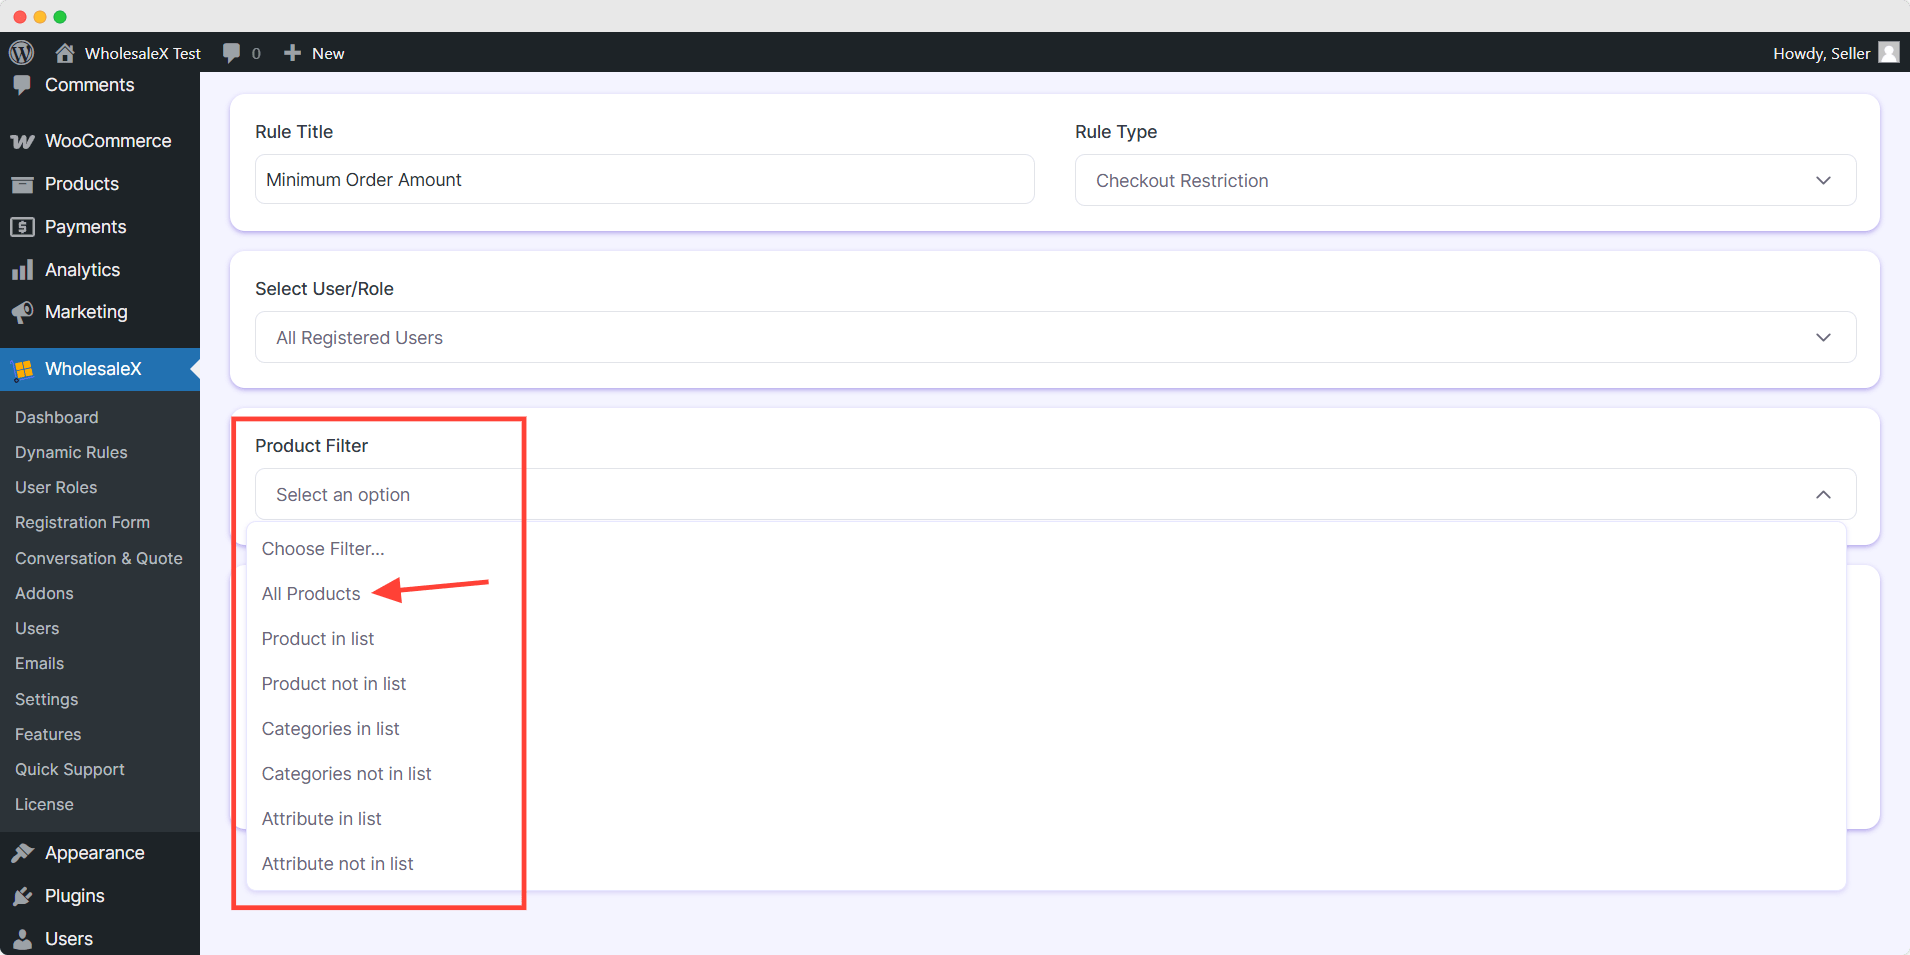
Step 4: Select a Product Option
Product Filtering will let you know which product(s) this rule would apply. You can select any specific folder, category/attributes, or all products. Open the Product filter option and select the preferred option from the dropdown.
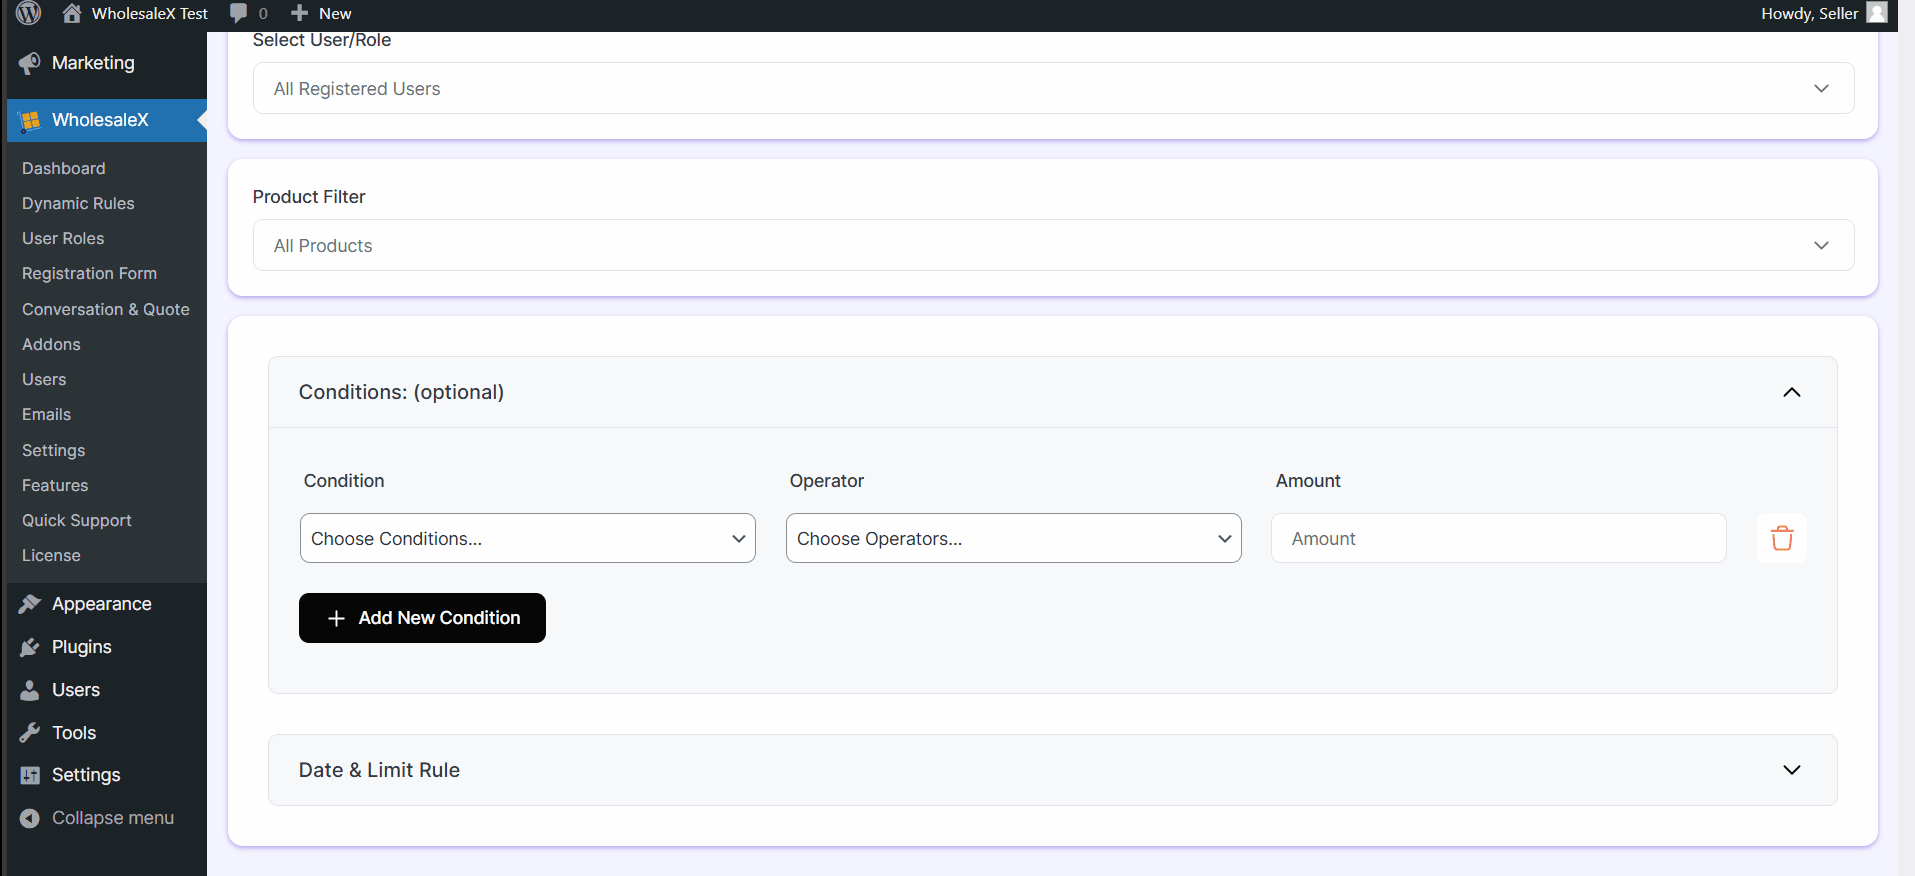
Step 5: Set the Conditions
Here, conditions will decide how you want the rule to act. You can combine the condition-based value, weight, or quantity with the operator.
- Open the Conditions setting.
- Click the Condition box to select the option from quantity, value, etc.
- Click and choose an Operator to define the function
- Set the Amount to fulfill the condition’s functionality
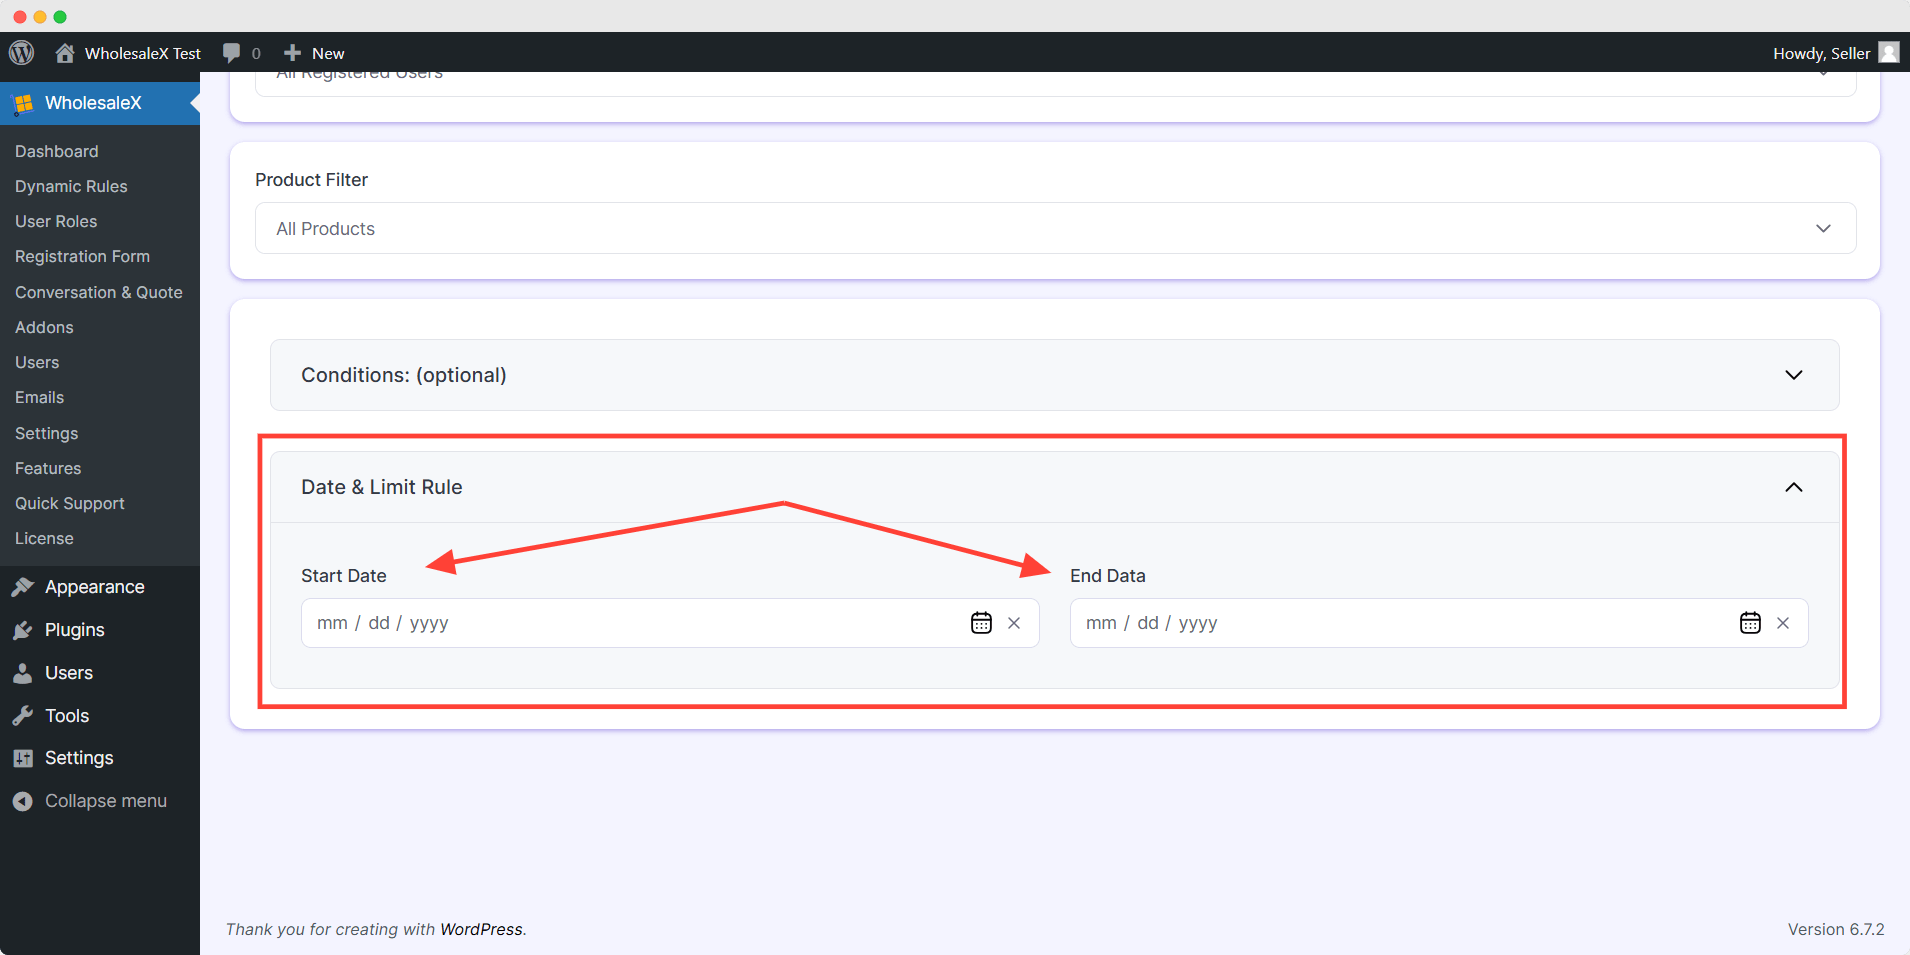
Step 6: Set Date & Limit Rule (optional)
You can limit this rule within a schedule if you want. It will control the rule’s functionality for the given duration. To do that:
- Open the Date & Limit Rule setting
- Click the start date box to set the date
- Click the end date box to set the date
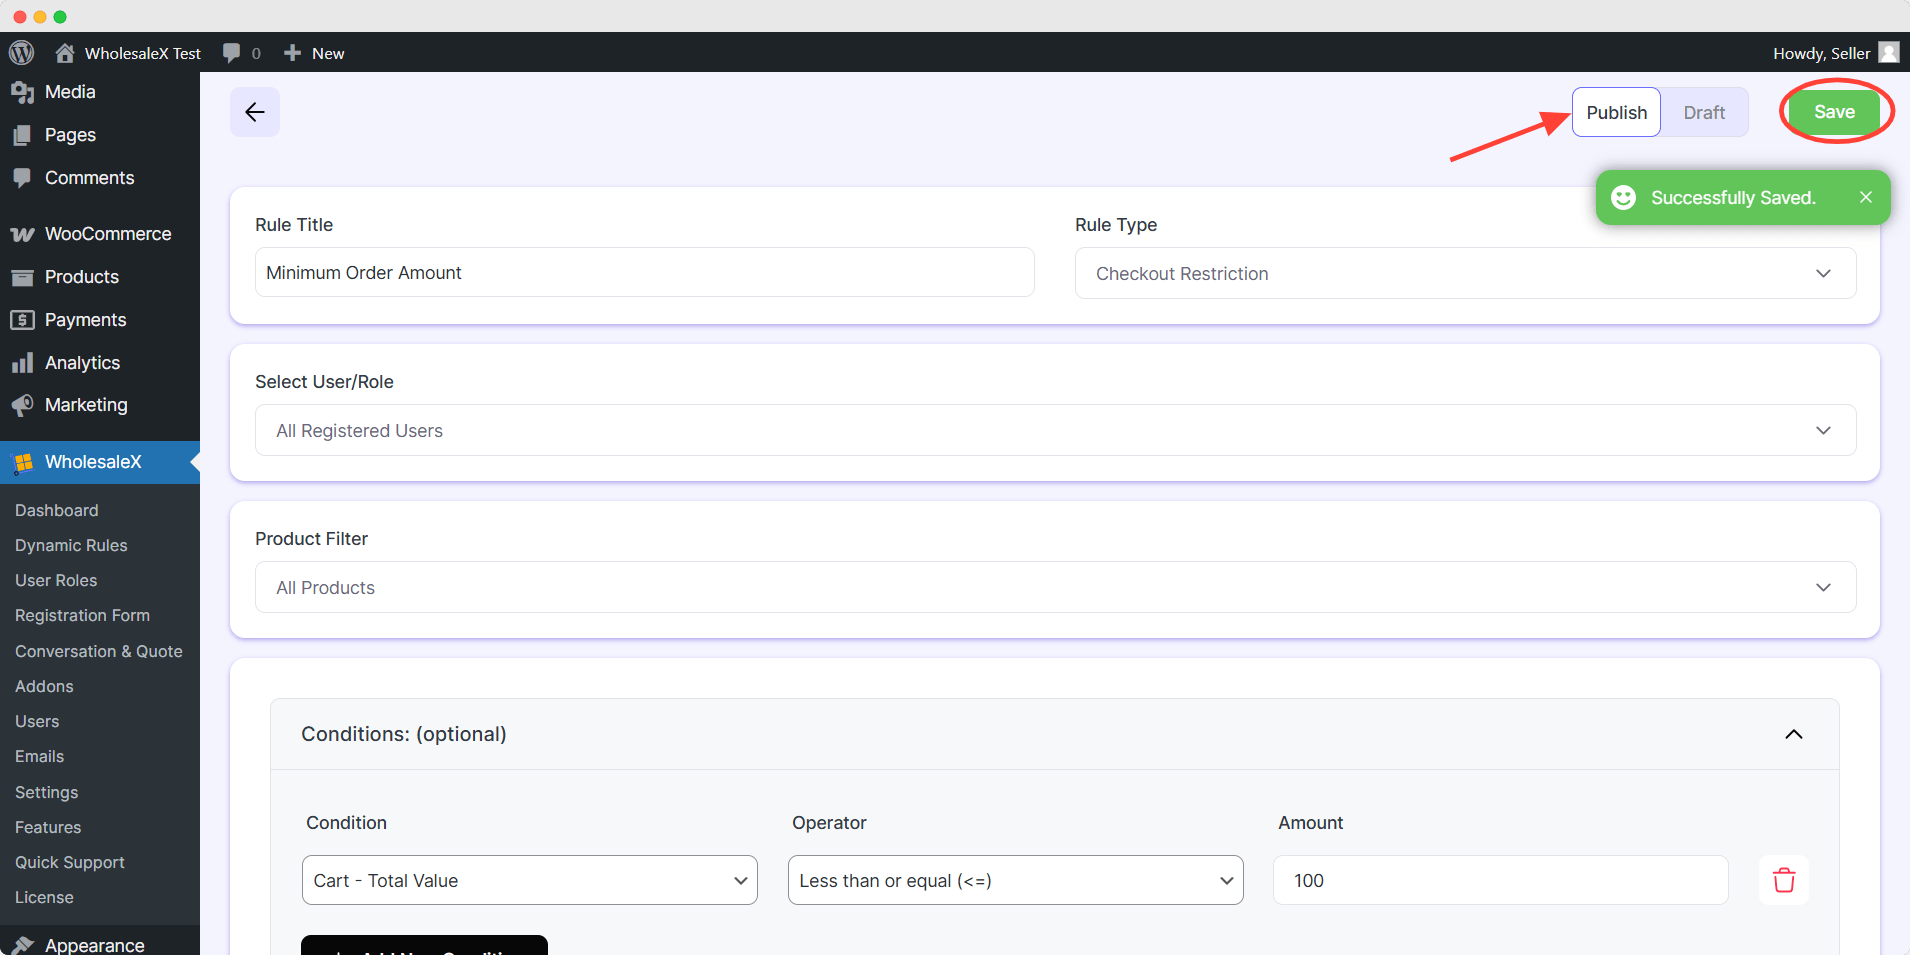
Step 7: Publish & Save
Finally, you have to publish and save to activate the rule and its functions properly.
- Toggle the Publish button on
- Click Save button
Troubleshooting
If your rule doesn’t work the way it supposed to be:
- Check if you select the right rule.
- Check the User/Role and which user’s perspective you’re observing from.
- Check the product filter is right.
- Revisit the condition and operator for functionality.