
Product Discount rules allow you to reduce the prices of selected products for eligible customers. You can target specific users or user roles, choose which products receive the discount, and apply a percentage, fixed-amount, or fixed-price discount.
Follow the steps below to create a Product Discount rule in WholesaleX.
Step 1: Create a New Rule
- Navigate to WholesaleX → Wholesale Price.
- Click Create Wholesale Pricing.
- Enter a title for the rule.
- Select Product Discount from the Rule Type dropdown.
Step 2: Select Customer Roles
Choose the customers who will receive the product discount. The available options are:
- All (Registered and Guest Users)
- All Registered Users
- All B2B Roles
- Specific Users
- Specific Roles
When you select Specific Users or Specific Roles, use the additional field to choose the applicable customers or roles.
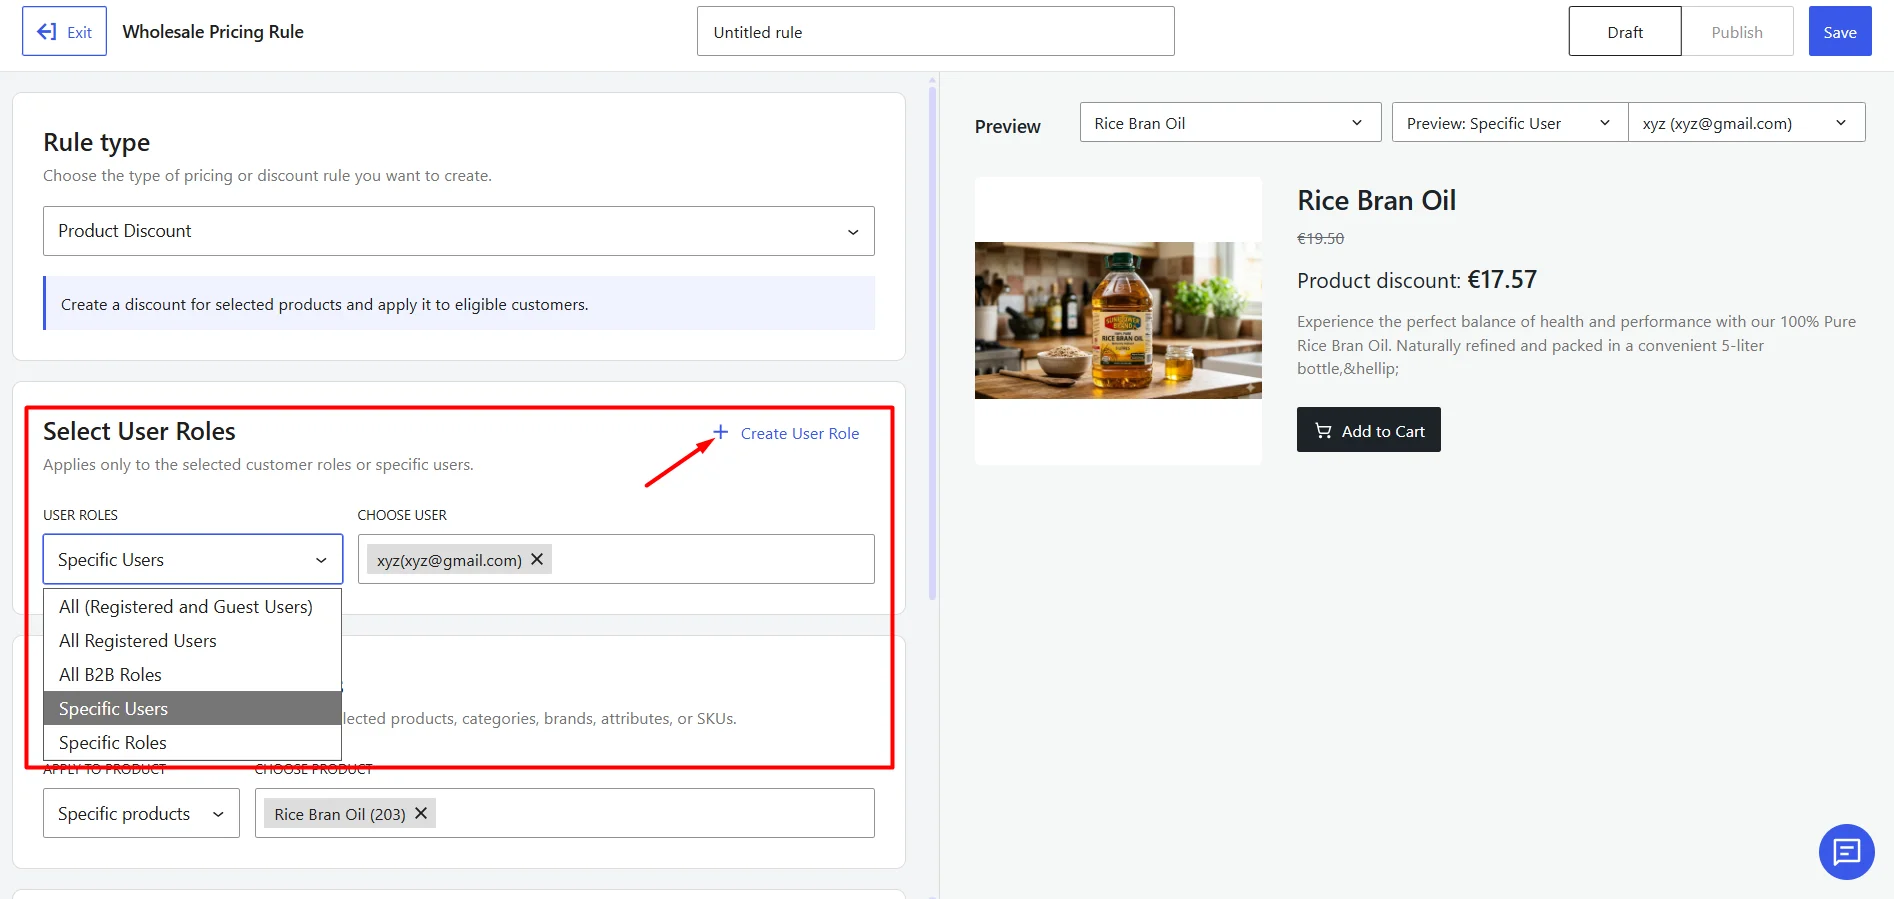
You can also click Create User Role to create a new B2B role without leaving the rule configuration page.
Step 3: Select Applicable Products
Choose the products to which the discount will apply. Available targeting options include:
- All products
- Specific products
- Specific categories
- Brands
- Attributes
- SKU
After selecting a targeting option, use the adjacent field to choose the applicable products, categories, brands, attributes, or SKUs.
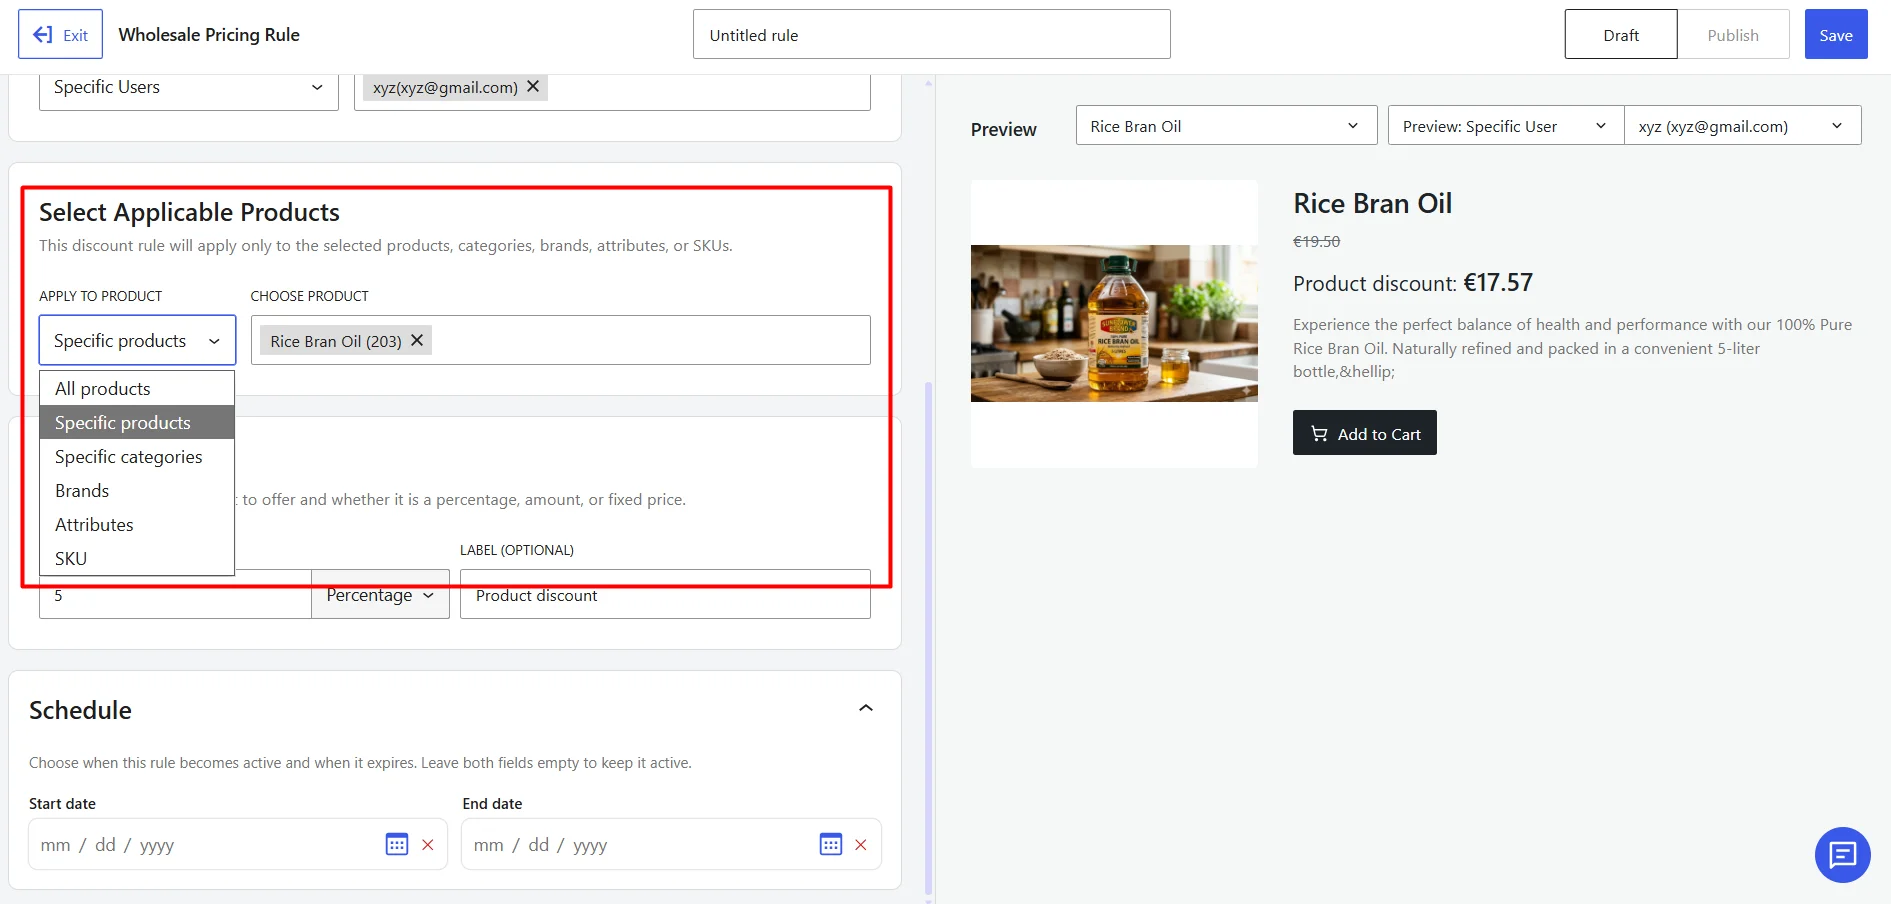
When applying the rule broadly, you can use the Exclude Products field to prevent selected products from receiving the discount.
Step 4: Set the Discount
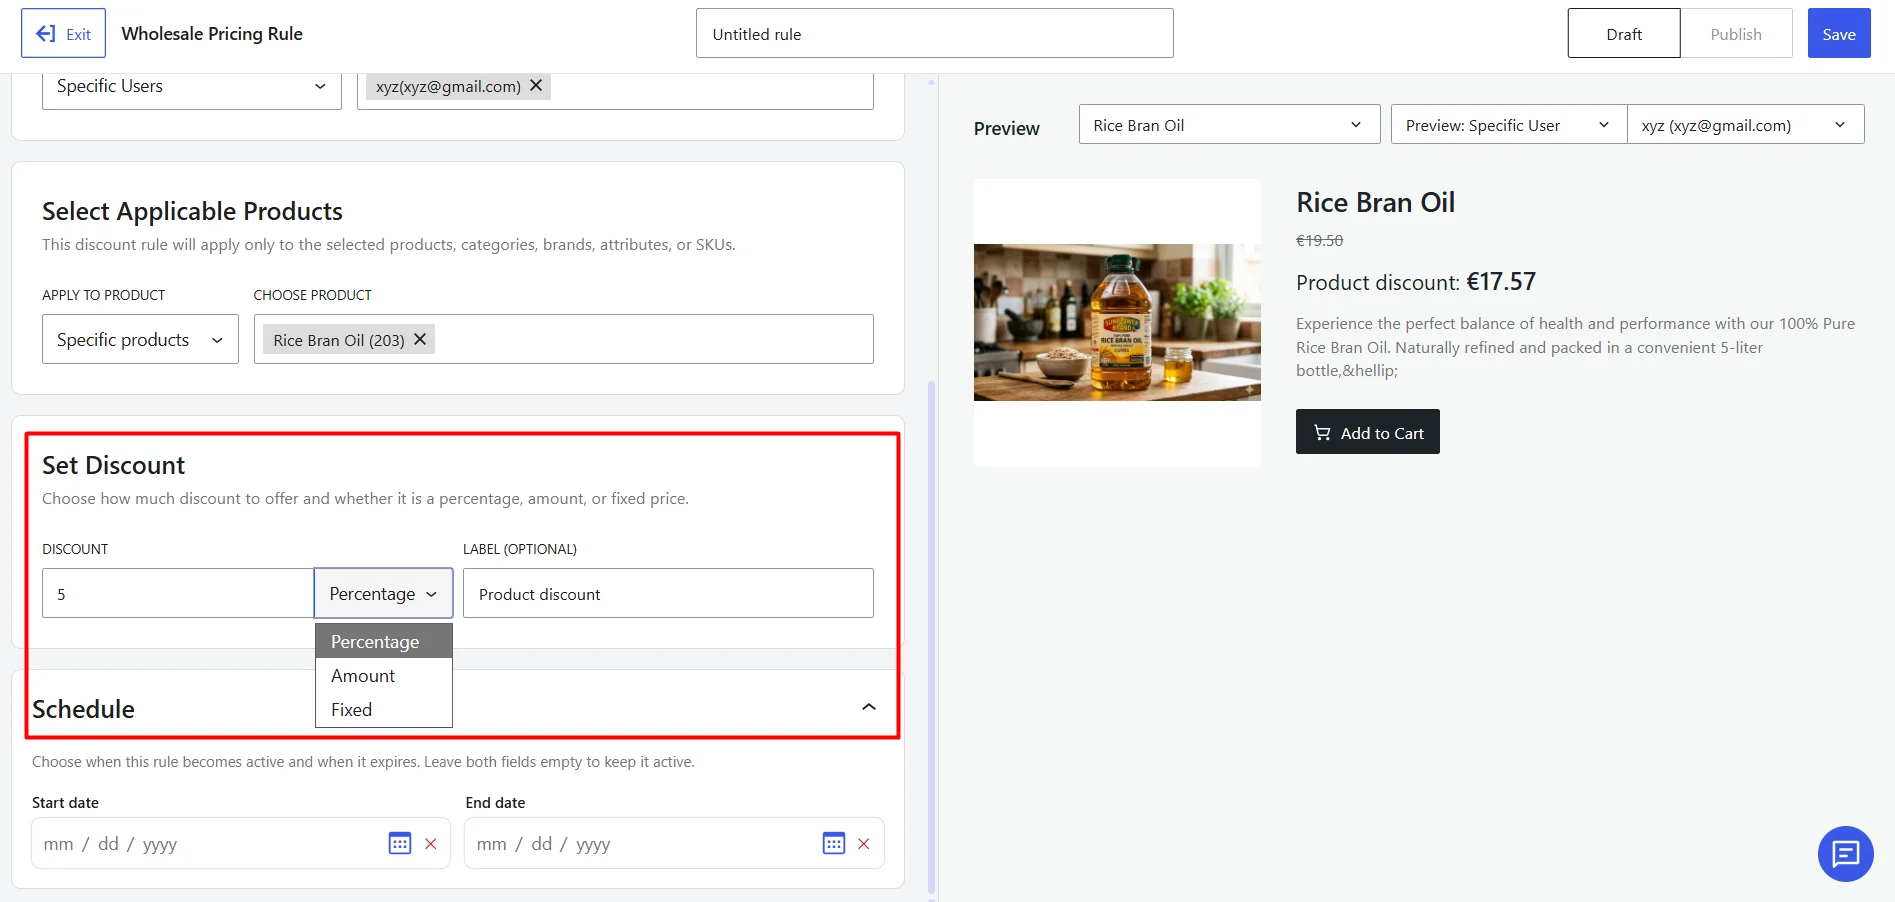
In the Set Discount section, enter the discount value and choose how it will be calculated. WholesaleX supports the following discount types:
- Percentage: Reduces the original product price by a specified percentage. For example, entering
10applies a 10% discount. - Amount: Deducts a fixed monetary amount from the original product price. For example, entering
5reduces the price by $5. - Fixed: Replaces the original product price with the specified fixed price. For example, entering
10sets the eligible product price to $10.
You can also enter an optional Label, such as Product discount, to identify the discounted price on the storefront.
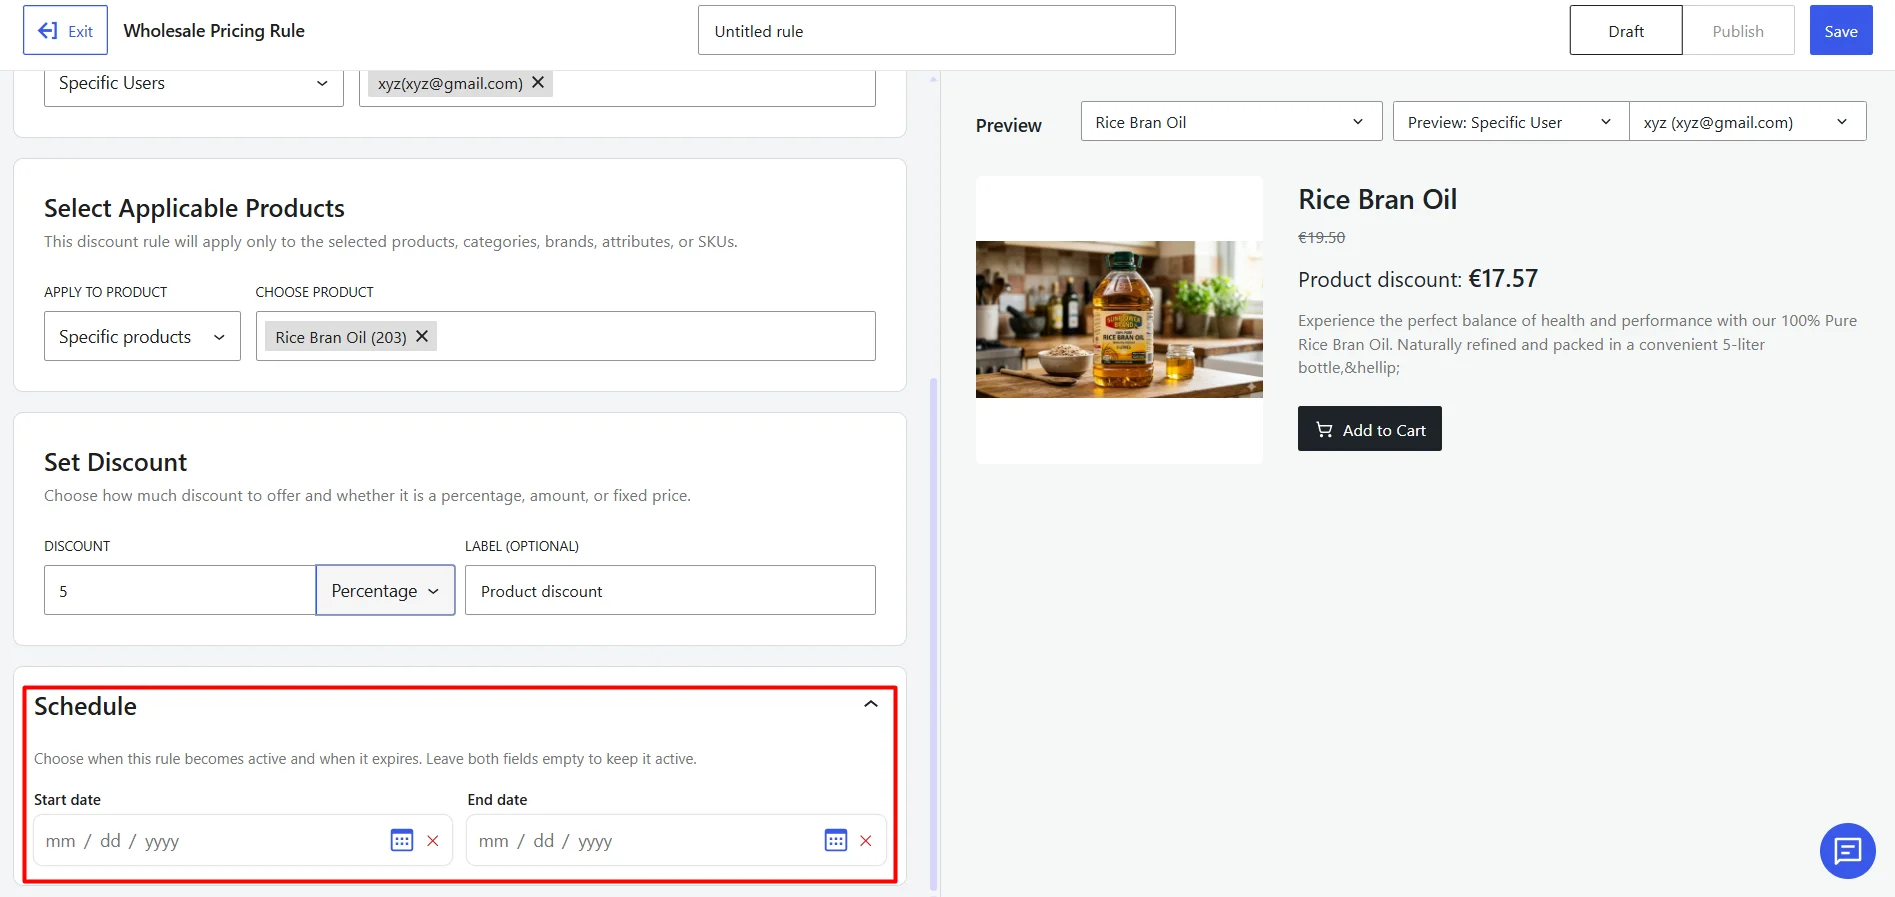
Step 5: Configure Scheduling (Optional)
Use scheduling to control when the wholesale pricing rule becomes active. You can:
- Set a start date and time for the rule.
- Set an end date and time to automatically deactivate the rule.
Step 6: Review and publish the Rule
Use the Preview section to verify how the pricing rule will appear on the storefront before publishing it.
- Select a product from the product dropdown.
- Choose the required user role.
- To check the rule for an individual buyer, select Preview: Specific User and choose the customer account.
Review the preview to confirm that the rule is applied correctly for the selected product and customer. Once everything is correct, publish the rule.
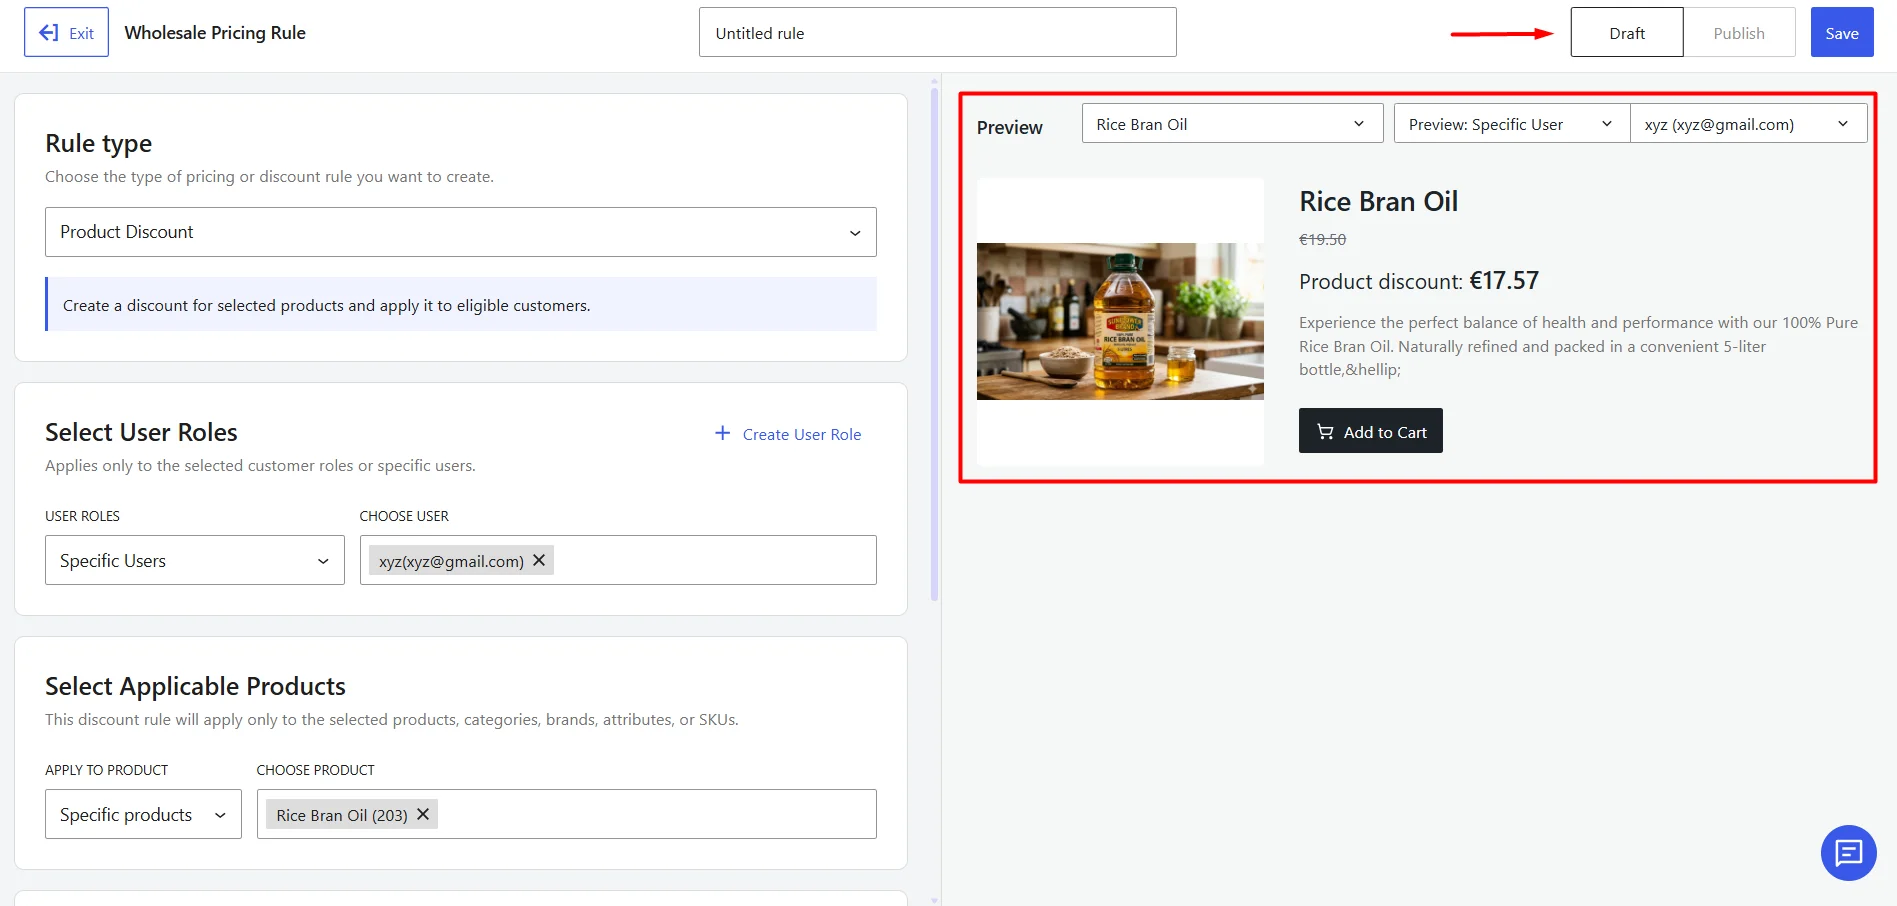
When the configuration is complete:
- Click Draft to save the rule without activating it.
- Click Publish to make the rule live.
- Click Create/Save to update an existing rule.
The wholesale pricing rule is now ready for use.