
Cart Discount rules allow you to apply discounts to a customer’s entire cart when specific conditions are met.
Follow the steps below to create a Cart Discount rule.
Step 1: Create a New Rule
- Navigate to WholesaleX → Wholesale Price.
- Click Create Wholesale Pricing.
- Enter a descriptive rule title.
- Select Cart Discount from the Rule Type dropdown.
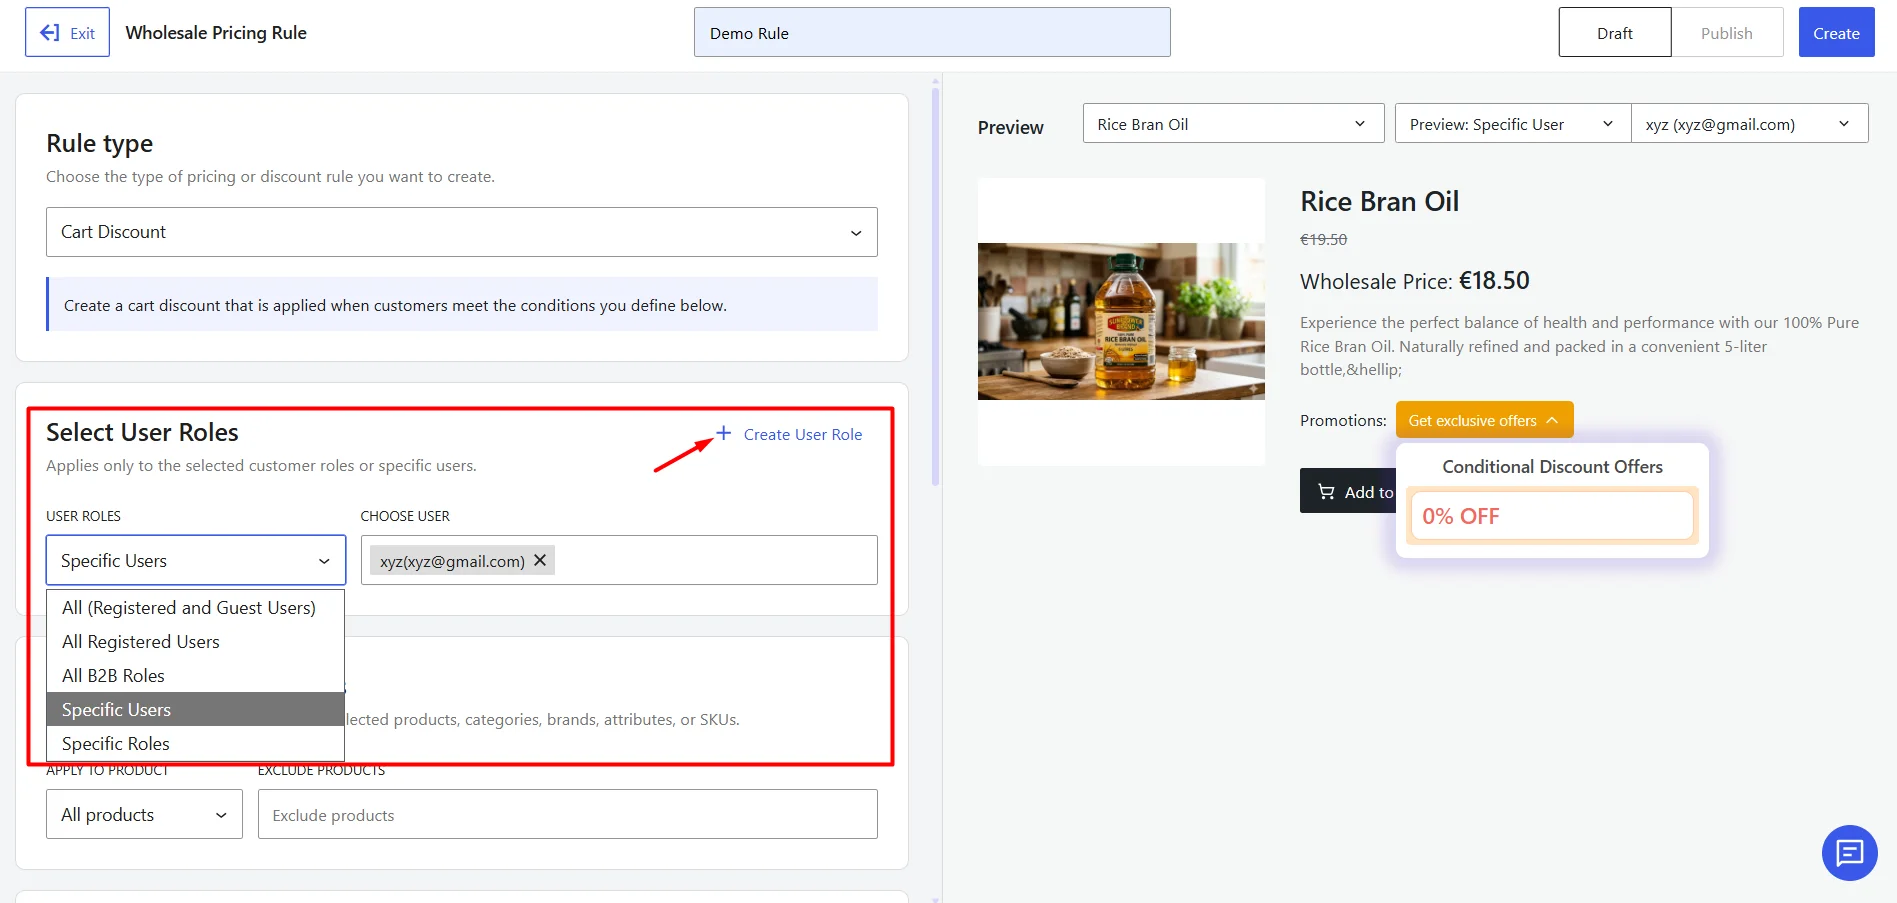
Step 2: Select Customer Roles
Choose which customer roles can access the cart discount.
- Open the User Roles field.
- Select one or more specific user roles.
- Alternatively, select All B2B Roles to apply the discount to all B2B customers.
- If needed, click Create User Role to create a new role without leaving the page.
Step 3: Select Products
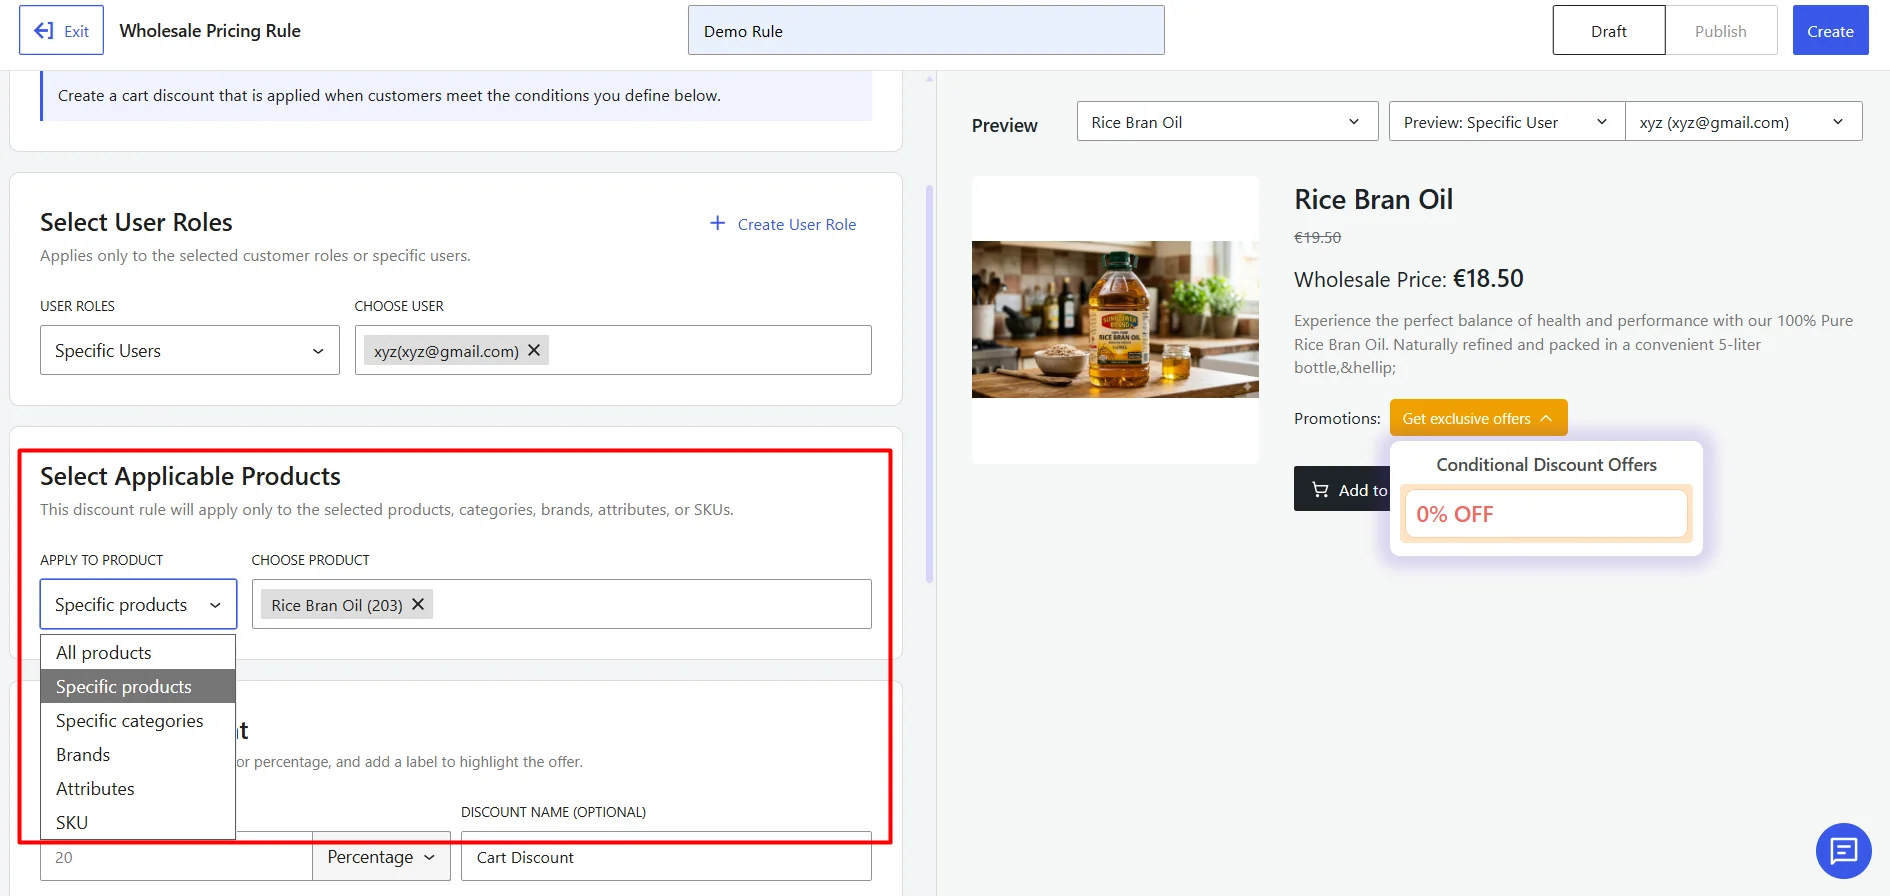
Choose which products the cart discount should apply to. Available targeting options:
- All Products
- Specific Products
- Specific Categories
- Brands
- Attributes
- SKU
Select the appropriate option based on your discount strategy.
Step 4: Configure the Cart Discount
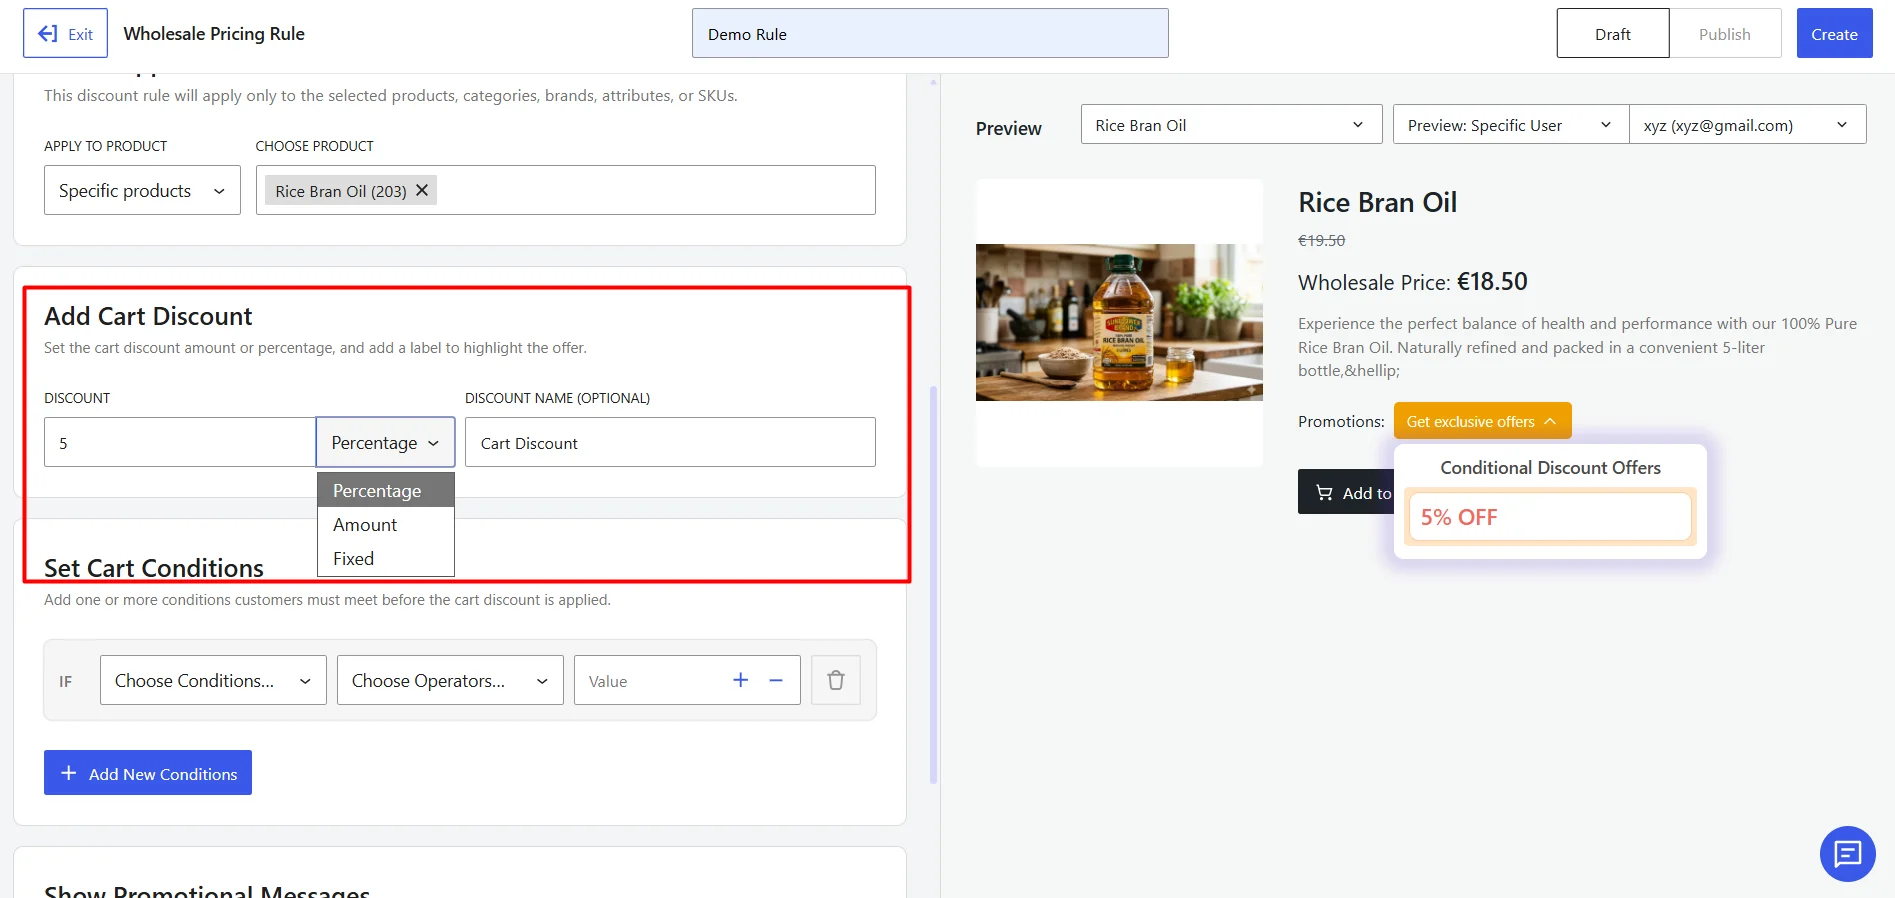
The Add Cart Discount section controls both the discount value and the conditions required to activate it. Configure the discount that will be applied when the rule conditions are met.
- Discount: Enter the discount amount.
- Discount Type: Choose how the discount should be calculated:
- Percentage
- Amount
- Fixed
- Discount Name (Optional): Enter a custom label to identify the discount.
Step 5: Set Cart Conditions
Use conditions to determine when the cart discount should be applied. Each condition includes the following settings:
Condition: Select the cart property to evaluate:
- Cart Total Quantity
- Cart Total Value
- Cart Total Weight
- Lifetime Order Count
- Lifetime Order Purchase
Operator: Choose how the condition should be evaluated:
- Greater Than
- Less Than
- Greater Than or Equal To
- Less Than or Equal To
Value: Enter the value that must be met.
Use Add New Conditions to create additional requirements. Multiple conditions can be combined to build more advanced discount rules.
Step 6: Configure Promotional Texts (Optional)
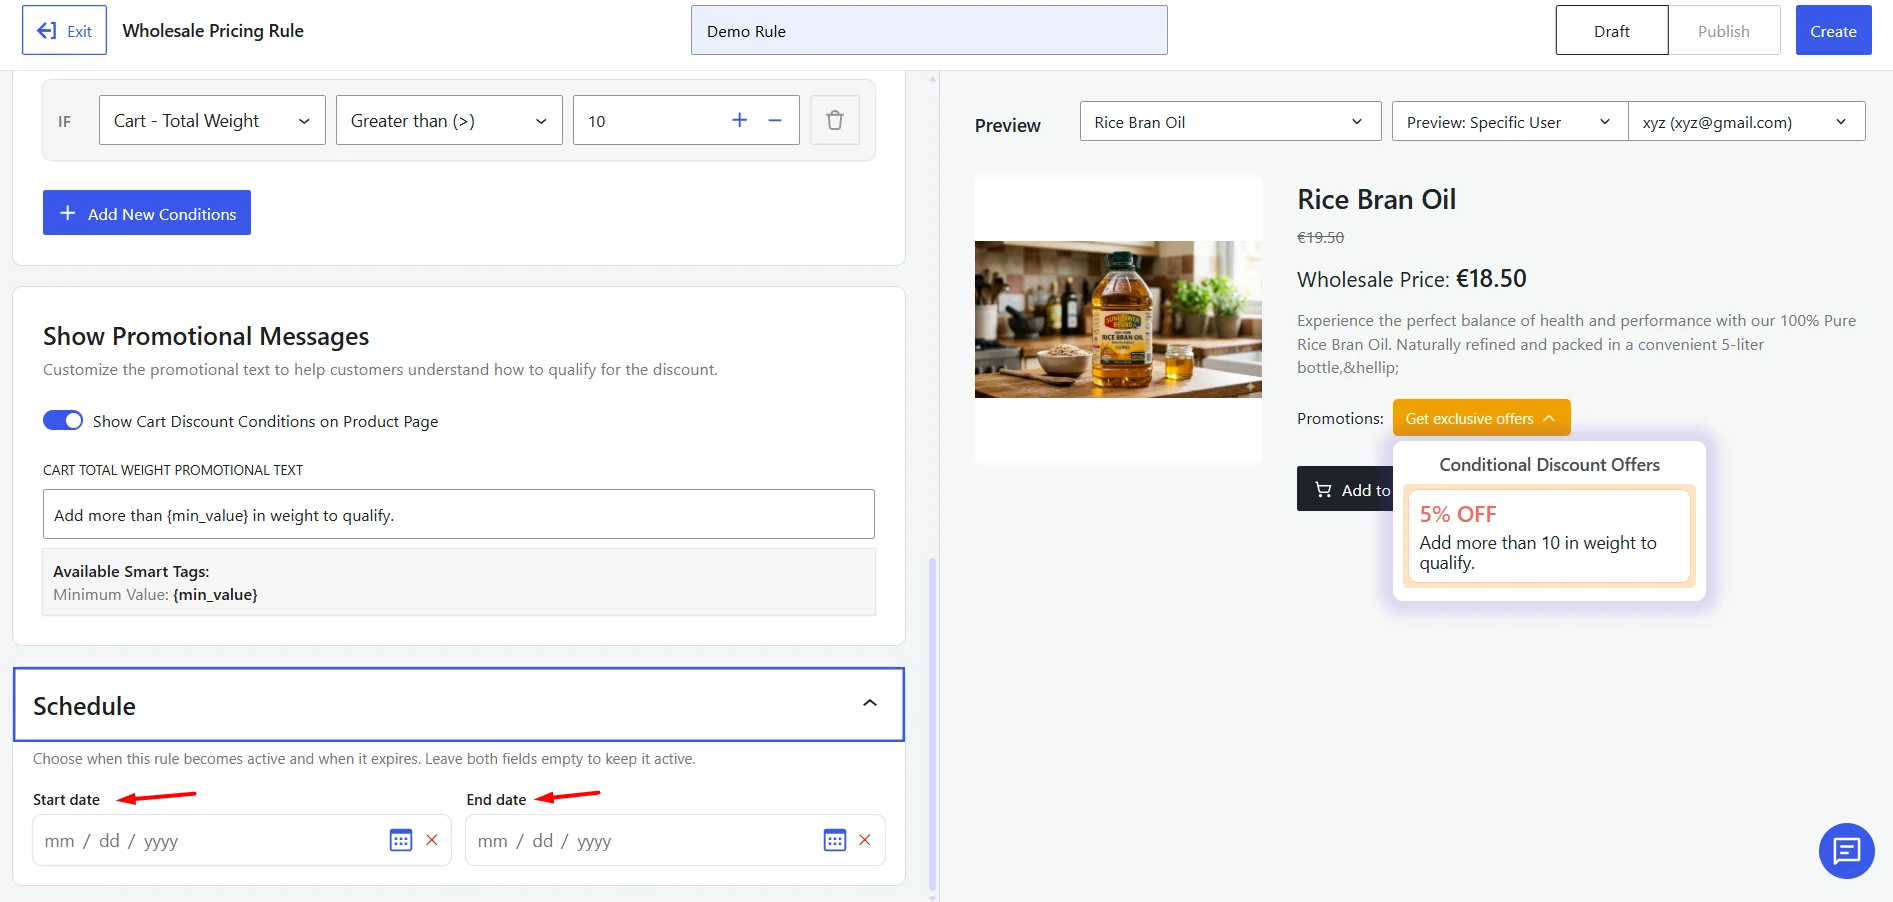
Enable Show Cart Discount Conditions on Product Page to inform customers how they can qualify for the discount.
The promotional message field and available smart tags update dynamically based on the selected cart condition and operator. Enter or customize the promotional text using the available smart tags.
For example, changing the condition from Cart Total Quantity to Cart Total Value, or changing the operator from Greater Than to Less Than, automatically adjusts the suggested message and the tags you can use.
Smart tags such as {min_value} and {max_value} insert the configured condition values automatically.
Use the Preview panel to confirm how the message will appear to customers under Promotions → Get Exclusive Offers on the product page.
Step 7: Configure Scheduling (Optional)
Use the Schedule section to control when the cart discount becomes active. You can:
- Set a start date and time.
- Set an end date and time.
- Leave the schedule empty to activate the rule immediately after publishing.
Scheduling is useful for limited-time promotions and seasonal wholesale campaigns.
Step 8: Review and Publish the Rule
Use the Preview section to verify how the pricing rule will appear on the storefront before publishing it.
- Select a product from the product dropdown.
- Choose the required user role.
- To check the rule for an individual buyer, select Preview: Specific User and choose the customer account.
Review the preview to confirm that the rule is applied correctly for the selected product and customer. Once everything is correct, publish the rule.
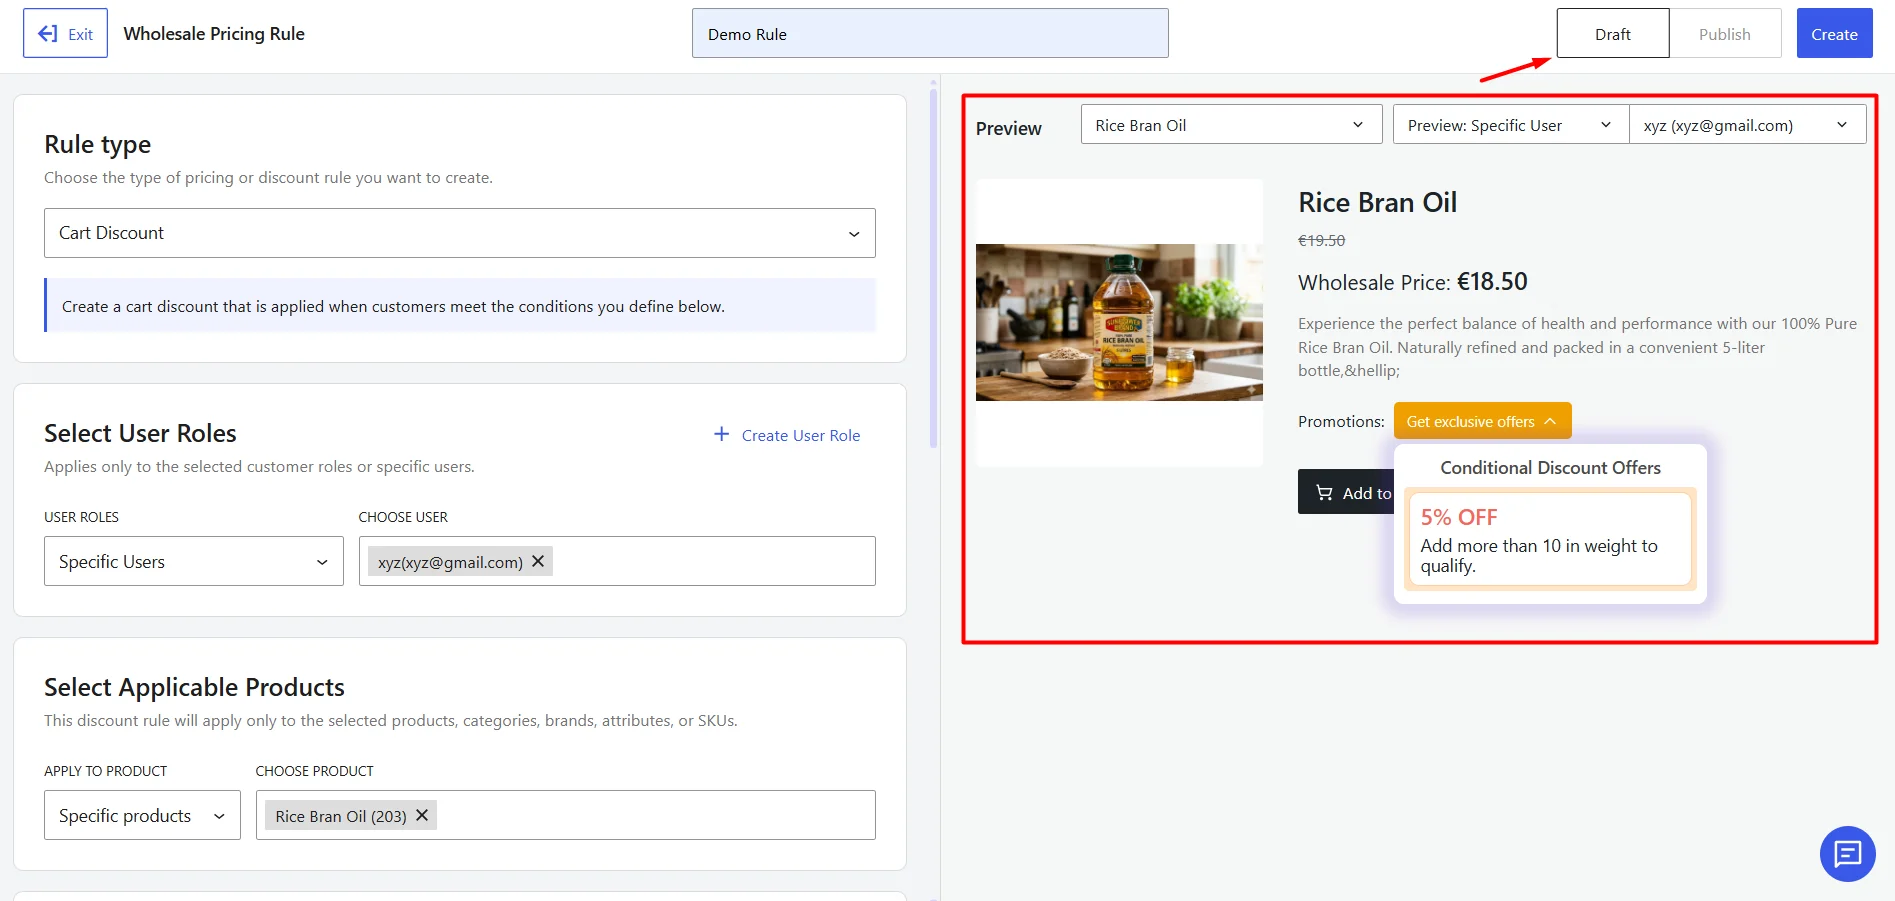
When the configuration is complete:
- Click Draft to save the rule without activating it.
- Click Publish to make the rule live.
- Click Create/Save to update an existing rule.
Your Cart Discount rule is now ready to use.