
Buy X Get One Discounted rules allow you to reward customers with free products when they purchase a specified quantity of eligible products.
Follow the steps below to create a BXGO discounted rule.
Step 1: Create a New Rule
- Navigate to WholesaleX → Wholesale Price.
- Click Create Wholesale Pricing.
- Enter a descriptive rule title.
- Select Buy X Get One Discounted from the Rule Type dropdown.
Step 2: Select Customer Roles
Choose which wholesale customers can access the BOGO discount.
- Open the User Roles field.
- Select one or more specific user roles.
- Alternatively, select All B2B Roles to apply the offer to all wholesale customers.
- If needed, click Create User Role to create a new role without leaving the page.
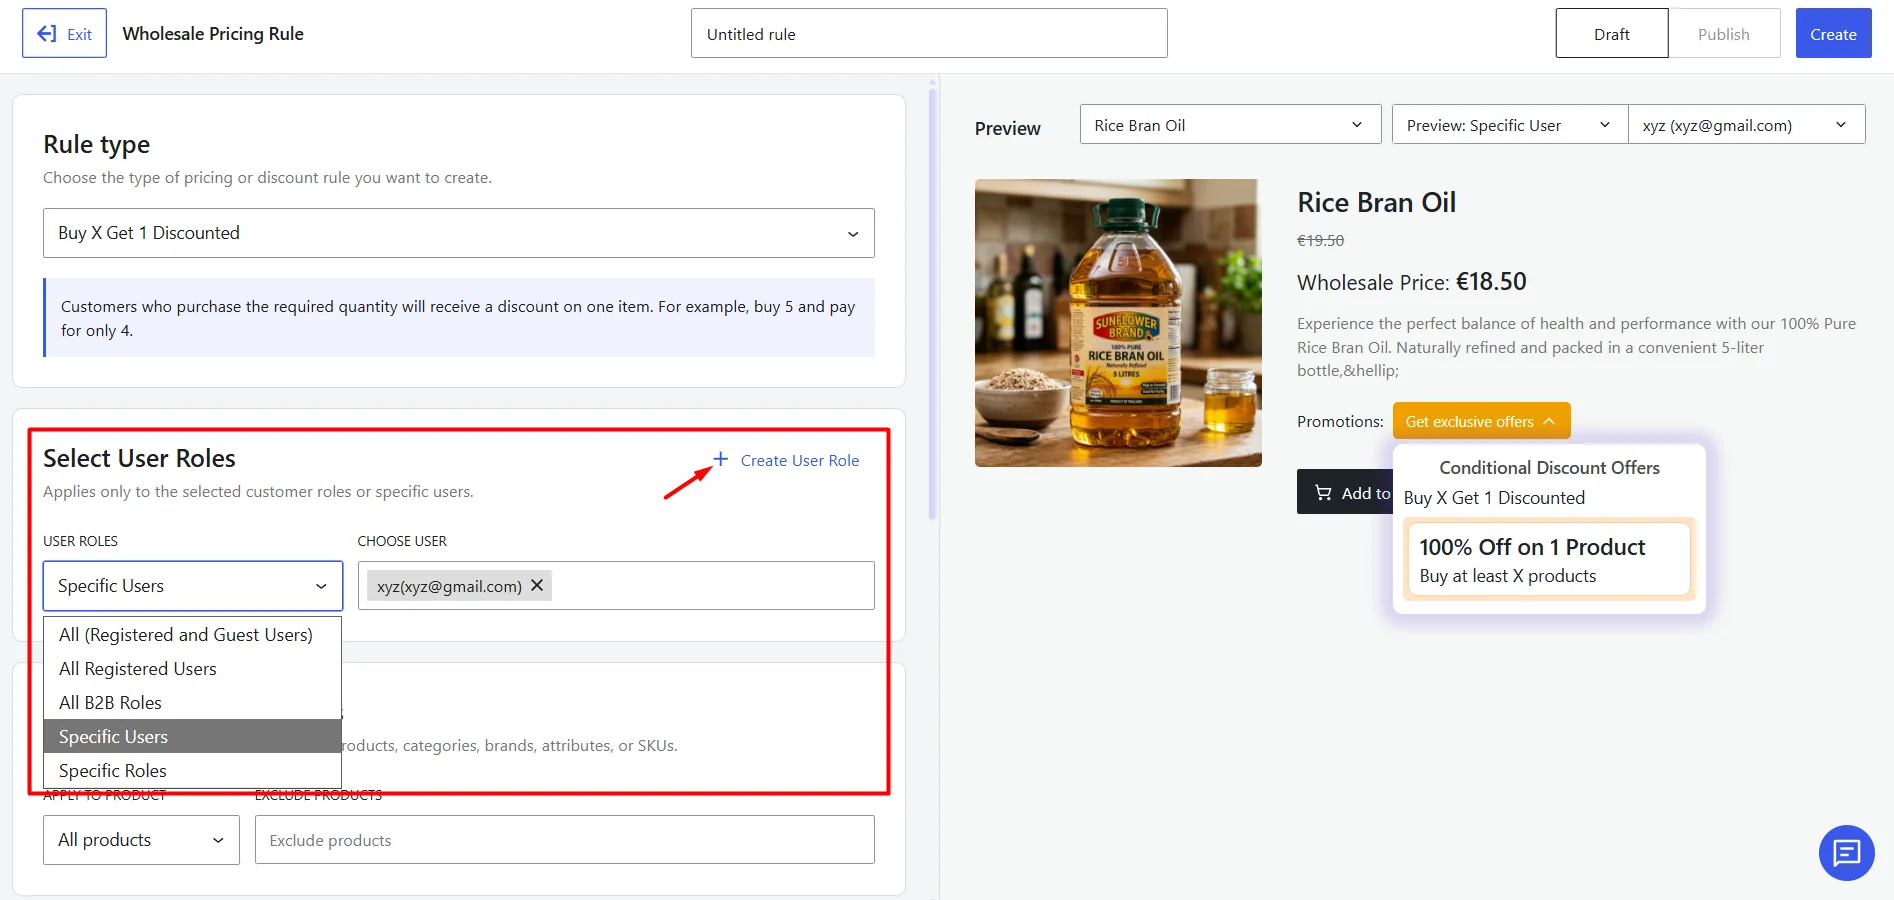
Step 3: Select Products
Choose the products that will be eligible for the BOGO offer. You can target:
- All Products
- Specific Products
- Specific Categories
- Brands
- Attributes
- SKU
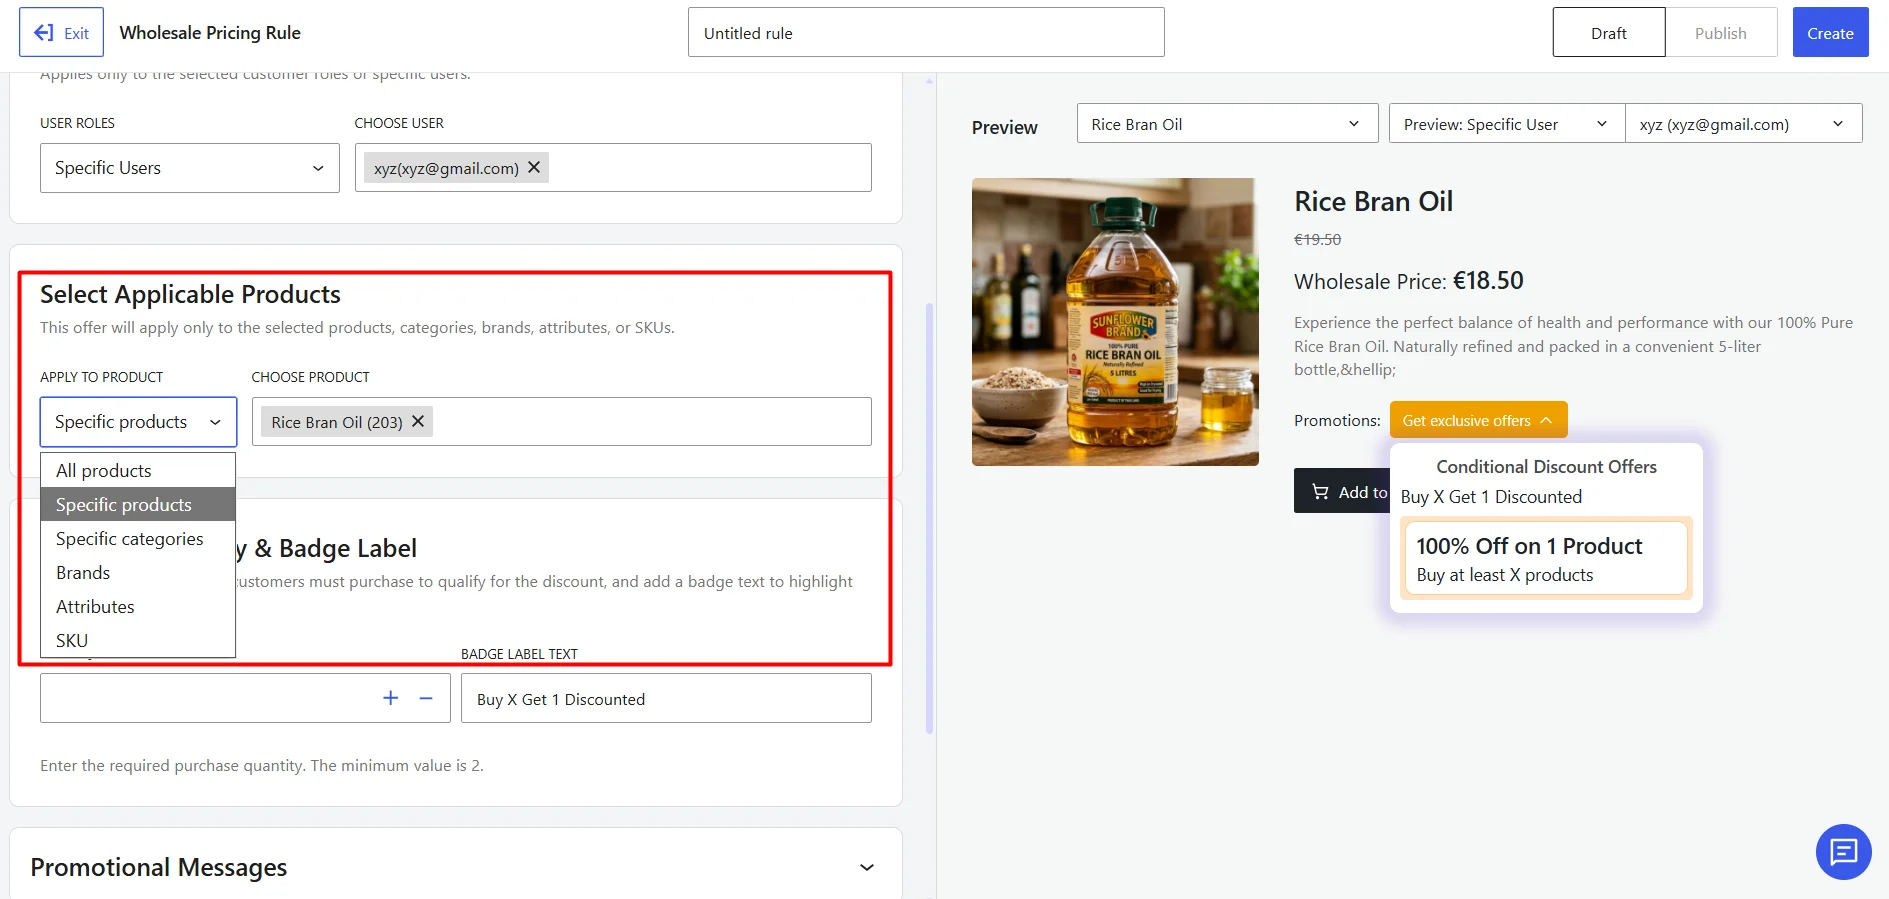
Step 4: Configure the BOGO Discount
The Required Quantity & Badge Label section controls how the promotion works.
- BUY X QTY: Enter the number of items a customer must buy to get the offer. (minimum value is 2)
- Badge Label Text: Type the text you want to display on the product’s promotional tag.
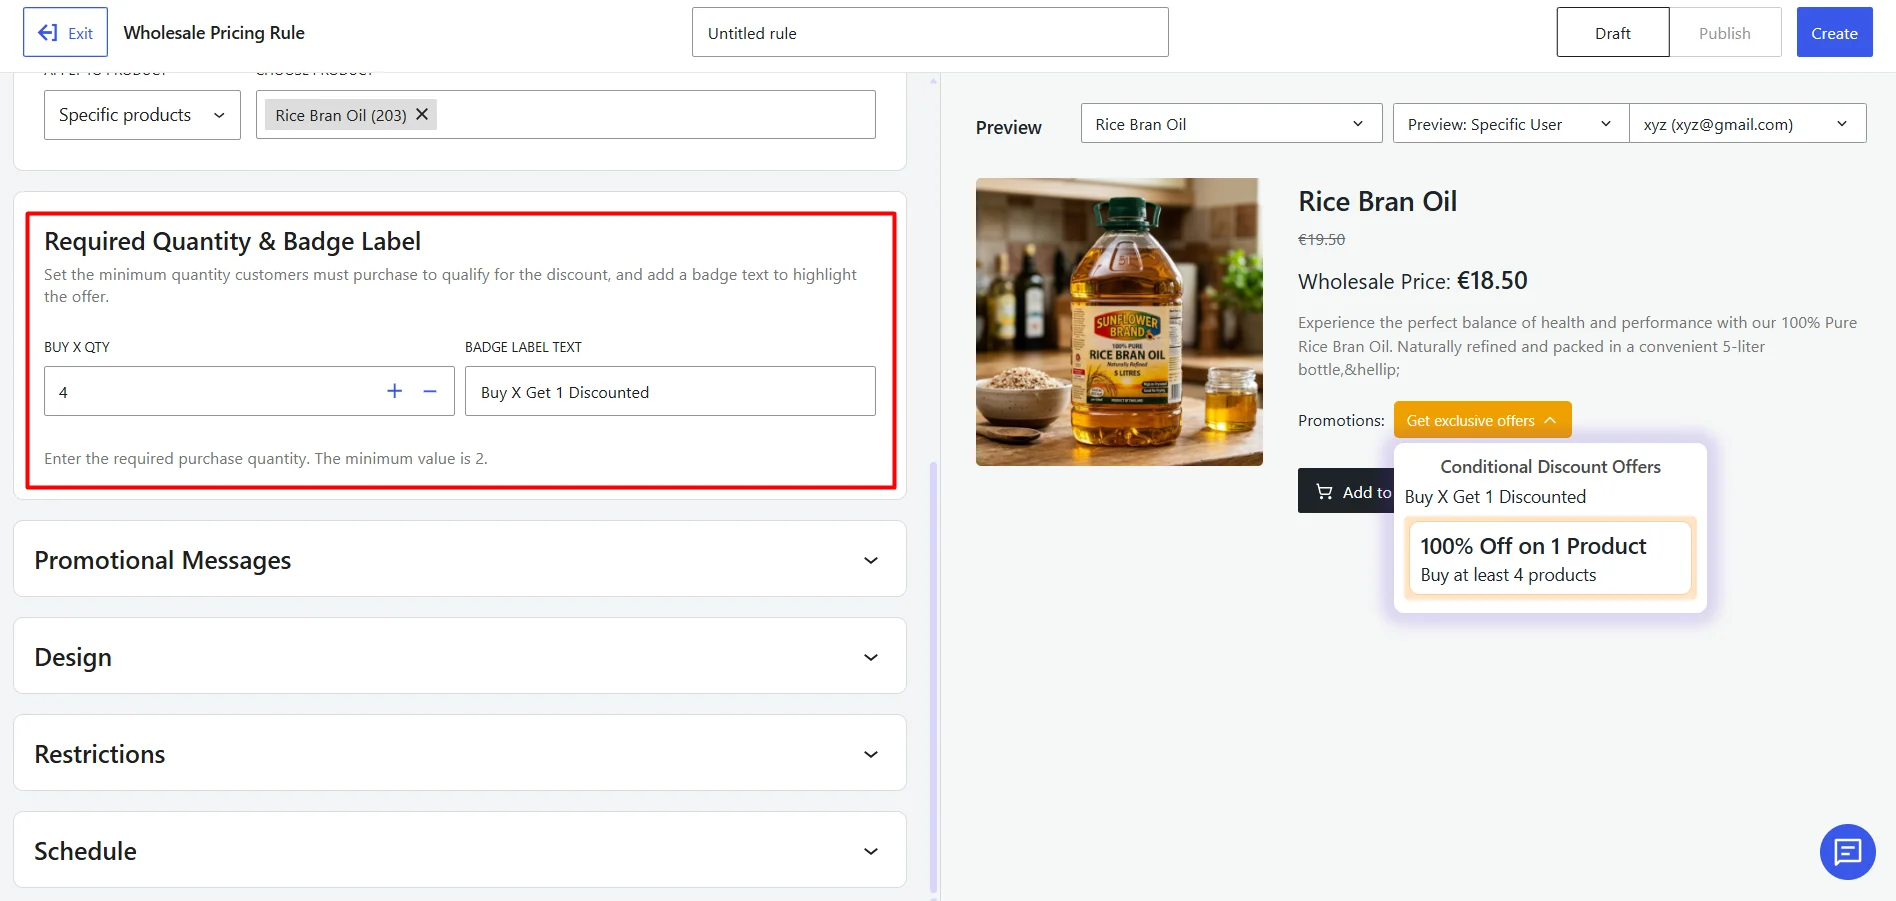
Step 5: Configure Promotional Messages (optional)
Open the Promotional Messages section to customize how the discount offer appears on the product and cart pages.
Enable promo text on the product page, then configure the following fields:
- Offer Text: Enter the main promotional headline, such as
100% Off on 1 Product. - Condition Text: Explain what customers must do to qualify, such as
Buy at least {required_quantity} products. - Promo Text for Cart Page: Enter the message displayed on the cart page, such as
{product_title} (Buy X Get 1 Discounted).
You can use the available smart tags to insert rule information dynamically:
{required_quantity}— Required quantity to receive the discount{product_title}— Product title
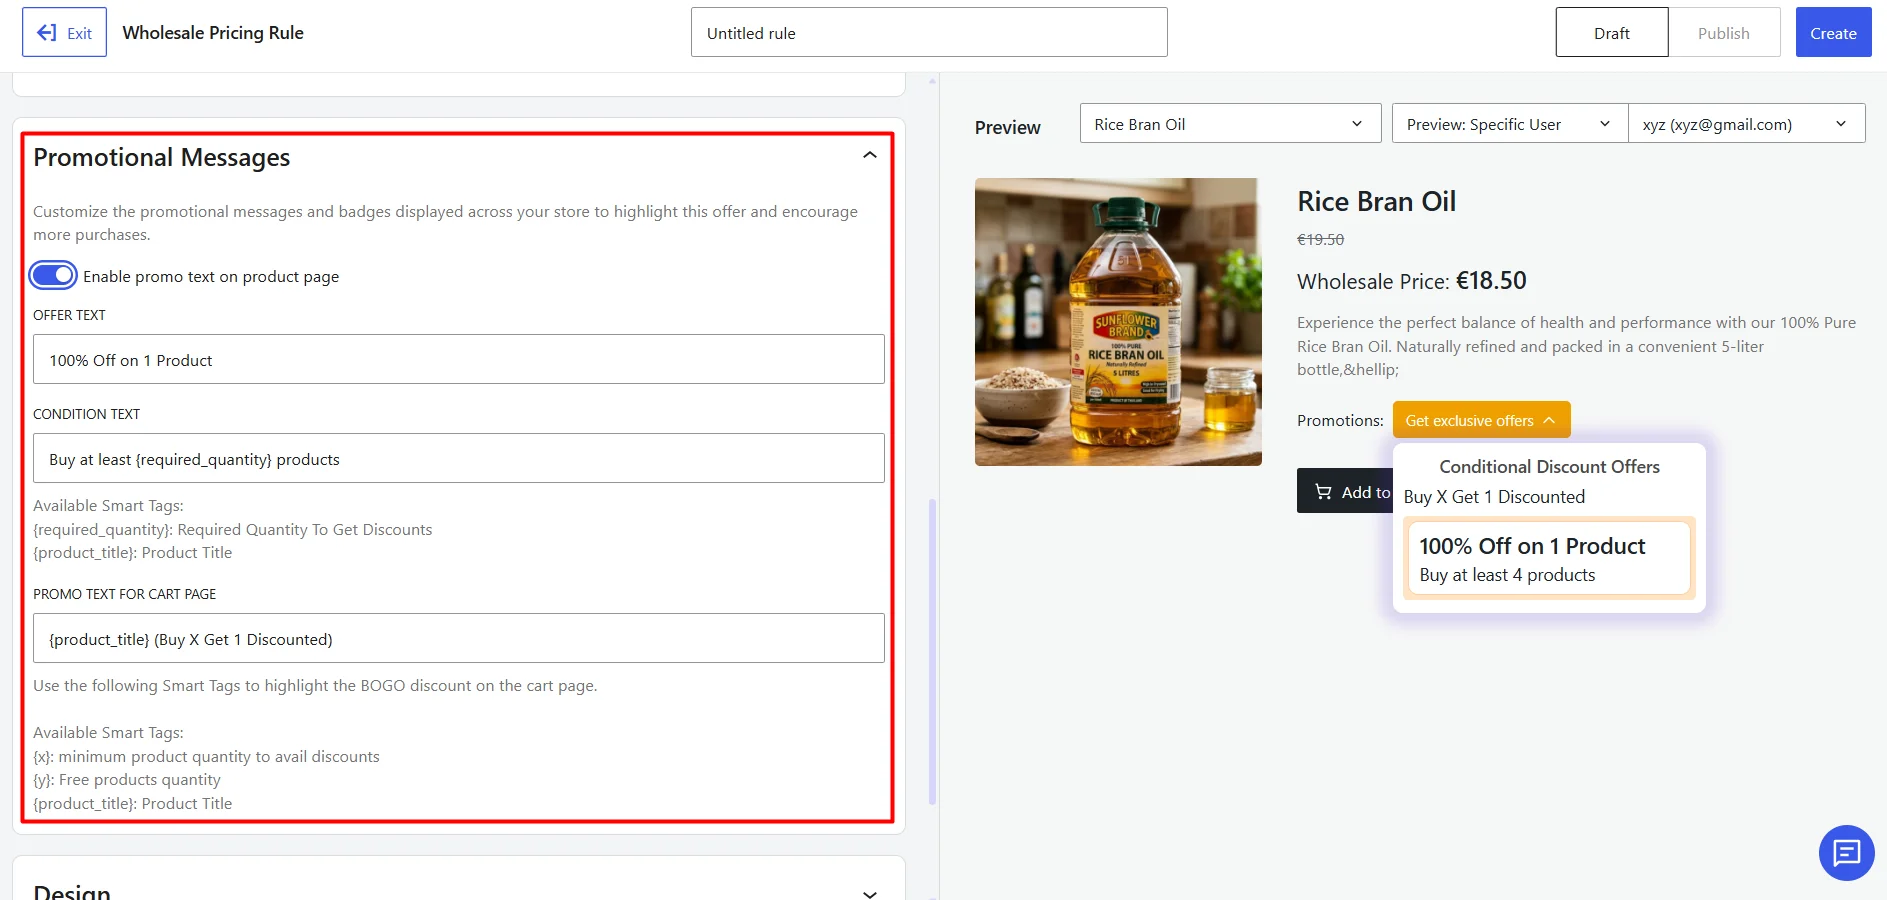
Use the Preview panel to check how the offer and qualification message will appear under Promotions → Get Exclusive Offers on the product page.
Step 6: Customize the Promotion Badge (Optional)
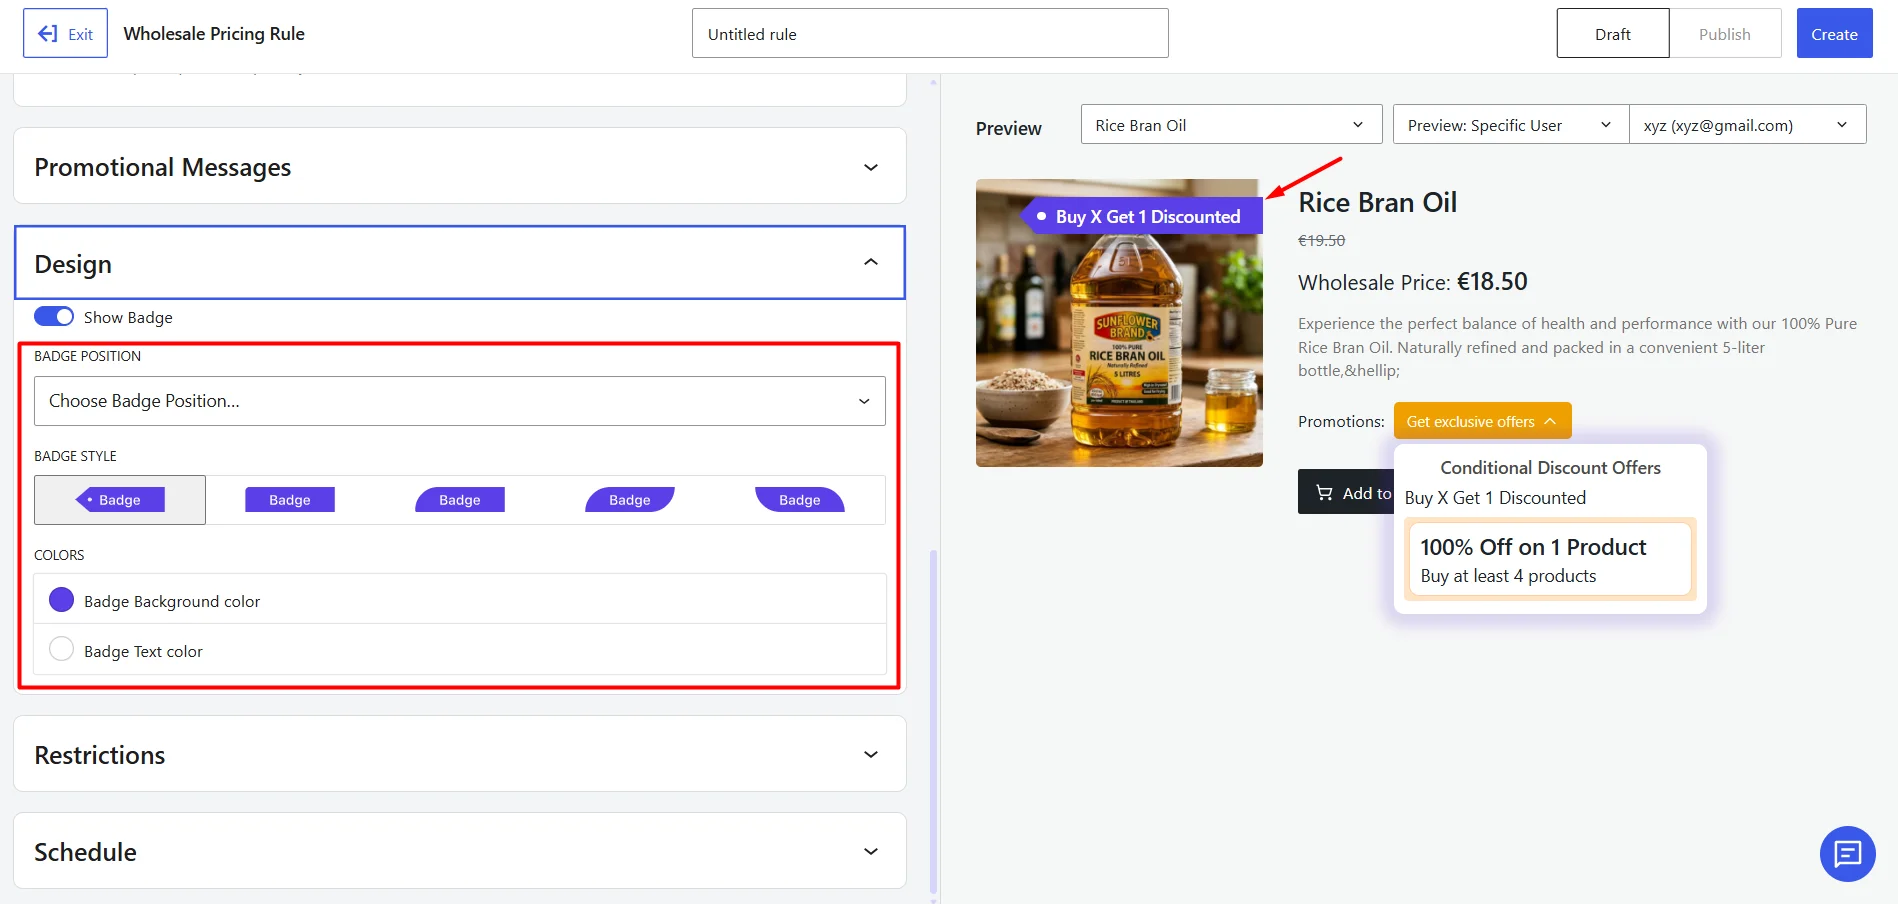
The Design section allows you to customize the appearance of promotional badges displayed on the storefront.
- Show Badge: Enable or disable promotional badges for this rule.
- Badge Position: Choose where the badge appears on the product image.
- Badge Style: Select a predefined badge design.
- Badge Colors: Customize the badge appearance using:
- Badge Background Color
- Badge Text Color
Step 7: Configure Restrictions (Optional)
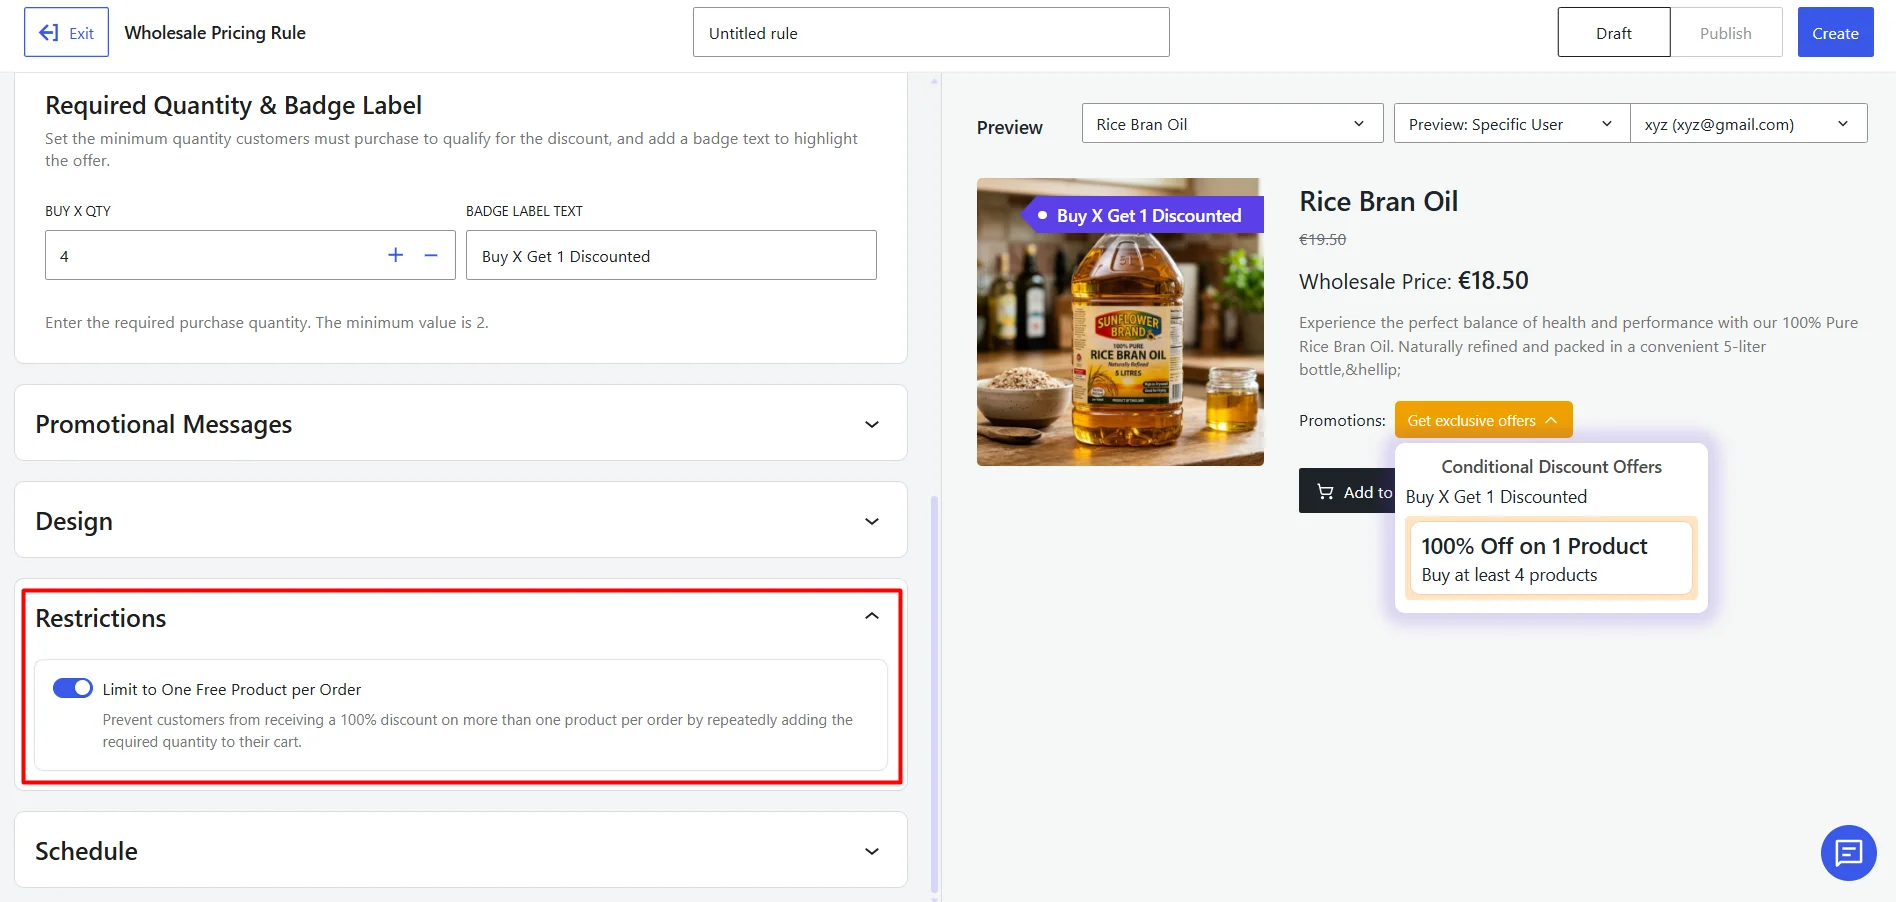
Use restrictions to control how the BXGO discounted offer can be redeemed.
Restrict to One Free Product Per Order
When enabled, customers can only receive one discounted item regardless of how many times they qualify for the promotion within the same transaction.
This helps prevent unintended discount stacking and excessive giveaway quantities.
Step 8: Configure Scheduling (Optional)
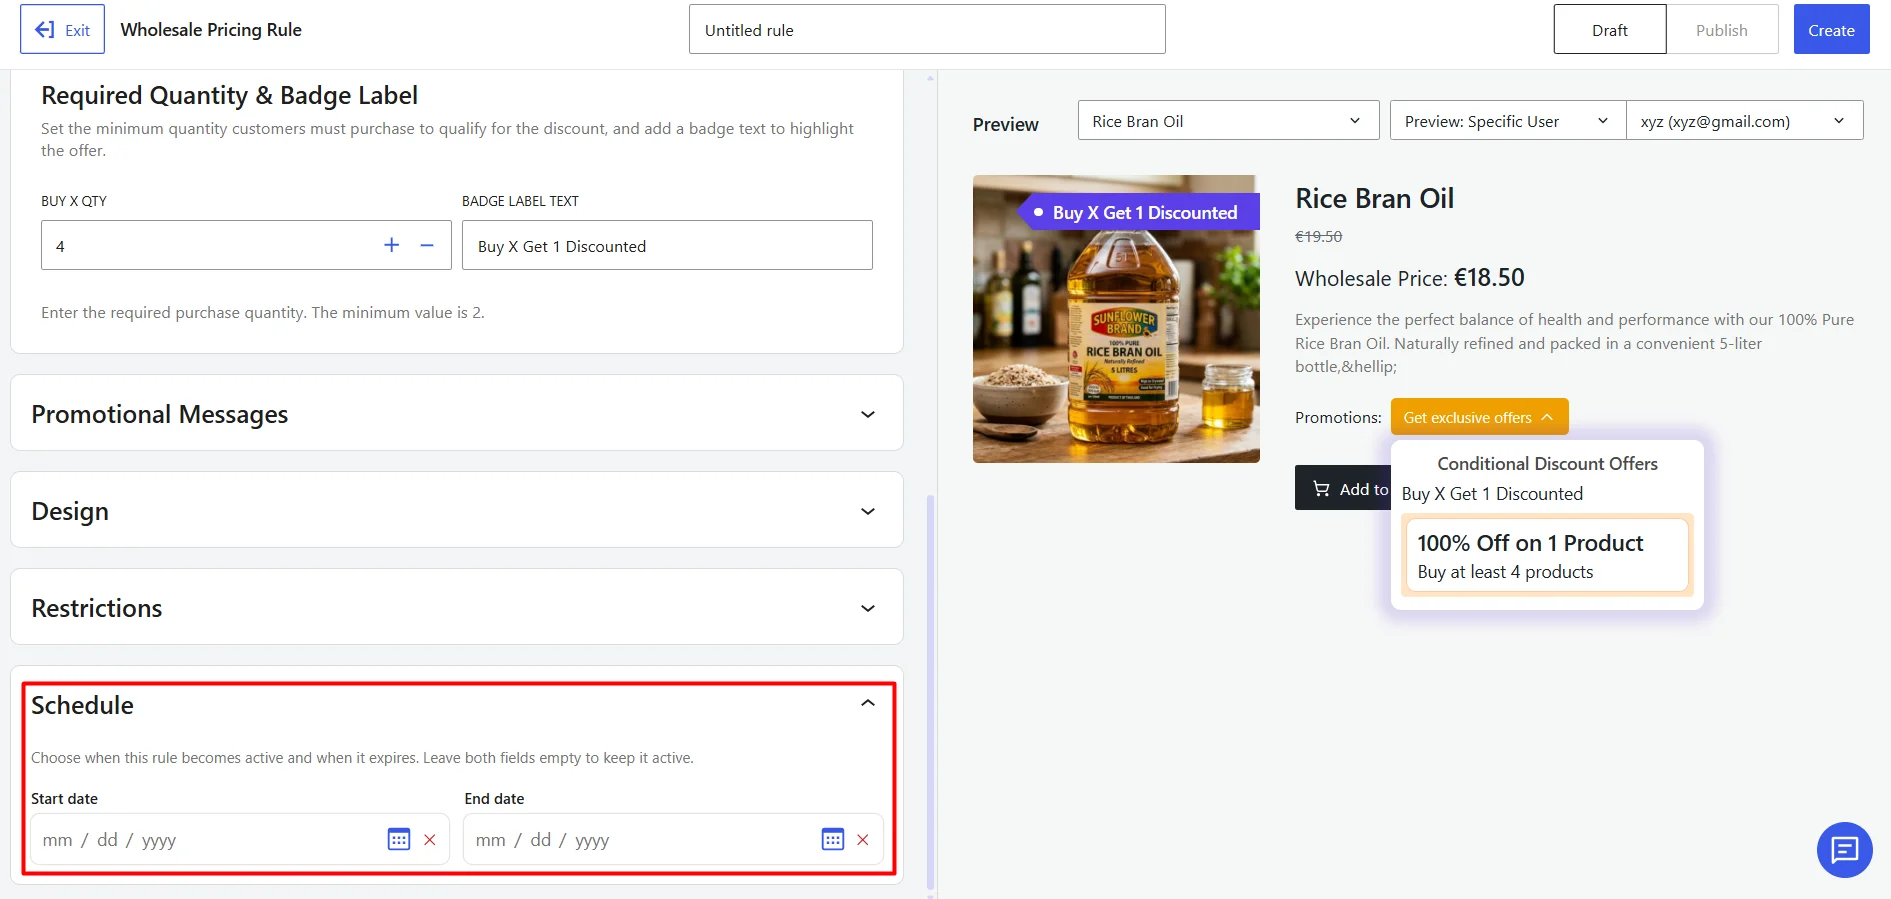
Use scheduling to control when the BOGO discount becomes active.
You can:
- Set a start date and time.
- Set an end date and time.
- Leave the schedule empty to activate the rule immediately after publishing.
Scheduling is useful for seasonal campaigns and limited-time promotions.
Step 9: Review and Publish the Rule
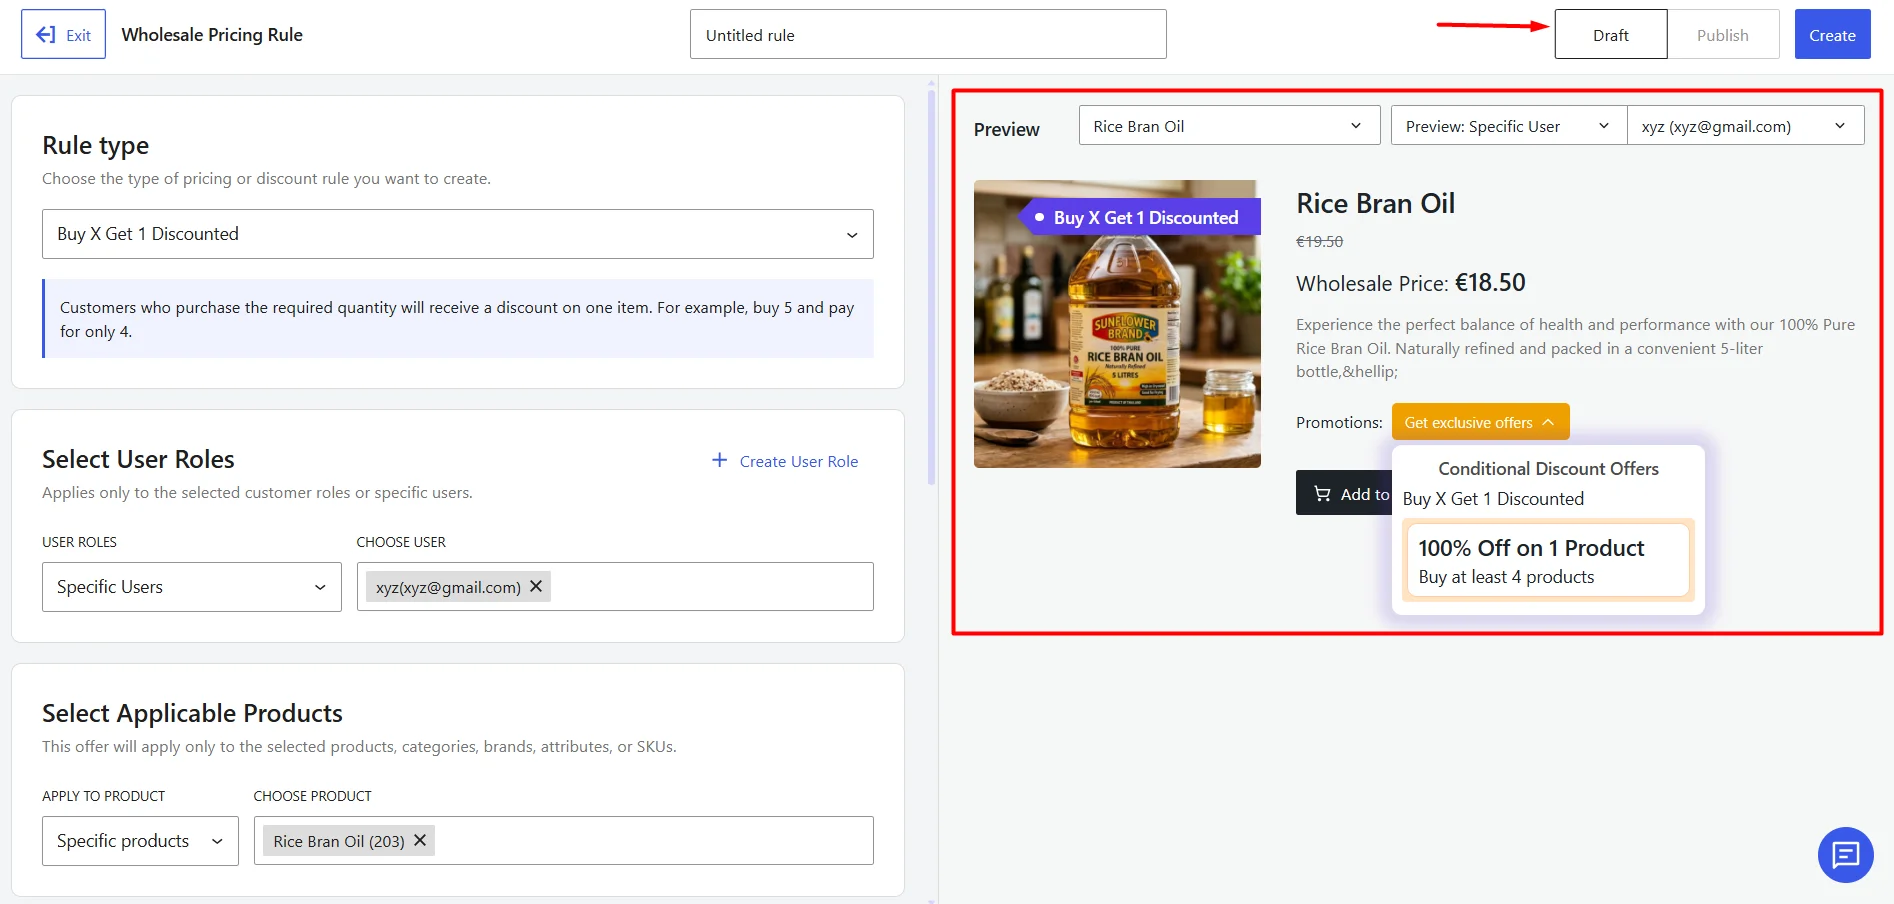
Use the Preview section to verify how the pricing rule will appear on the storefront before publishing it.
- Select a product from the product dropdown.
- Choose the required user role.
- To check the rule for an individual buyer, select Preview: Specific User and choose the customer account.
Review the preview to confirm that the rule is applied correctly for the selected product and customer. Once everything is correct, publish the rule.
When the configuration is complete:
- Click Draft to save the rule without activating it.
- Click Publish to make the rule live.
- Click Create/Save to update an existing rule.
Your BXGO discounted rule is now ready to use.