
Registration Form Field Settings
The WholesaleX Registration Form Builder includes 22 fields for collecting account, profile, business, and verification information from customers.
You can add the fields you need, arrange them in the required order, display them in one or two columns, and configure each field separately.
Accessing the Registration Form Builder
From your WordPress dashboard:
- Go to WholesaleX.
- Open the Registration Form tab.
The builder displays the login form on the left and the customer registration form on the right. All registration fields are added and managed from the registration form preview.
Add a Field to the Registration Form
To add a field:
- Click the Plus (+) icon below the existing fields in the registration form.
- The Form Fields panel will open on the left.
- Find and select the field you want to add.
- The selected field will be added to the registration form.
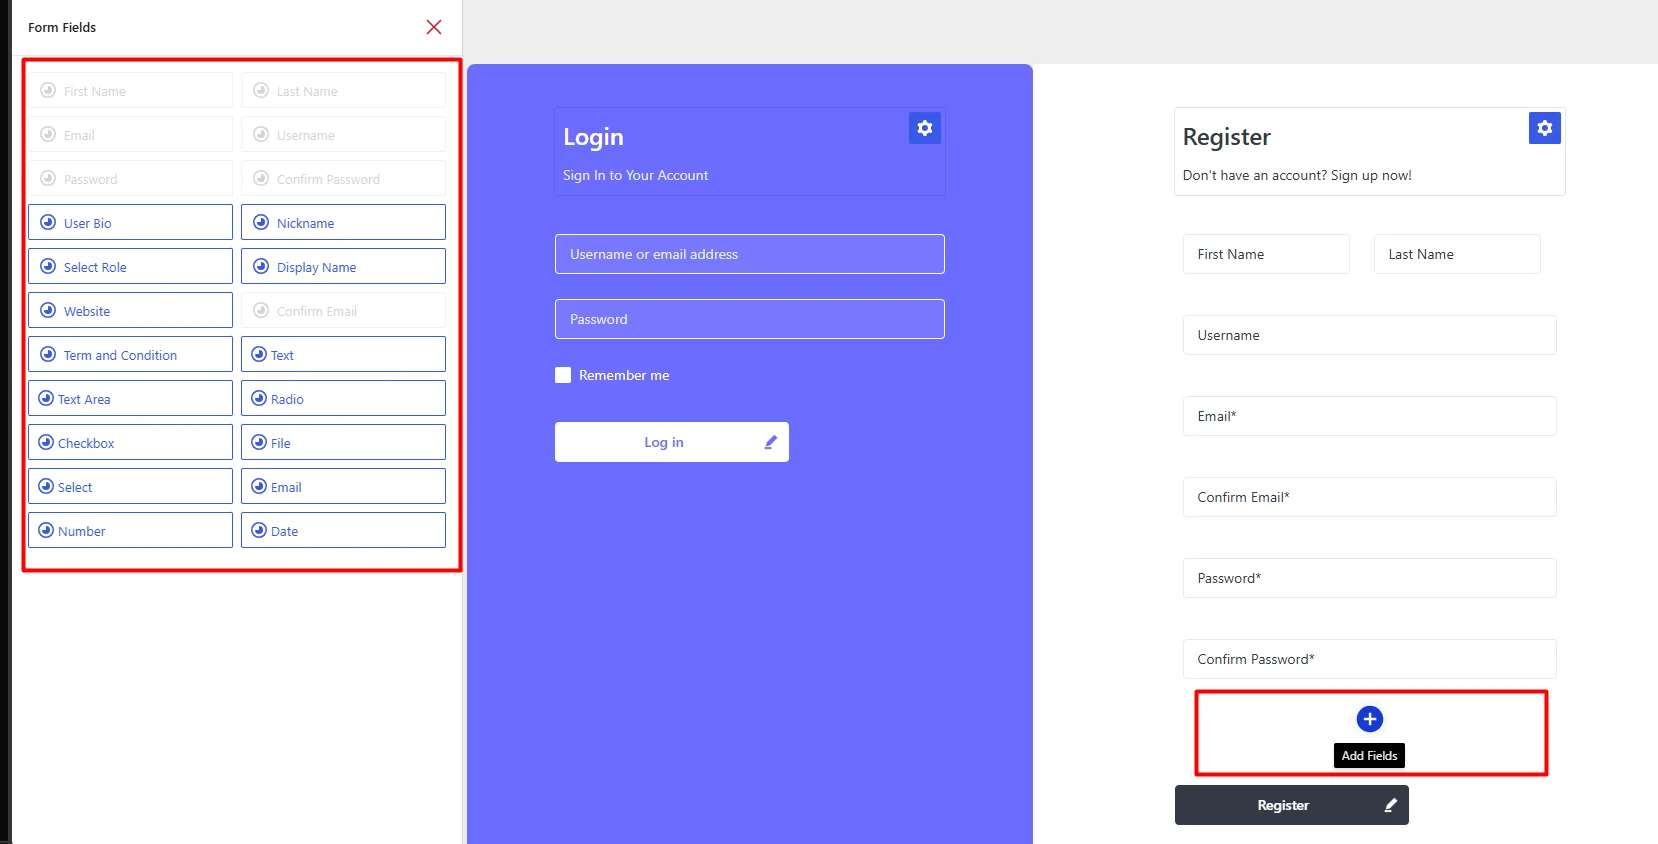
Available Registration Form Fields
WholesaleX provides the following 22 field options:
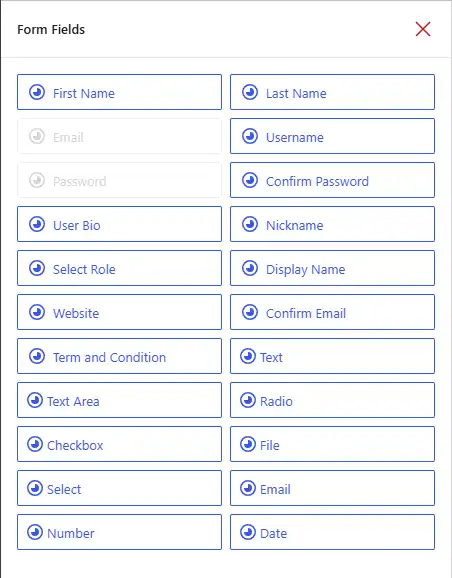
| 1 | First Name | Collects the customer’s first name. |
| 2 | Last Name | Collects the customer’s last name. |
| 3 | Collects the primary email address associated with the customer’s WordPress account. | |
| 4 | Username | Allows the customer to choose a username for the account. |
| 5 | Password | Allows the customer to create an account password. |
| 6 | Confirm Password | Asks the customer to enter the password again for confirmation. |
| 7 | User Bio | Collects a longer description about the customer or their business. |
| 8 | Nickname | Collects an alternative name for the customer’s WordPress profile. |
| 9 | Select Role | Allows the customer to select an available WholesaleX user role. |
| 10 | Display Name | Collects the name that may be displayed publicly for the customer. |
| 11 | Website | Collects the customer’s business website or online store address. |
| 12 | Confirm Email | Asks the customer to enter the primary email address again for verification. |
| 13 | Term and Condition | Adds an agreement checkbox linked to your terms, privacy policy, or another policy page. |
| 14 | Text | Collects a short, single-line text response. |
| 15 | Text Area | Collects a longer, multi-line text response. |
| 16 | Radio | Allows the customer to select one option from a visible group. |
| 17 | Checkbox | Allows the customer to select one or more options. |
| 18 | File | Allows the customer to upload a document or image. |
| 19 | Select | Adds a dropdown from which the customer can select one option. |
| 20 | Adds an additional email-type field for collecting another email address. | |
| 21 | Number | Collects a numerical value. |
| 22 | Date | Allows the customer to select or enter a date. |
The Two Email Fields
The Form Fields panel contains two fields named Email, but they serve different purposes.
The first Email field is the default account email field. It stores the primary email address associated with the customer’s WordPress account.
The additional Email field is a custom email-type field. You can use it to collect another email address, such as:
- Billing email
- Accounts department email
- Secondary contact email
- Business verification email
The additional Email field does not replace the default account Email field.
Access a Field’s Settings
Click any field in the registration form preview to open its settings panel on the left. From there, you can customize how the selected field appears and works on the registration form.
Each field has its own configuration options. For detailed instructions, see the dedicated documentation for that field type.
Set Field Conditions
The Field Condition tab lets you control when a registration field should appear based on another field or a customer’s selection. This helps you create conditional registration forms that show only the fields relevant to each user.
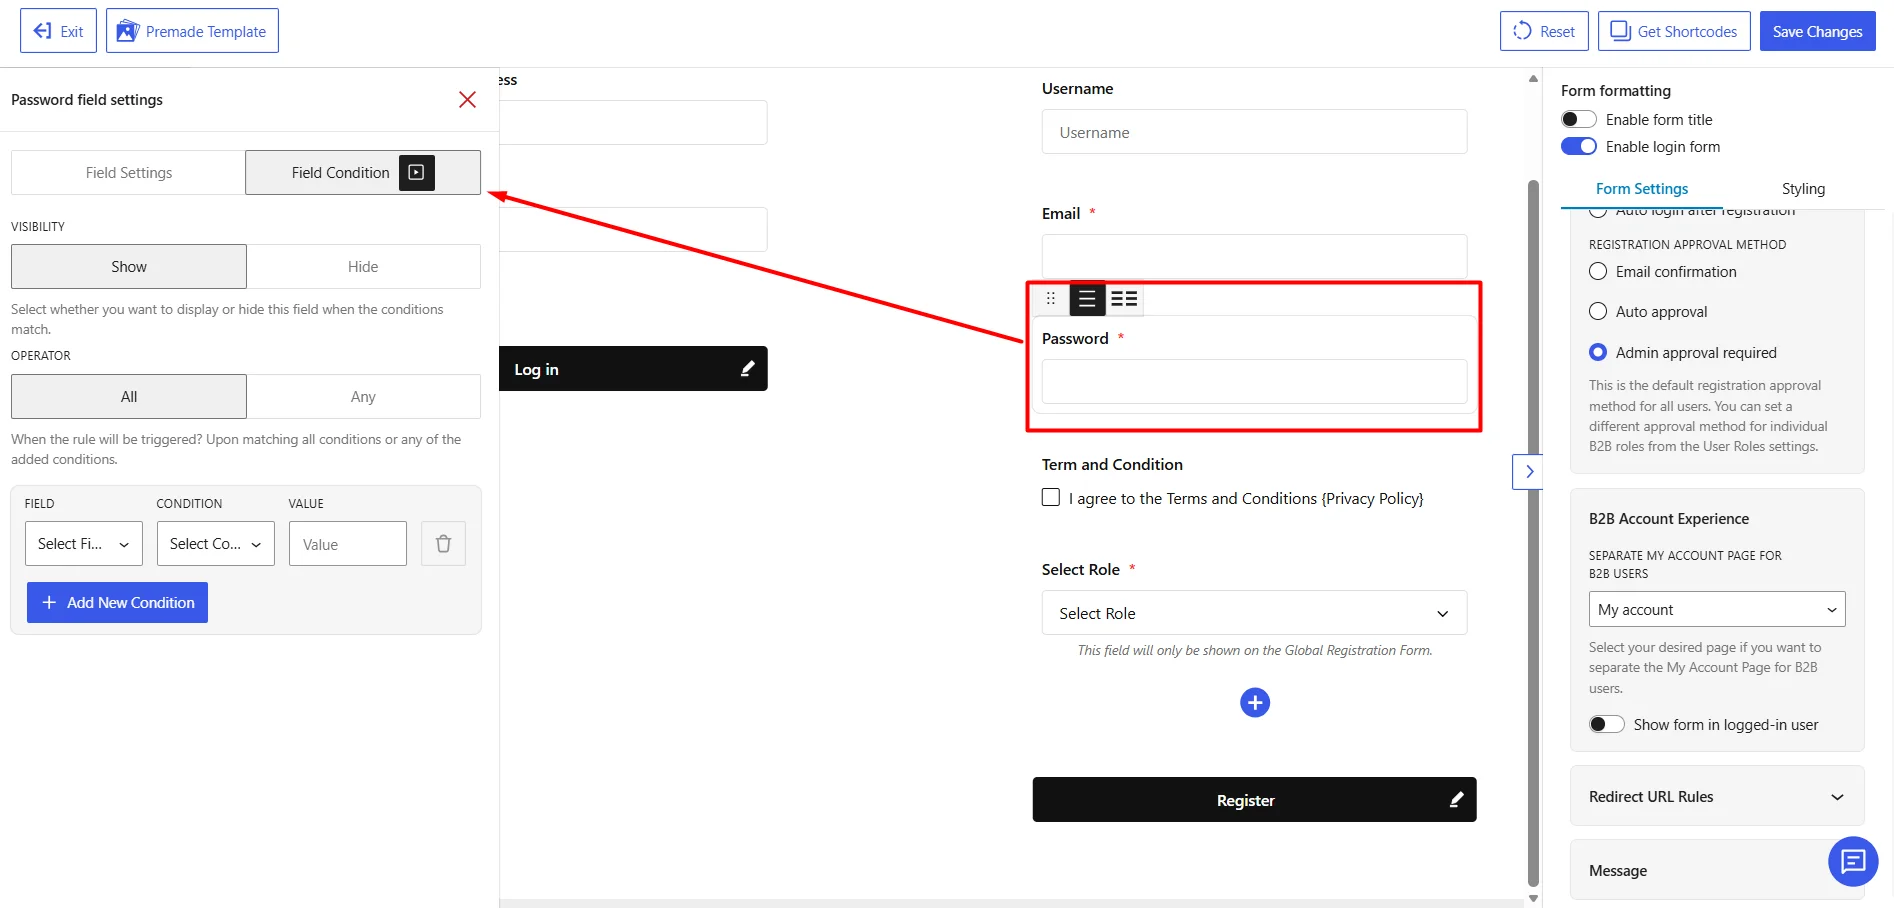
For configuration steps and examples, see the [How to Configure Registration Form Field Conditions] documentation.
Reorder Registration Form Fields
You can change the order in which fields appear on the form. To move a field:
- Click the field in the registration form preview.
- Click and hold the drag icon.
- Move the field to the required position.
- Release it to place the field.
Arrange the fields in a logical order so customers can complete the form without moving back and forth between related information. For example, you may place the fields in this sequence:
- Name and account information
- Business information
- Verification documents
- Terms and Conditions
Change the Field Column Layout
WholesaleX lets you display fields in either a single-column or two-column layout. The layout controls appear after you select a field in the registration form preview.
Use a Single-Column Field
Select the single-column icon to make the field occupy the full width of the row. A single-column layout is suitable for fields that need more horizontal space, such as:
- Text Area
- File Upload
- Terms and Conditions
- Website
- User Bio
- Business description fields
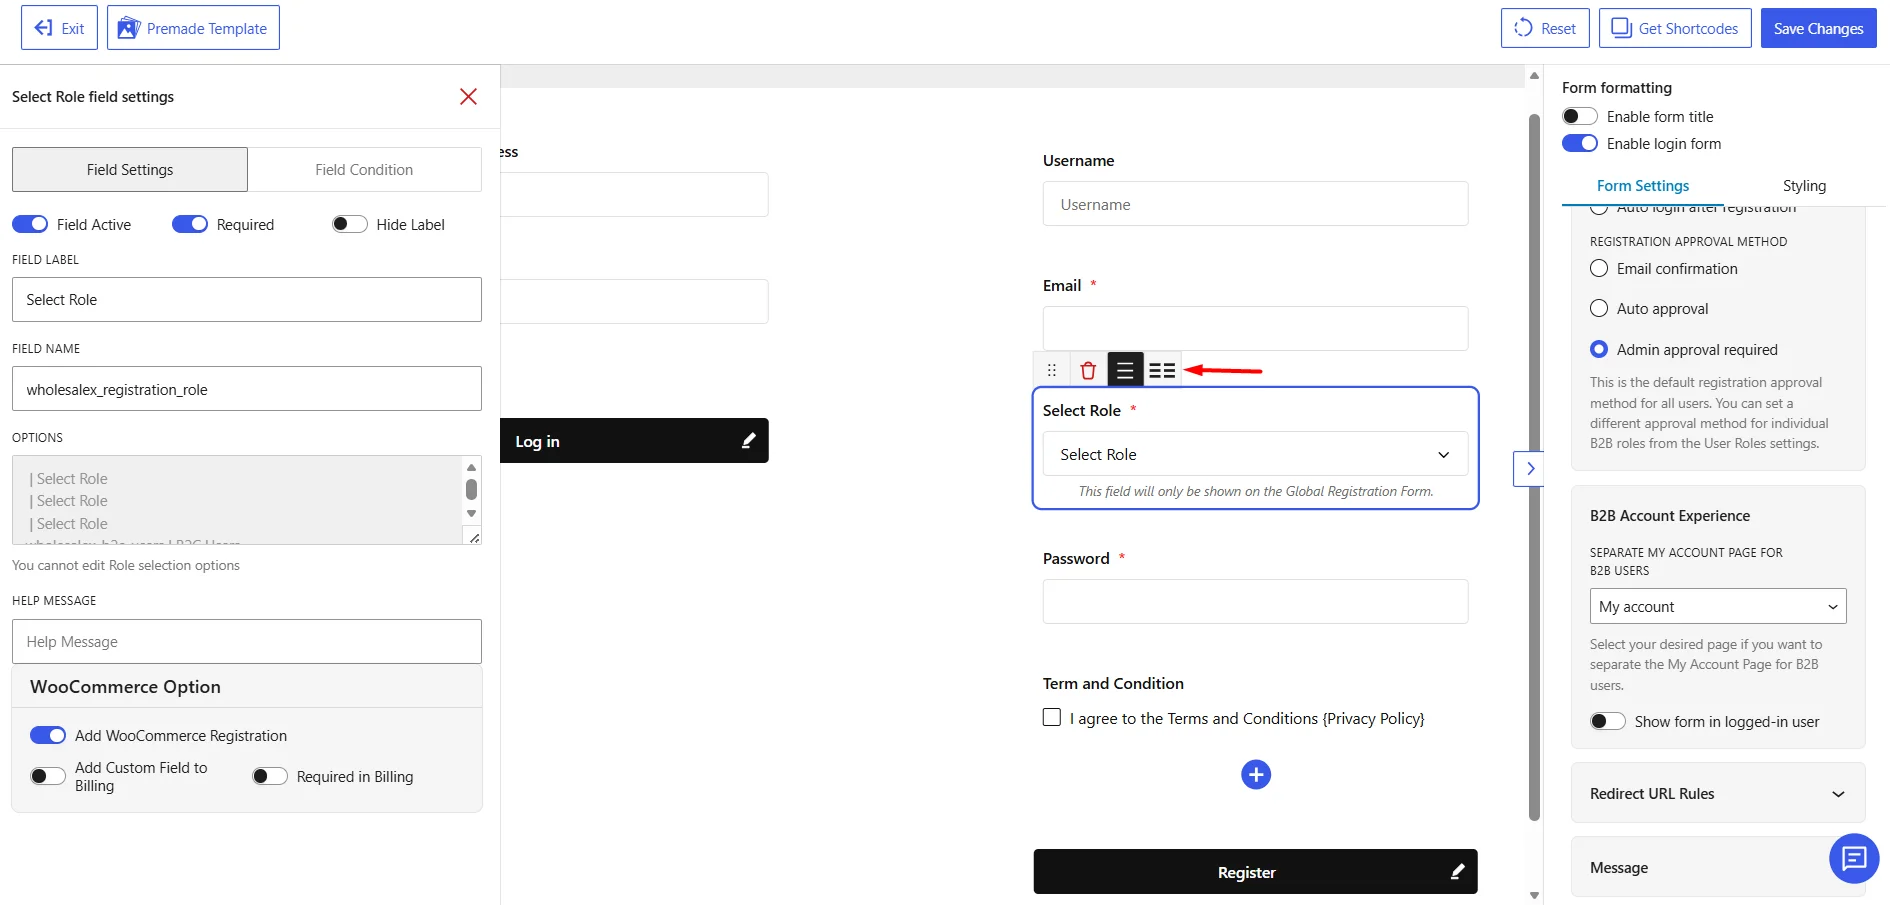
Use a Two-Column Field
Select the two-column icon to make the field occupy half of the row. After enabling the two-column layout, use the available Plus (+) icon to add another field beside it. A two-column layout works well for related fields such as:
- First Name and Last Name
- Email and Confirm Email
- Password and Confirm Password
- City and Postal Code
- Business Type and Number of Employees
Use two columns only when both fields remain easy to read and complete on smaller screens.
Permanent Registration Fields
The following two fields are permanent:
- Password
These fields cannot be deleted from the registration form because they are required for creating and securing the customer’s WordPress account.
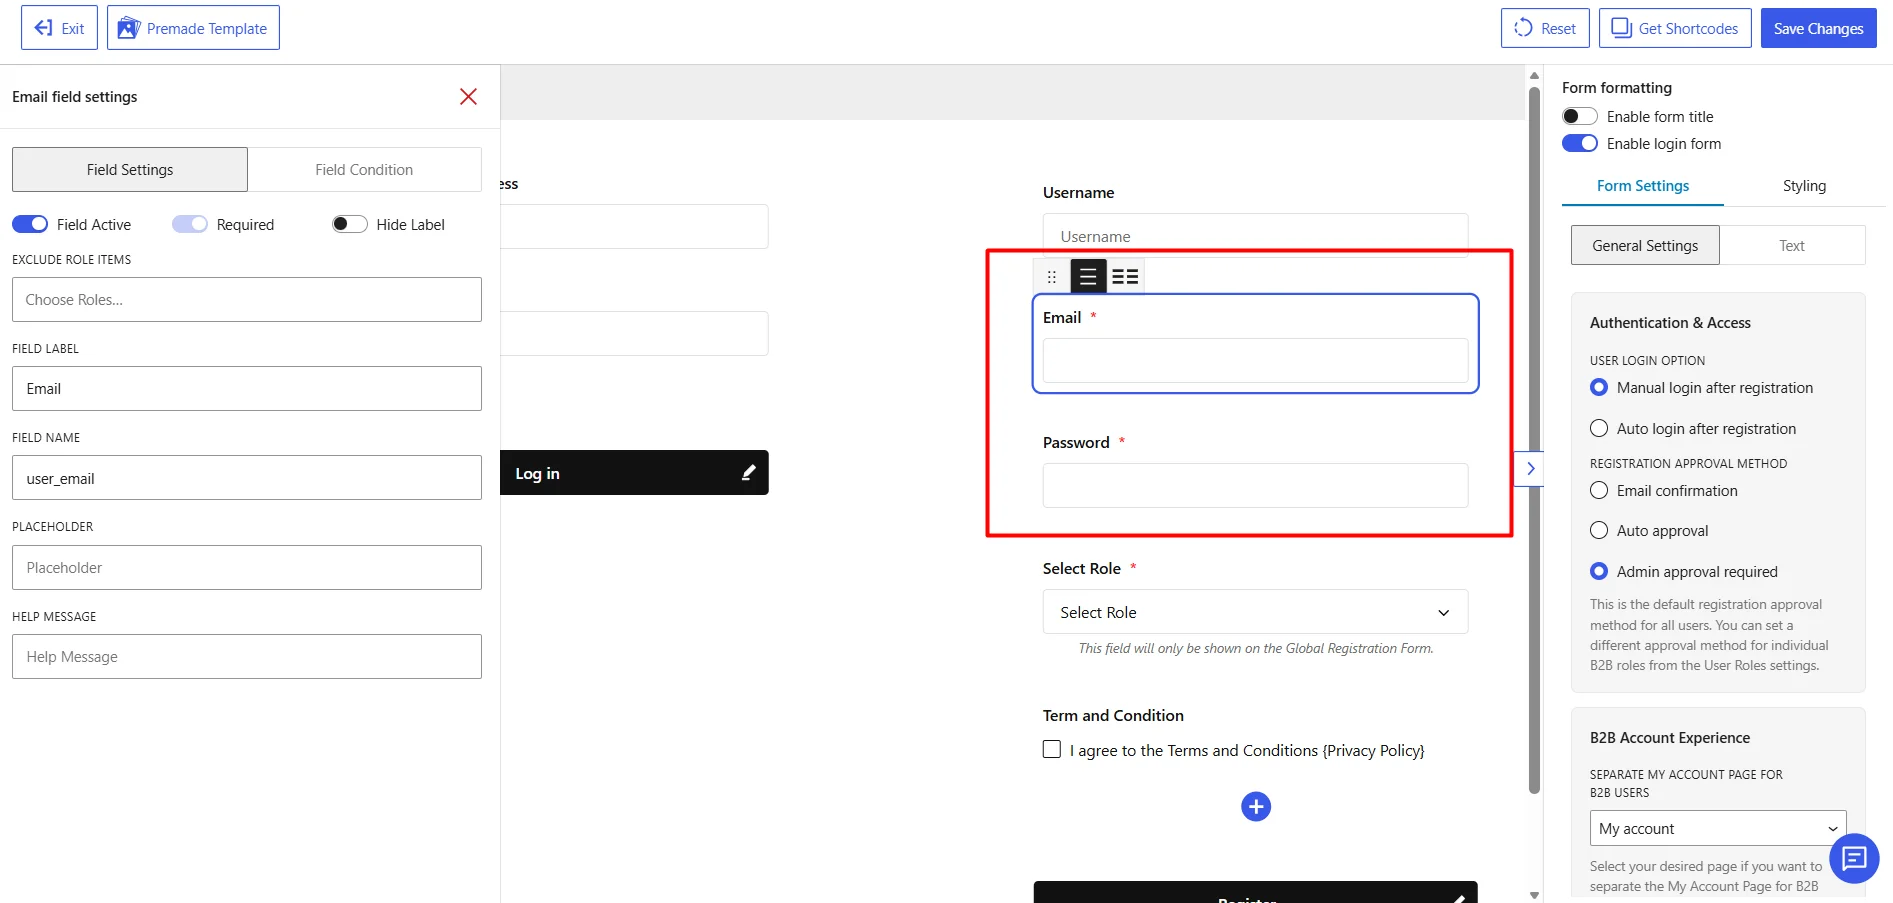
You can still click and configure them. For example, you can change their:
- Labels
- Placeholders
- Help messages
- Password-strength requirements
- Field visibility settings
- Role-related settings
All other fields can be added or removed based on your registration requirements.
Remove a Field from the Form
Removing a field deletes it from the current registration form layout. You can add it again later from the Form Fields panel. To remove a field:
- Click the field in the registration form preview.
- Click the Delete icon in the field toolbar.
- The field will be removed from the form.
Save the Registration Form
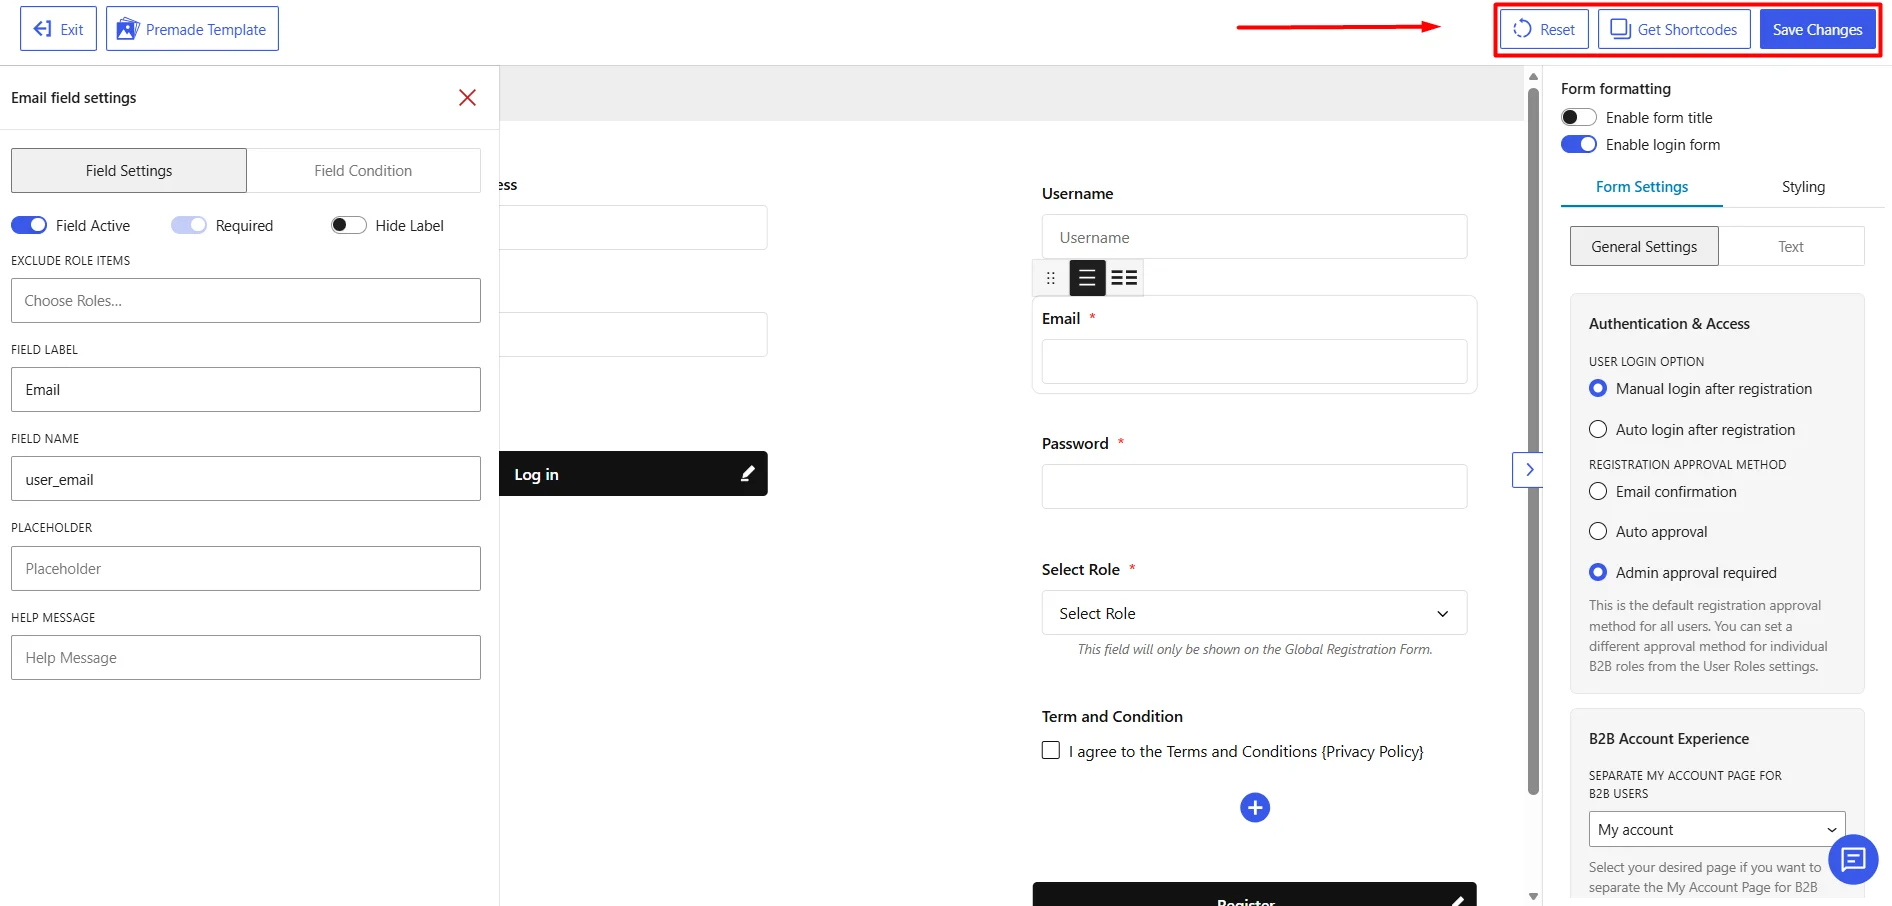
After adding, removing, arranging, or configuring fields, click Save Changes in the upper-right corner of the builder. Changes are not applied to the registration form until you save them.
Reset the Form
Click Reset to restore the builder configuration. Use this option carefully, particularly after making multiple changes. Save any configuration you want to keep before resetting the builder.
Get the Registration Form Shortcodes
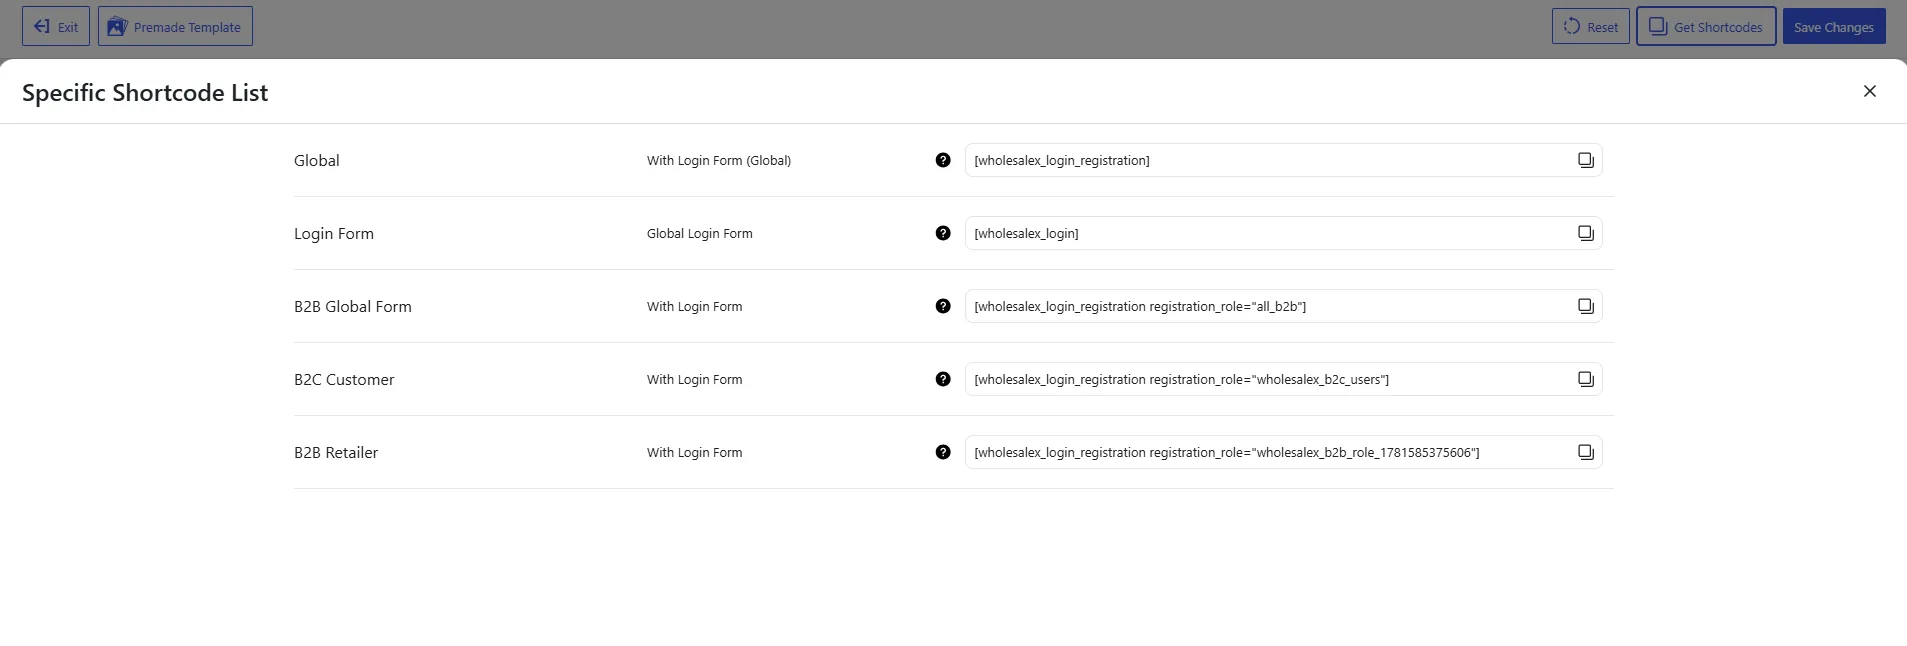
Click Get Shortcodes to view the available shortcodes for displaying the registration or login form on your website.
Copy the required shortcode and add it to the page, post, widget, or supported page-builder area where you want the form to appear.
Test the Registration Form
After saving the form, open the registration page on the frontend and verify that:
- All required fields appear.
- Fields are displayed in the correct order.
- Single-column and two-column layouts work correctly.
- Required fields cannot be skipped.
- Dropdown, radio, and checkbox options appear correctly.
- File restrictions work as configured.
- Password conditions are enforced.
- Password and Confirm Password values must match.
- Email and Confirm Email values must match.
- Terms and Conditions must be accepted when required.
- Role-specific fields appear only for the intended users.
- Submitted information is saved in the correct customer profile fields.