
The Email field collects the customer’s email address during registration. The Confirm Email field asks the customer to enter the same address again, helping prevent registration errors caused by typing mistakes.
Select either field in the registration form preview to open its settings in the left-side panel.
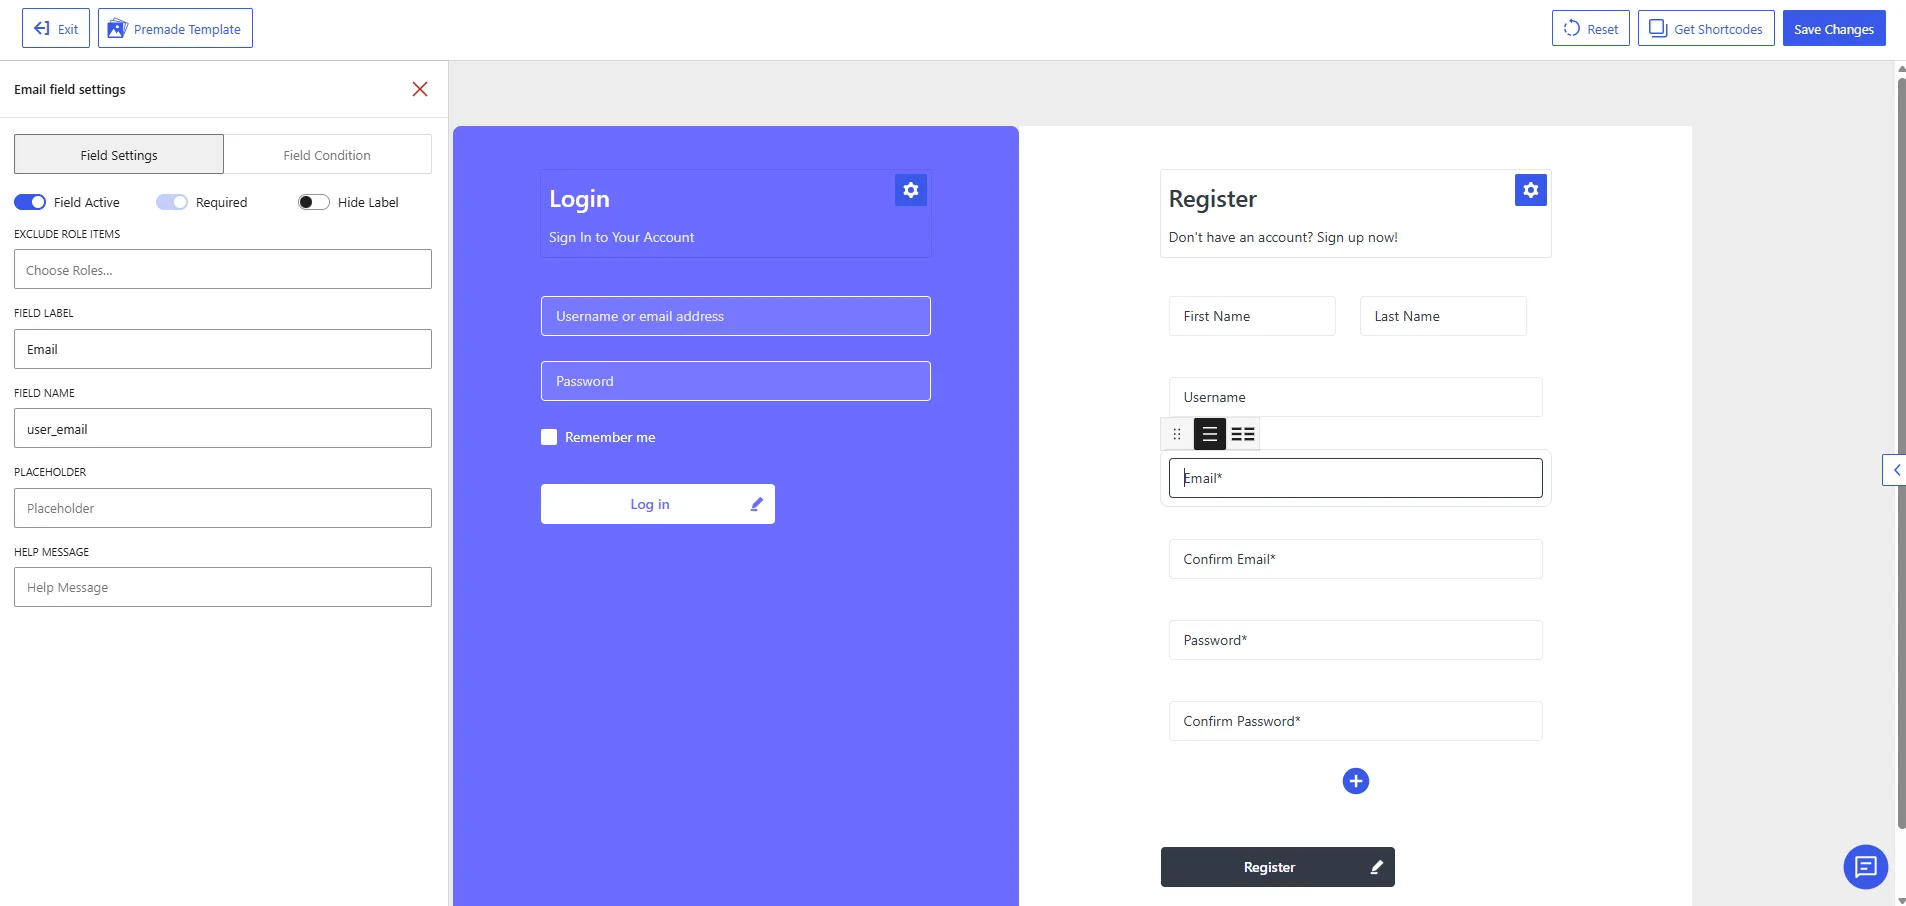
Email field settings in the WholesaleX Registration Form Builder.
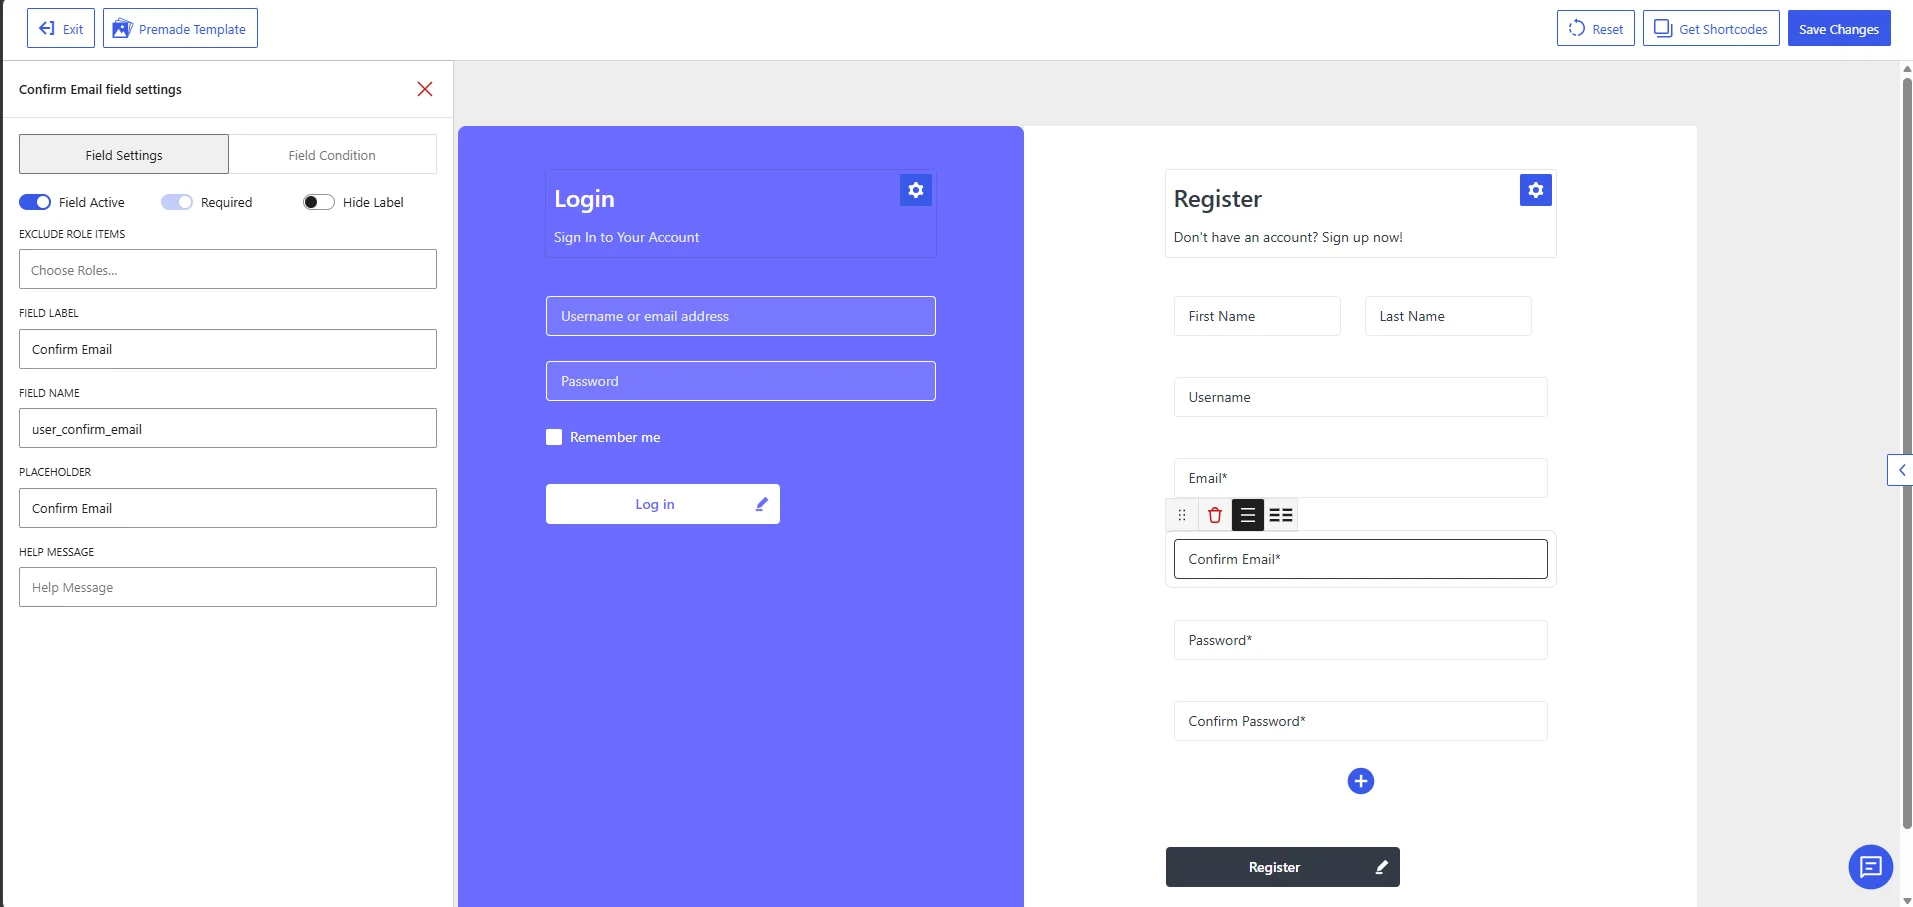
Confirm Email field settings in the WholesaleX Registration Form Builder.
How the Fields Work Together
The customer enters an email address in the Email field and repeats it in the Confirm Email field. The entered addresses should match before the registration form is submitted.
The Email field provides the account’s primary email address. The Confirm Email field is used only to verify that the first address was entered correctly.
Available Field Settings
Field Active
Enable Field Active to display the selected field on the registration form.
For a standard registration form, keep the Email field active because the customer’s email address is required for creating and managing the account.
Enable the Confirm Email field when you want customers to verify their email address before submitting the form. Disable it when one email input is sufficient for your registration process.
Required
Enable Required to prevent customers from submitting the registration form without completing the field.
The Email field should remain required because it collects the primary email address associated with the customer’s account.
When the Confirm Email field is active, it should also remain required. Otherwise, customers may be able to leave the confirmation field empty, which removes the benefit of verifying the address.
Hide Label
Enable Hide Label to remove the visible field label from the registration form.
When the label is hidden, customers must identify the field from its placeholder text. Use a clear placeholder such as Email Address or Confirm Email Address if you hide the label.
For better clarity and accessibility, keeping the labels visible is generally recommended.
Exclude Role Items
Use Exclude Role Items to hide the selected field from specific user roles.
Click Choose Roles and select the roles for which the field should not appear. Leave the setting empty to display the field for all applicable users.
Avoid excluding the Email field unless another active field or registration process already collects the customer’s email address. An account generally requires an email address for communication and account management.
Field Label
The Field Label controls the name displayed for the field on the registration form.
The default labels are:
| Field | Default label |
|---|---|
Email | |
| Confirm Email | Confirm Email |
You can change the labels to make their purpose more explicit, such as:
Email AddressConfirm Email AddressBusiness EmailRe-enter Your Email
Use different labels for the two fields so customers can clearly understand which email input is the confirmation field.
Field Name
The Field Name is the internal identifier WholesaleX uses to process and store the submitted value.
The default field names are:
| Field | Default field name |
|---|---|
user_email | |
| Confirm Email | user_confirm_email |
Keep these default values unchanged.
The user_email field name connects the submitted address to the customer’s WordPress account email. The user_confirm_email field identifies the second email input used for confirmation.
Changing either value may interfere with email validation, account creation, stored user information, or integrations that rely on these field names.
Placeholder
The Placeholder is the text displayed inside the input box before the customer starts typing.
Suitable placeholders include:
| Field | Suggested placeholder |
|---|---|
Enter your email address | |
| Confirm Email | Confirm your email address |
The Confirm Email field uses Confirm Email as its placeholder in the shown configuration. The Email field can be given a placeholder based on the wording used in your form.
When labels are hidden, use placeholders that clearly distinguish the two fields.
Help Message
Use the Help Message setting to provide additional instructions below the selected field.
Examples for the Email field:
Enter the email address you want to use for your account.
Use your business email address for wholesale account verification.
Examples for the Confirm Email field:
Enter the same email address again for confirmation.
The email addresses entered in both fields must match.
A help message is optional. Add one when customers may need clarification about which email address to provide or why they must enter it twice.
Recommended Configuration
| Setting | Confirm Email | |
|---|---|---|
| Field Active | Enabled | Enabled when email verification is needed |
| Required | Enabled | Enabled when the field is active |
| Hide Label | Disabled | Disabled |
| Exclude Role Items | None | None |
| Field Label | Email | Confirm Email |
| Field Name | user_email | user_confirm_email |
| Placeholder | Enter your email address | Confirm your email address |
| Help Message | Optional | Optional |
After configuring both fields, click Save Changes. Test the registration form on the frontend and confirm that the email fields appear correctly and that the confirmation address matches the primary email address.