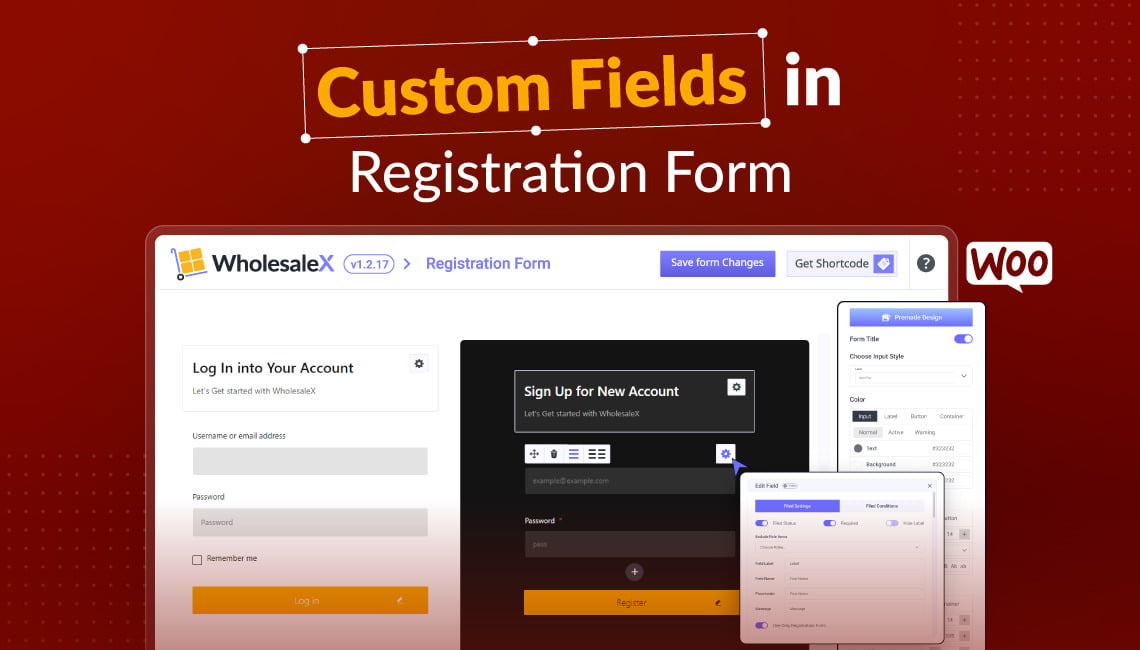
WooCommerce registration form is a great technique to know about your customers.
Every store owner needs to collect their consumer’s data and WooCommerce registration forms give the store owner access to vital consumer information by getting data from some pre-fixed fields.
The default WooCommerce does not provide the opportunity to add any extra custom fields on the registration form, but the field they have set in the default options does not fulfill all the requirements any store owner needs.
In today’s article, we will share step-by-step guidelines about adding custom fields to the registration form, and hope this will solve your problem!
How to Add Custom Fields in the Registration Form: Step-by-Step Guide
As we already know the default WooCommerce does not allow adding extra fields so we need to take help from an additional plugin.
“WholesaleX” is the best plugin that offers a complete custom registration form using its builder option.
So, let’s see how can we add a custom field in the registration page using the WholesaleX registration form builder in different steps →
Step-1: Start Creating a Custom Registration Page
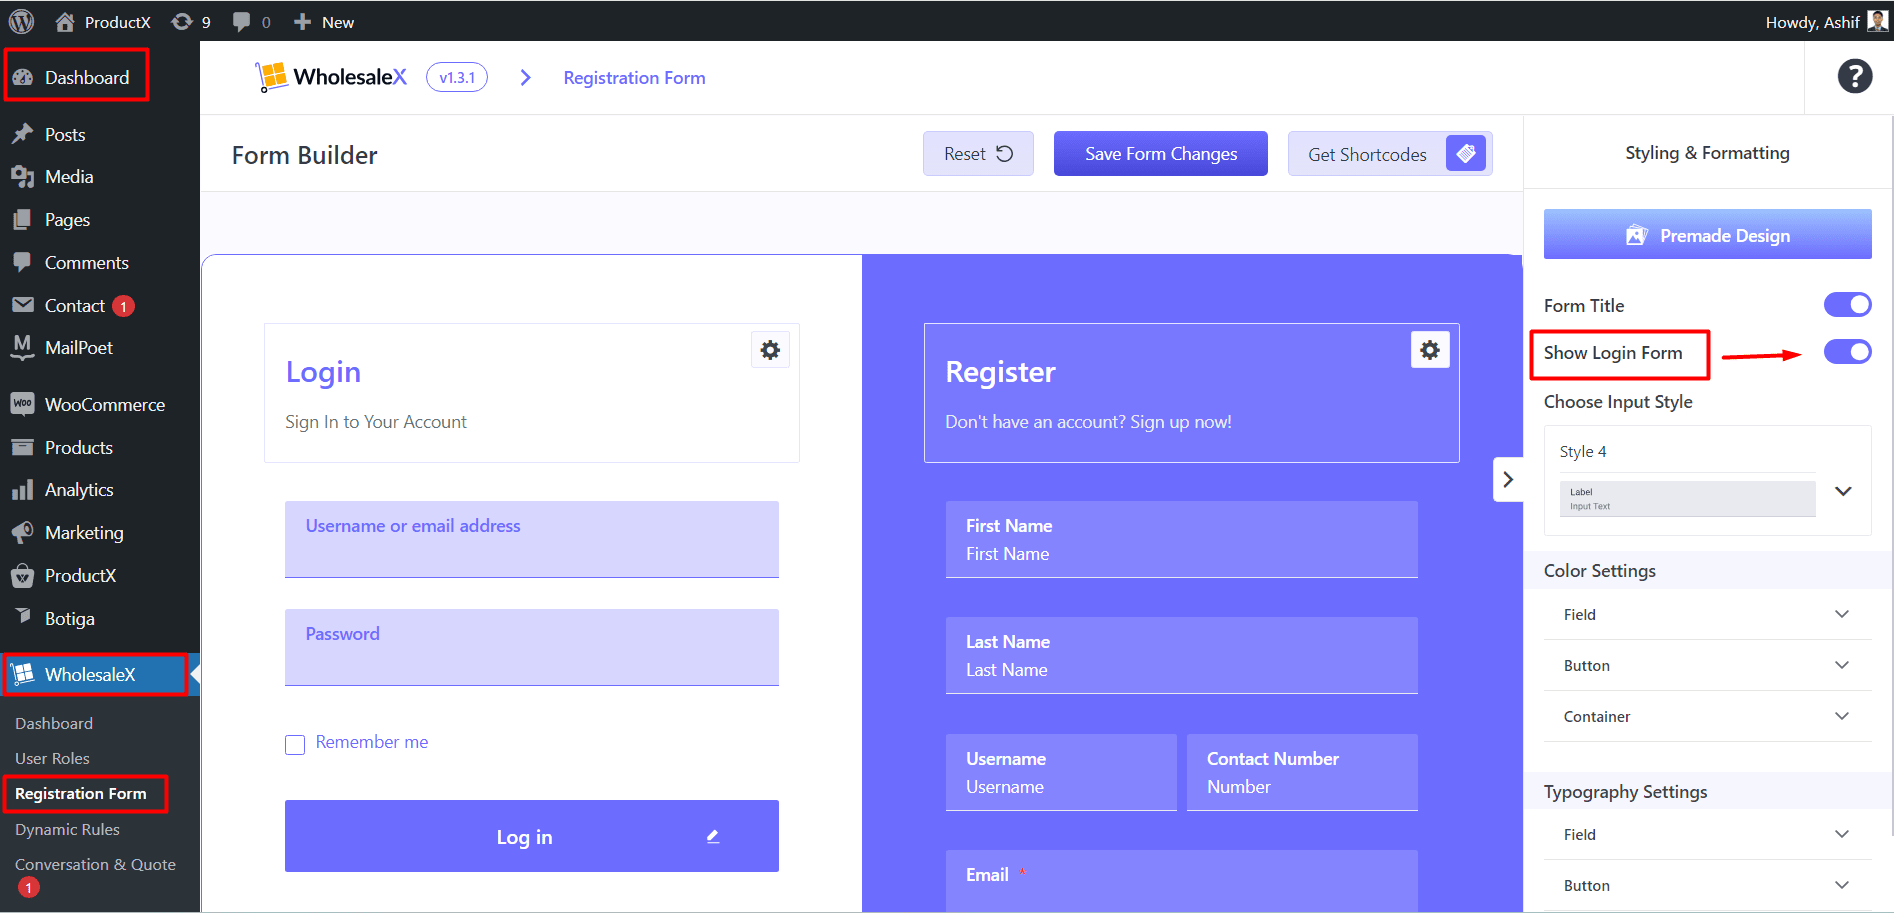
To start creating a custom registration page, you need to click on the WholesaleX plugin, you will find the “Registration form” option below the WholesaleX button.
In the registration form option, there is a form builder, we can see that there are two types of forms. One is the login form and another is the registration form. You can hide or show the login form.
Step-2: Adding Custom Fields in the Registration Form
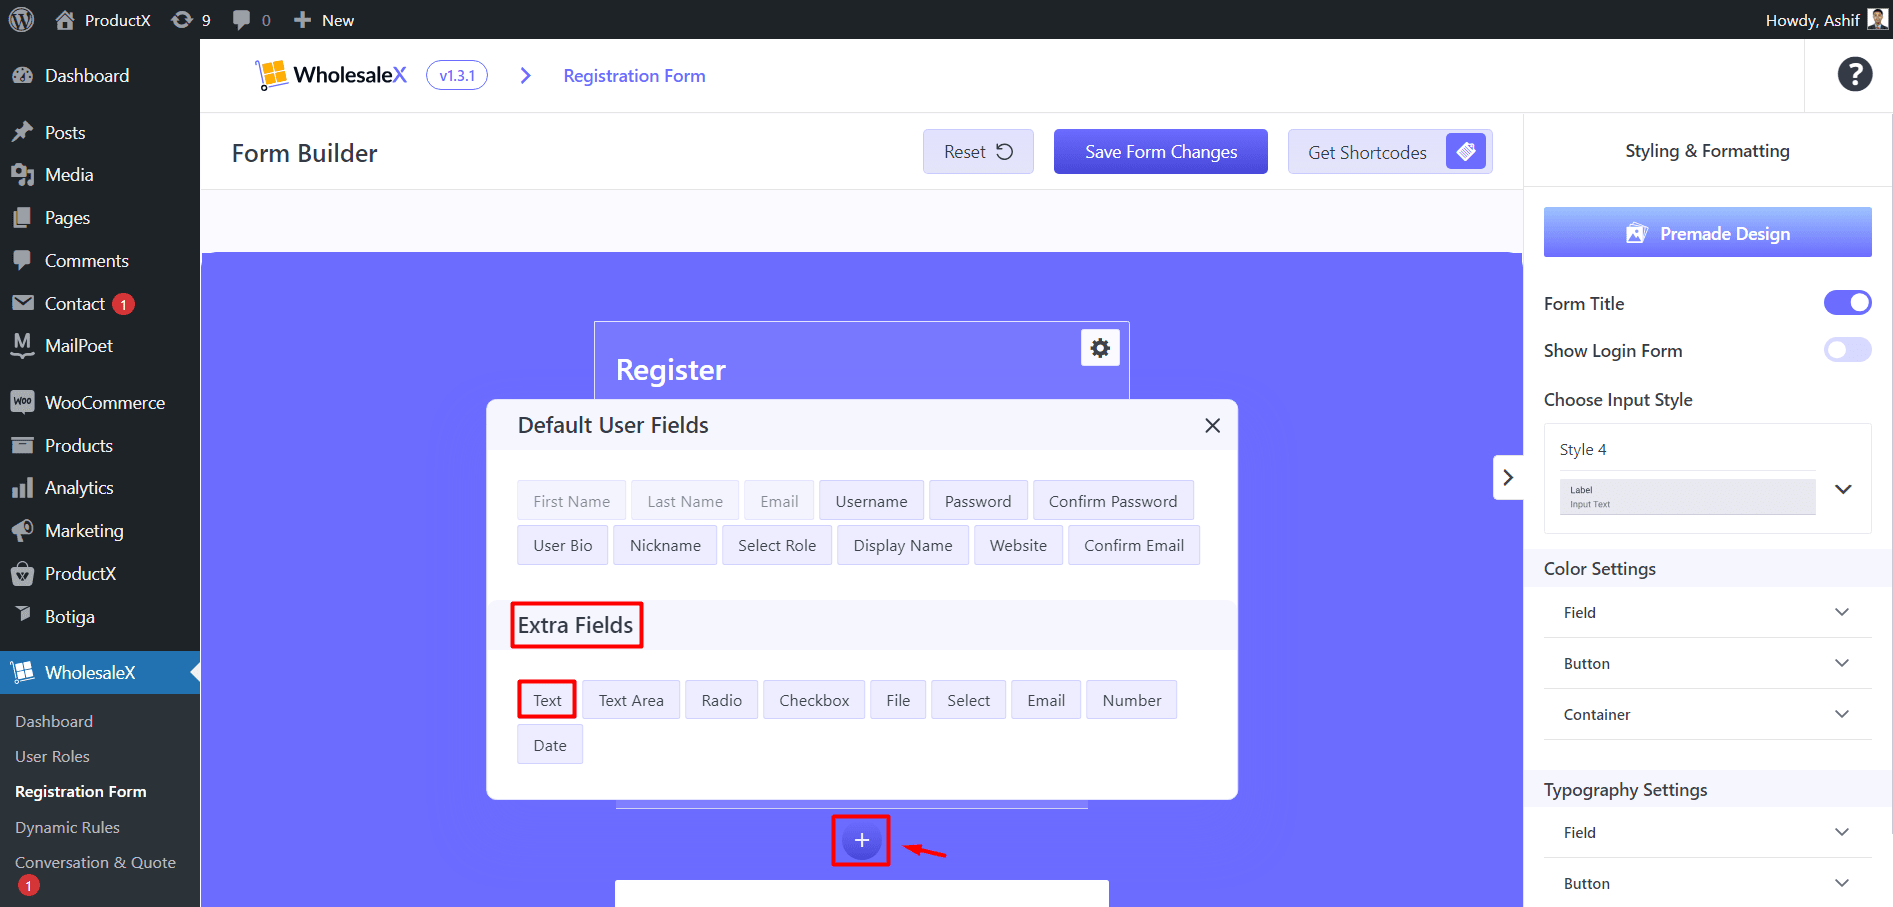
To add a new field to the default form, simply click on the “+” icon at the lower part of the registration form.
You can see two boxes there, “Default user fields” and “Extra fields”. You can add custom fields from the “Extra Fields” section. You’re free to add as many custom fields as you want. These fields come with extra settings.
So, let’s see how it works!
As an example, we need to add a “Tax Identification No” (TIN) field in the registration form.
First, we are picking the “Text” field from the extra fields section. Now we have to rename the field level, name, and also placeholder text from the “Field Settings”. To see the “Field Settings” just click on the “Text box” that we have added, at the right corner of this field there will be a settings icon visible, click on it.
So, we have renamed “Field Level”, from Text → “TIN”. We have cleared the placeholder texts.
You can make this a mandatory field in the form, by enabling the “Required” button from the same setting.
After completing the settings, do not forget to press the “Save Form Changes” button at the top.

Step-3: Complete Creating the Custom Registration Page
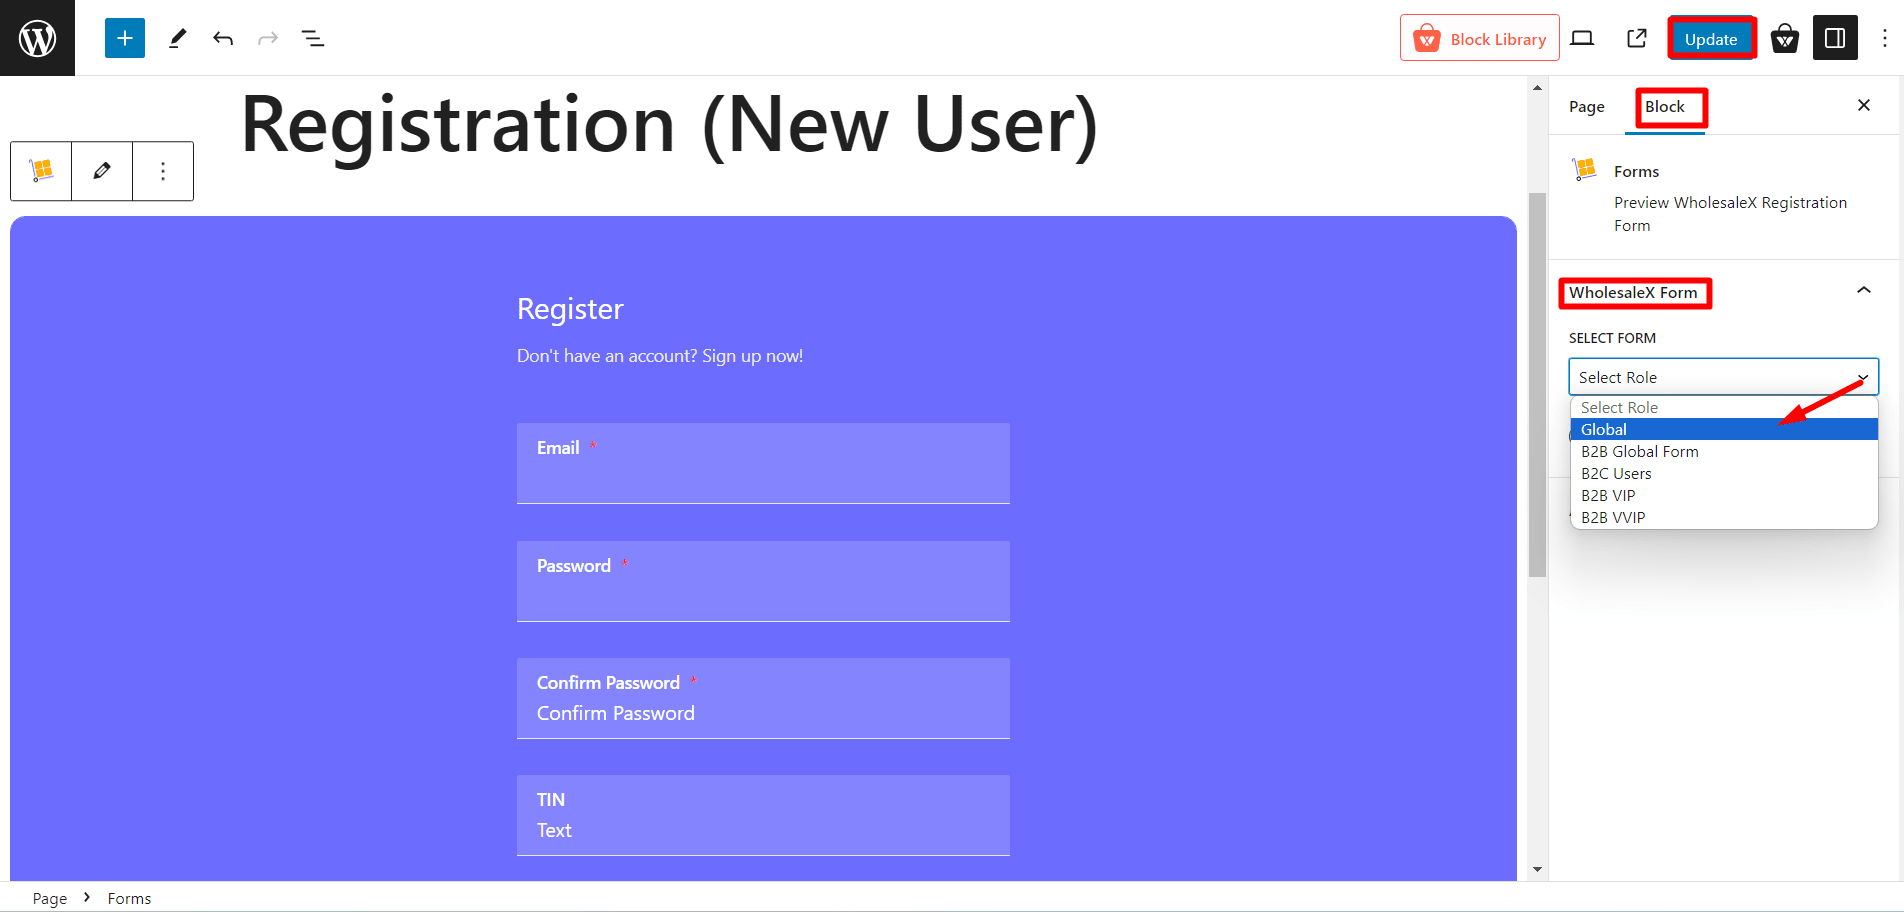
We have created a custom WooCommerce registration form in the builder along with a custom field. You can see the “Get Shortcodes” option at the top of the WholesaleX form builder, you need to click there and then you will find different shortcodes based on different roles.
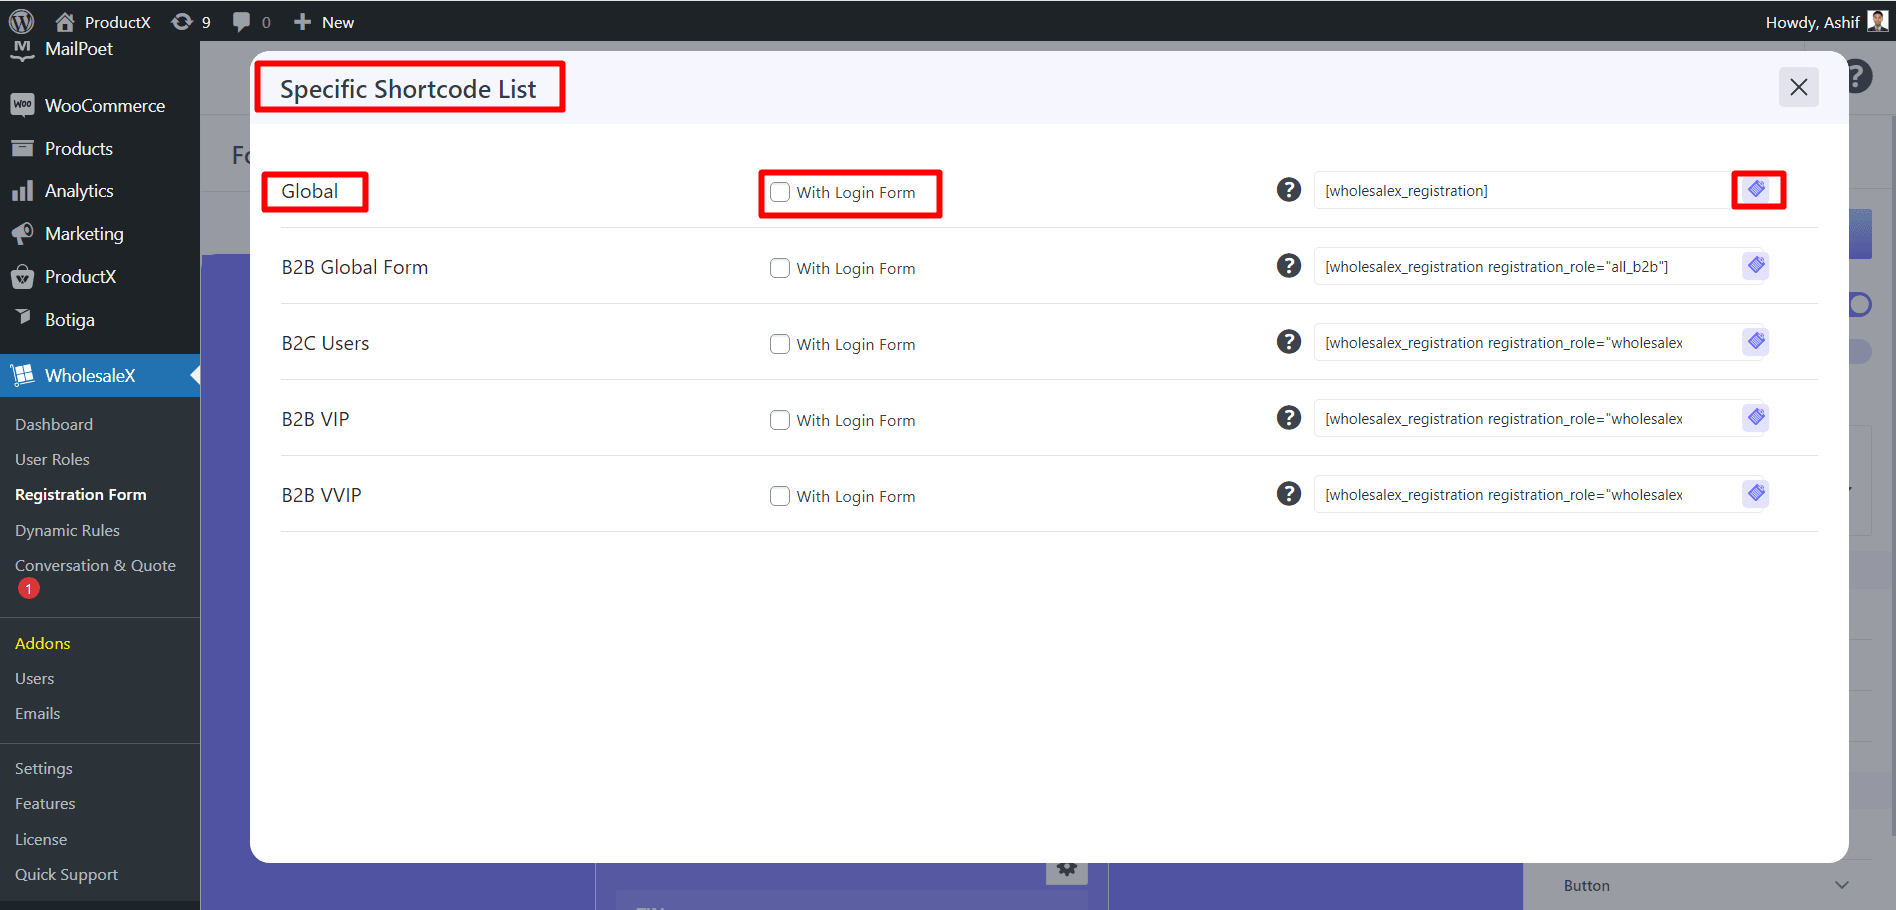
As we are going to apply this form for all of our customers, so we will copy the first shortcode, which is “Global”. If you want to add a login form along with the registration form, do not forget to select the “With Login Form” option.
Now, we need a registration form page to make this visible to our customers.
If you have already a page for the registration form you do not need to create a new page. If you do not have a custom registration page, go to your dashboard, and click on the “Pages” option, it will show you “Add new page’’, you need to click here. A new page will appear, name it with “Registration Form” or anything of your preference.
After pasting the shortcode into a custom page, go to the right side of the page and you will find “Block” settings. From there, click on the WholesaleX form and select the role “Global”.
Do not forget to “Publish” the page.
How to Add Custom Field to Default WooCommerce Registration Form
You can add a custom field to the default WooCommerce registration form. The newly created field “TIN” can be added to the default WoCommerce form. To do this,
Go to the “Field Settings” of the custom field we have created.
Scroll down, and you will find WoCommerce settings.
Enable, the “Add WoCommerce Registration” option.
By enabling this, it will directly appear on the default WoCommerce form
Additionally, adding custom field information in the “Billing” section is also possible!
Just go through the “Field Settings” of the custom field that you have created. Scroll down and you will find “Add Custom Field to Billing”, you need to turn on this option.
You can also make it compulsory in the billing by simply enabling the “Required in Billing” button.
Conclusion
The WholesaleX registration form builder is an excellent option for adding custom fields in the registration form.
It allows you to create a perfect custom WooCommerce registration form with all possible opportunities.
Understanding your customers better enables you to strategize, implement plans effectively, and ultimately succeed in your business endeavors!