WordPress comes with multiple user role creation options. However, you’ll need something more, something extra, to manage an ideal WooCommerce store. Yes, we get two new user role creation options once we install the WooCommerce plugin on our WordPress sites.
However, is it really enough for an ideal online store? And what if we want to run a Wholesale business in WooCommerce?
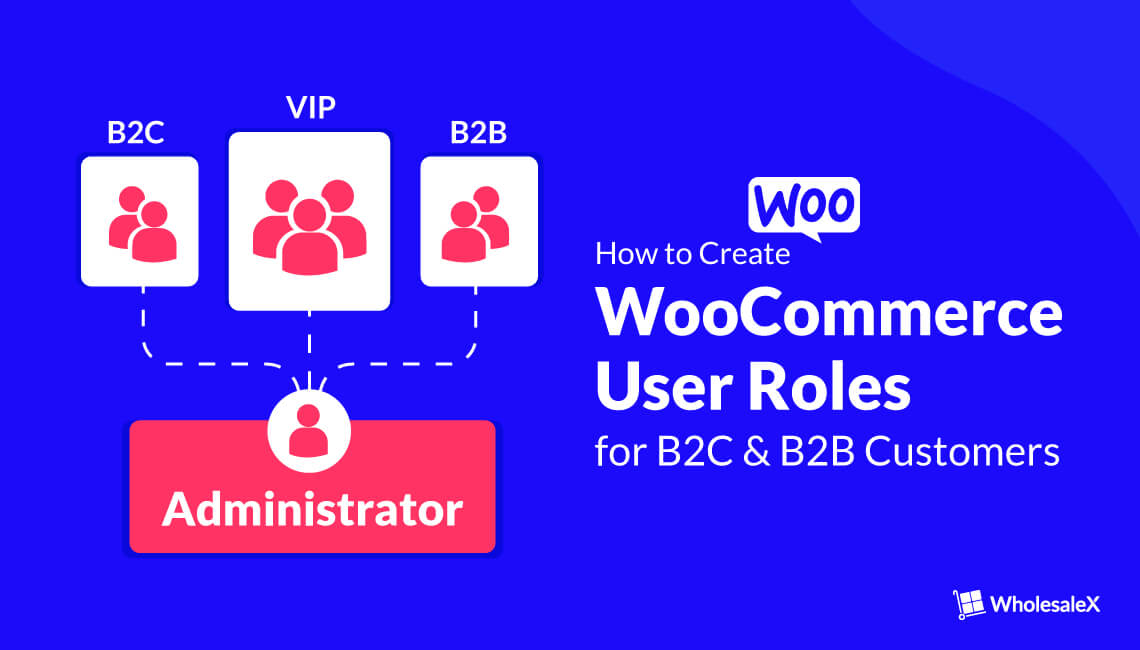
We need to create some more roles to manage the WooCommerce stores properly. So, in this blog post, we will explain what and how to create WooCommerce User Roles for managing an ideal WooCommerce online store. No matter whether you are serving a B2C, B2B, or B2B+B2C hybrid store.
Understanding WordPress and WooCommerce User Roles
First, you should know about the WordPress and WooCommerce user roles to make it easier for you to decide and choose which user roles you should create.
If you are running a basic WordPress site, you will get the following roles creation options:
Subscriber: Subscribers are the audience of a WordPress site. If you want to share private or premium content that should be hidden from guest users, the subscriber role is a perfect choice.
Contributor: Usually, contributors are blog post writers. However, they can not publish any blog posts like authors and editors. They can only write blog posts and submit them for review. So that the editors can proofread and publish the posts.
Author: The authors can write, edit, and publish blog posts. However, they won’t have access to edit the blog posts of other authors.
Editor: The editors can write, edit, publish, and delete blog posts or any other content of a WordPress site.
Administrator: The Administrator has all the access to WordPress sites. An administrator can do anything, from editing and deleting to installing plugins and themes.
Now, let us see what options we get once we install WooCommerce.
Usually, WoCommerce comes with two new user roles along with the roles mentioned above.
Customer: Once someone registers on a WooCommerce store, they get the role of a customer. Usually, the customer has no access to a site’s backend. Rather, they get their “My Account” section. From here, they can manage their profile details, order details, and some other basic options.
Shop Manager: Shop managers get access as a customer and some of the major access like an administrator. A shop manager can add or edit any products and access all settings and reports. That’s how they can manage the store without being dependent on the administrator.
How to Create WooCommerce User Roles (Customer and Shop Manager)
Now that you have a clear idea of the WordPress and WooCommerce roles. It’s time to know how we can create roles in WooCommerce. For that, go through the following steps:
Step-1: Start with Creating WooCommerce User Role
To create a new user role, we need to go to the user section and click the add new button. From here, we can create user roles as per our needs.

Step-2: Configure The Role
We must add the required information and choose the role type to configure it. You can see multiple fields; some of them are mandatory, and some are not.
We must add the username and email and generate a strong password. And then, select the role type by clicking on the dropdown button.
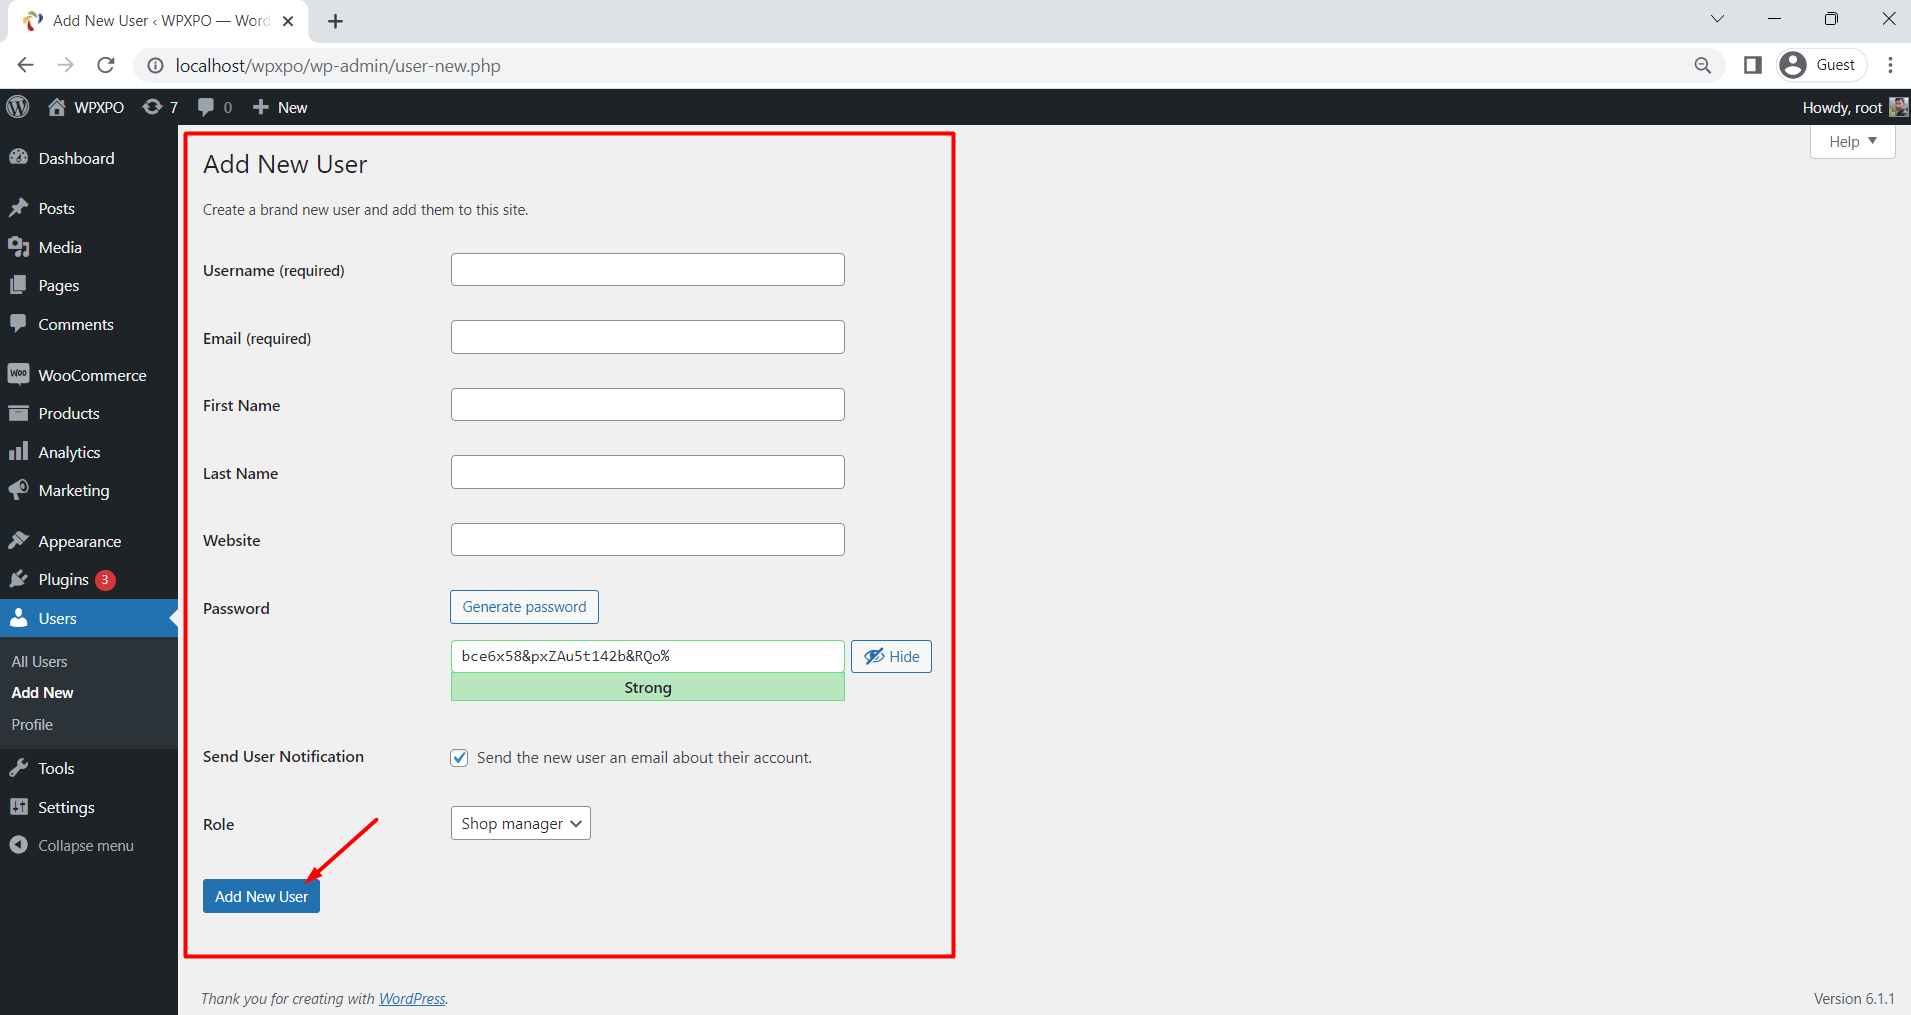
You can tick the checkbox to notify the person via email. After filling in all the required fields, we must click the “Add New User” button. That’s all. And we have successfully created a new user role.
Why Should We Create Extra User Roles in WooCommercre for B2B Users?
As we already mentioned, WooCommerce has two new opportunities to add users, which are good enough for a new online store. However, we may need to create more roles if we want to extend the functionalities of our WooCommerce store.
Especially if we want to create a B2B Wholesale business in WooCommerce, it is hard to manage all the types of users with just a single “Customer Role.”
In this case, we must create different user roles to facilitate different types of customers effectively. If you create multiple user roles, you can facilitate and restrict groups of users at once and effectively. But how can we do that?
Don’t worry; WholesaleX is here to make this difficult task possible with less effort. It allows you to create unlimited user roles, facilitate them with offerings and restrict them with conditions.
How to Create WooCommerce User Roles for B2B Wholesale Users
As you have come so far, you probably need to add extra roles to manage B2B customers. To create new user roles, just follow the steps below:
Step – 1. Install WholesaleX Plugin
First of all, we need to install the WholesaleX plugin. It is the simplest and all-in-one solution to create and manage B2B Wholesale stores in WooCommerce.
To install the free version of the plugin:
- Go to the plugin section, and click on the add new button.
- Search for “WholesaleX”.
- Install and activate the plugin to start using it.
You can start with the free version, but it is recommended to get the pro version of WholesaleX to unlock the full capabilities.
Step – 2. Start Creating B2B User Roles
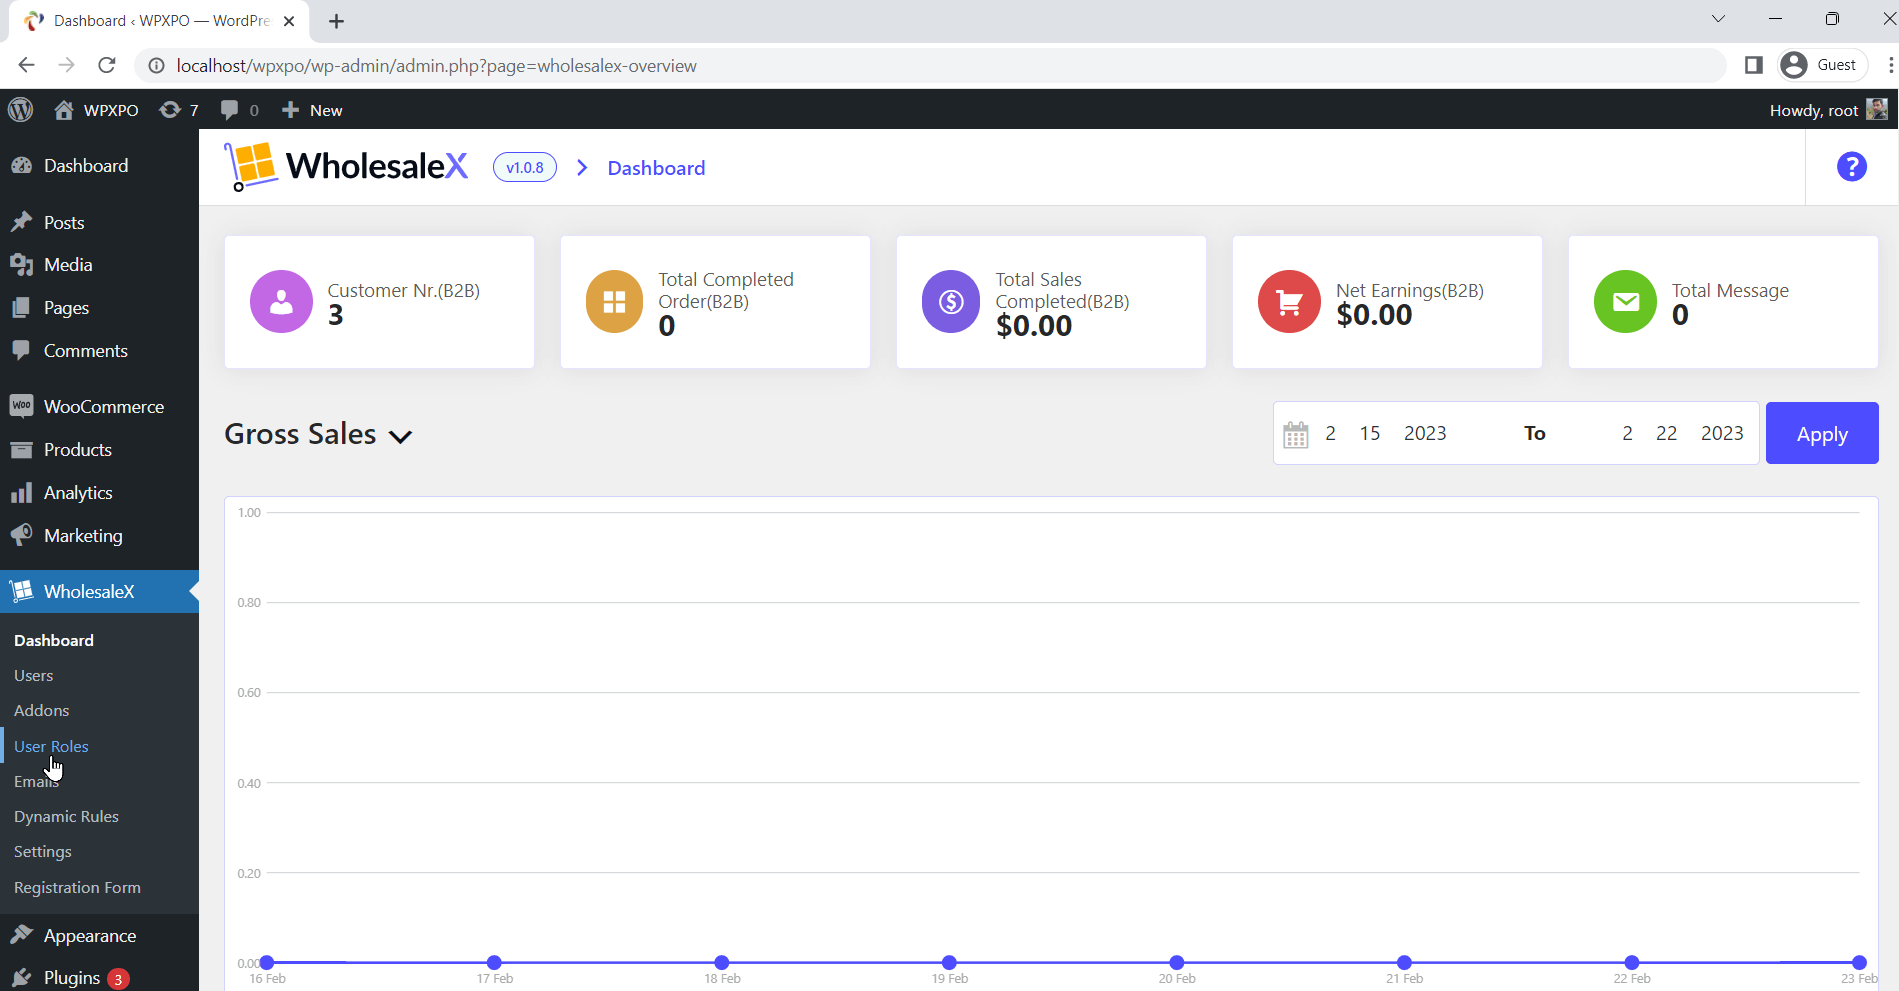
After properly installing and activating the plugin, we can start creating our desired roles. First, go to the “User Roles” section.
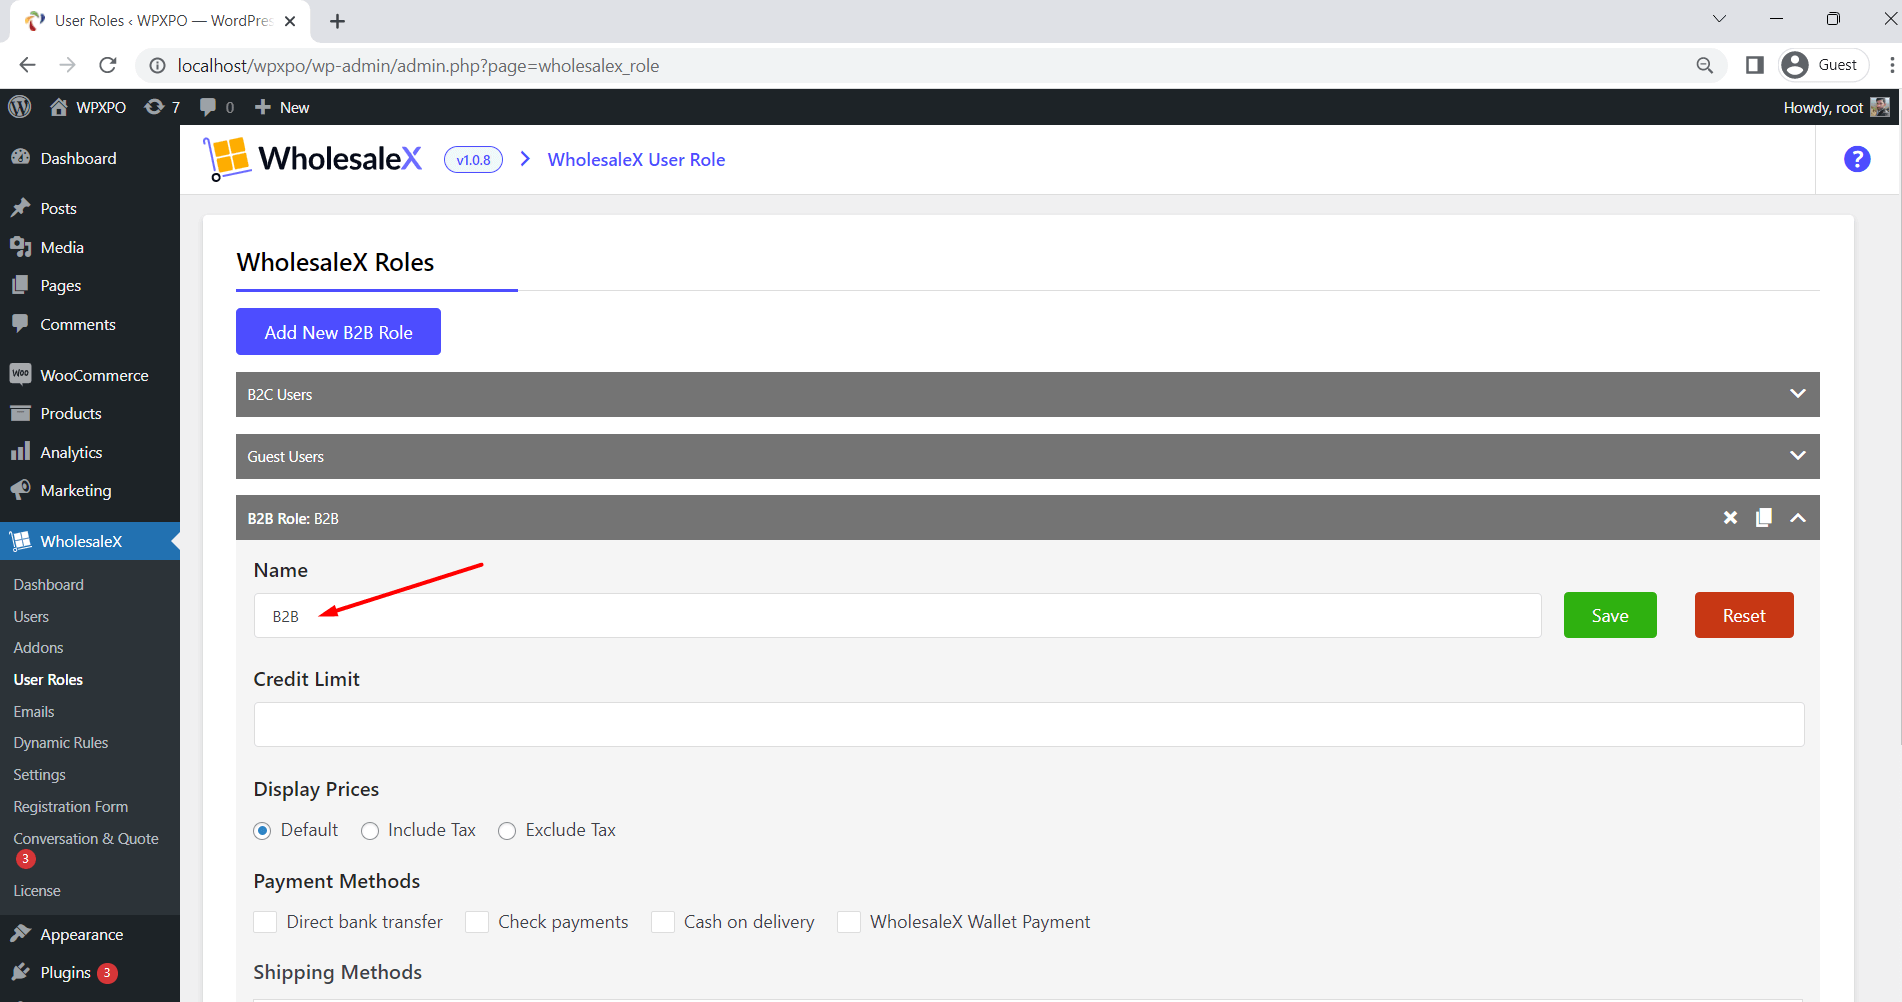
Here, two roles are already created by default, including Guest and B2C. You can not delete these two roles. However, you can configure them according to your requirements.
Now, we will create a new role for the B2B user. To do that, click on the “Add New B2B Role” button. Add the name of the role as B2B or anything you want. So that you can identify the role while using it for assigning customers or creating dynamic rules for them.
Then, we can configure it and click on the save button. If you want to understand the proper configuration, continue reading the blog post.
Step – 3. Restrict and Facilitate the Users
Now, let’s configure the new user role. We will facilitate and restrict the users at the same time while configuring the role. We will select all the options individually and explain them separately so you can properly understand the process without any confusion.
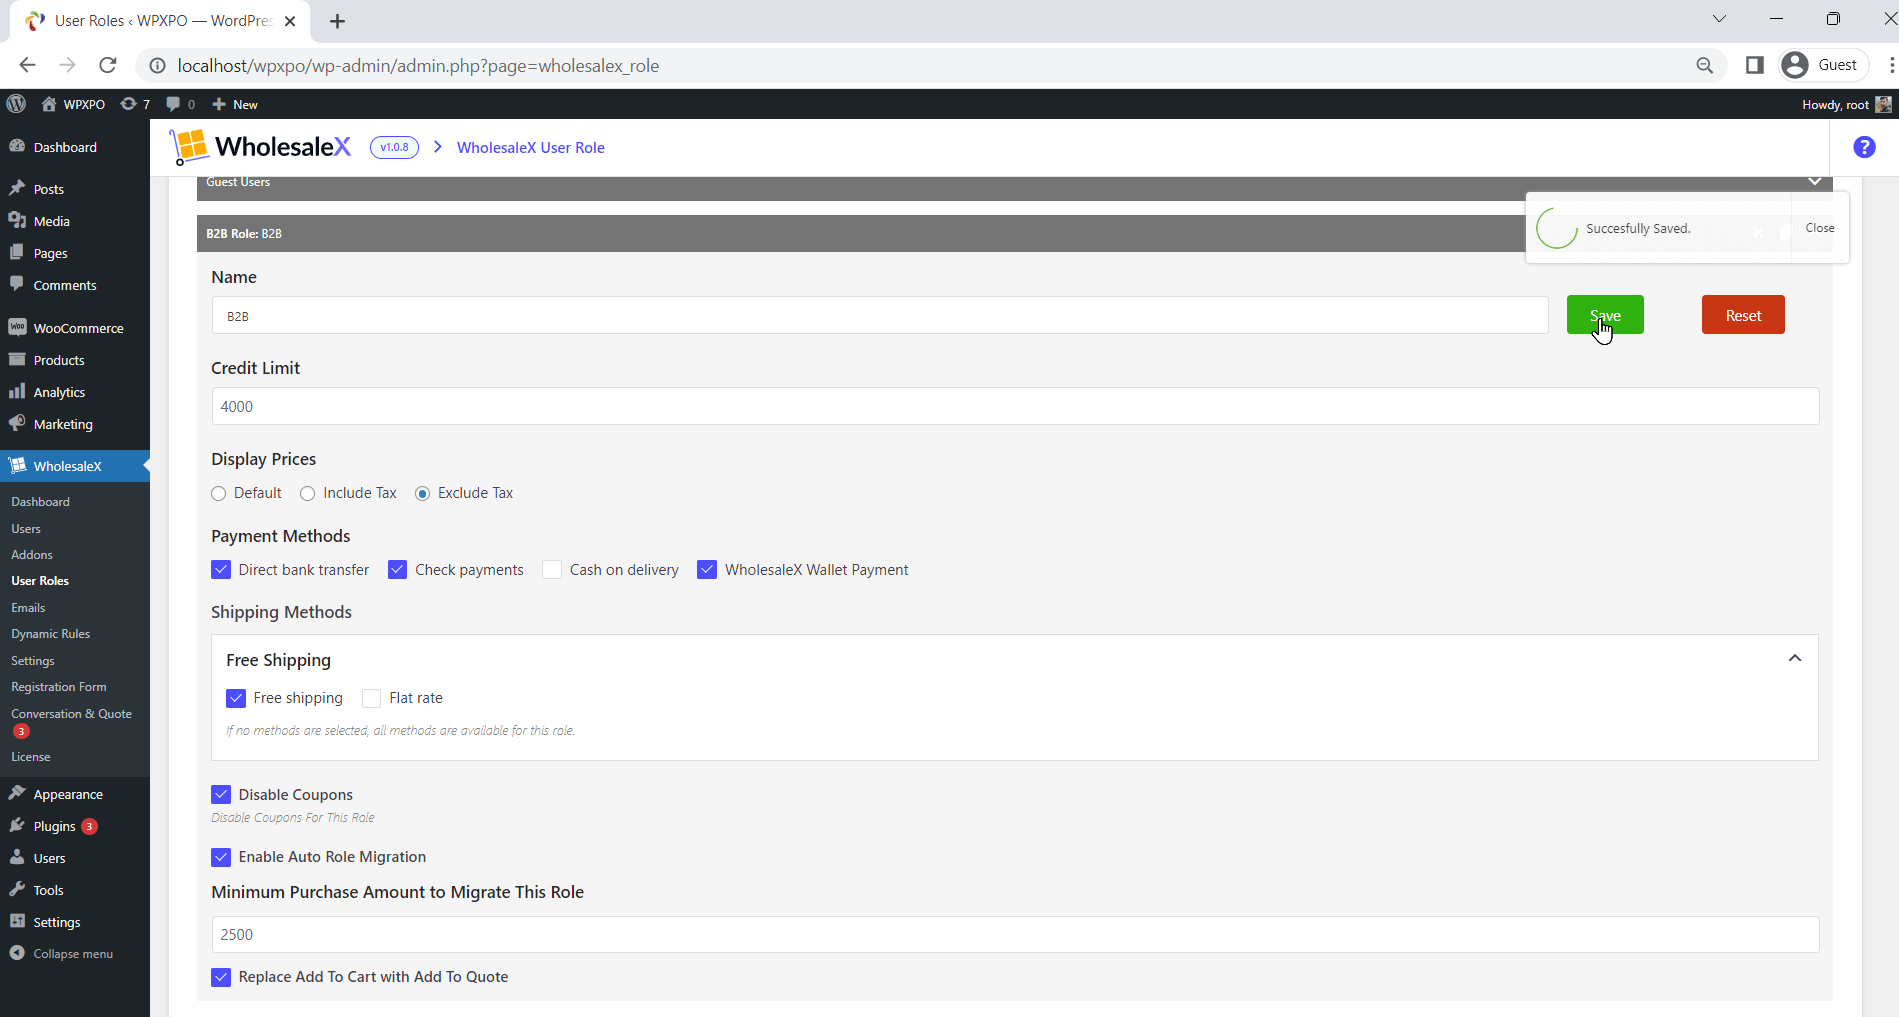
Credit Limit: Here, we can set the limit of credit. It will apply to the Digital Wallet that comes with the WholesaleX plugin. The registered shoppers can add funds and use the wallet to make purchases. For this example, we will set the limit to $4000. So, the shoppers can not add more than the limit ($4000) to their wallets.
Display Prices: This option lets us choose whether you want to display the prices with or without tax. For now, We will select the without-tax option. That’s how all the users under this role will see the product prices without tax.
Payment Methods: In this option, you will see all available payment methods of your WooCommerce store. From here, we need to select which payment options should be available for the users.
Shipping Methods: It is similar to the payment method selection option. Only the selected shipping methods will be available for the users of this role.
Disable Coupons: Here, we can disable coupon fields from users by clicking the checkbox.
Enable Auto Role Migration: These options allow us to set an auto role migration rule. For example, you have B2B and VIP user roles. So you can set spending criteria in the VIP role. So that all the B2B users who spend equally or more than the criteria will be migrated from the B2B to the VIP role.
Replace “Add to Cart” with “Request a Quote”: You can tick the checkbox to replace the add to cart button with the Request a Quote.
After configuring the settings, we need to click the save button. And guess what? We have successfully created a new user role.
What Can We Do With the B2B User Roles?
So, now you know how to create B2B user roles using WholesaleX. It’s time to discuss the benefits and what we can do with the roles. Suppose you use WholesaleX to create and manage a Wholesale business in WooCommerce. You will get so many opportunities of using the user roles. Here are some of the most important and effective use cases of the B2B user roles.
User-Based Pricing & Discounts
One of the most effective uses of roles is setting the pricing. The dynamic rules feature of WholesaleX allows so many conditions to add pricing & discounts. One of them is user-based pricing. It means you can set different pricing for the same products.
Product Visibility Options
Another thing you can do with the dynamic rule is hide specific or multiple products from any user or group of users. So, you have proper user roles, and you can use them to hide your desired products from multiple users at once.
You can also check out the WordPress Quiz Plugin, which will help you to create quizzes that dynamically adjust based on user roles, offering personalized content or recommendations.
Set Minimum & Maximum Restrictions
WholesaleX also comes with the functionality of setting minimum and maximum order restrictions. So that you can restrict any or multiple users with these conditions, and they must meet the requirements to purchase any products from your store.
Offer Special Facilities
You can also offer some special facilities to the users of any role, like tax exemption, special discounts, free delivery, free shipping, and much more.
That’s not all; there are many more use cases for user roles. So, consider using WholesaleX not only for creating user roles but as a complete solution. It will save you time and money simultaneously.
Conclusion
That’s all about the WooCommerce user roles. Feel free to comment below if you still have any confusion. We will be glad to help you out. You can also get in touch with our support team to get a faster response.
Now, it’s your turn to use the ultimate B2B Wholesale solution for WooCommerce. With WholesaleX, be stress-free, grow your business, and unlock limitless earning opportunities.