
Shipping is one of the most important things for any eCommerce site. However, it is difficult to configure and manage efficiently. Thanks to WooCommerce, which allows us to configure and manage shipping charges effortlessly. But things get difficult when we need to charge differently for specific product variations.
Don’t worry; we are here to save your precious time.
We have explored each and every aspect of how WooCommerce Shipping works and started guiding you in the efficient ways of accomplishing your goals.
So, you must be wondering, how to assign multiple shipping classes to specific product variations?
To apply multiple shipping classes to variable products, you just need to follow the below steps:
Step 1: Create Multiple Shipping Classes.
Step 2: Set Different Charges for Specific Classes.
Step 3: Assign Classes to Different Product Variations. And that’s all!
What are Shipping Classes?
WooCommerce shipping class is a default feature that allows us to set different shipping rates for specific products, product variations, or groups of products.
We can use this feature in the following ways:
- Set higher shipping rates for bulky or heavy products
- Offer free shipping for lightweight, small, or flopped products
Here is an example:
Suppose you sell both lightweight and heavy products in the same store. So you can create a shipping class for heavy items and charge $15 for them. And use a flat rate of $5 for the lightweight products.
Why Assign Multiple Shipping Classes to Variable Products
If you’re not sure whether the shipping classes are required for your store, you should explore the reasons below.
Accurate Shipping Costs
Some WooCommerce stores need to handle some types of products that have different weights or sizes. So, in this case, the store owners might spend different shipping costs. So, if you are also in a similar situation, you should adjust accordingly using classes.
Better Customer Experience
If you charge according to the highest shipping cost for all the products, your customer will be disappointed. So, you can use classes to set shipping charges that make sense and ensure a better experience for the customers.
Optimized Shipping Strategy
As shipping management is one of the most important things in any online store, you should make an optimized strategy. Shipping classes help you to do that efficiently. You can offer free shipping for lighter or promotional items. On the other hand, you can also set custom rates for products that have higher shipping or packaging costs.
Zone-Specific Flexibility
Shipping classes also help you configure special shipping rates with both customer locations and product variations.
How to Apply Multiple Shipping Classes to Variable Products
Now, let’s stop discussing extra things and get to the main point of this blog post. Follow the step-by-step guide, and you will be able to configure different classes for product variations in no time. For instance, I am configuring it for a Table that has three sizes: Small, Medium, and Large.
Step 1: Create Multiple Shipping Classes
First, we need to create the required shipping classes. For instance, I want to create three classes: Small, Medium and Large. For that, we need to:
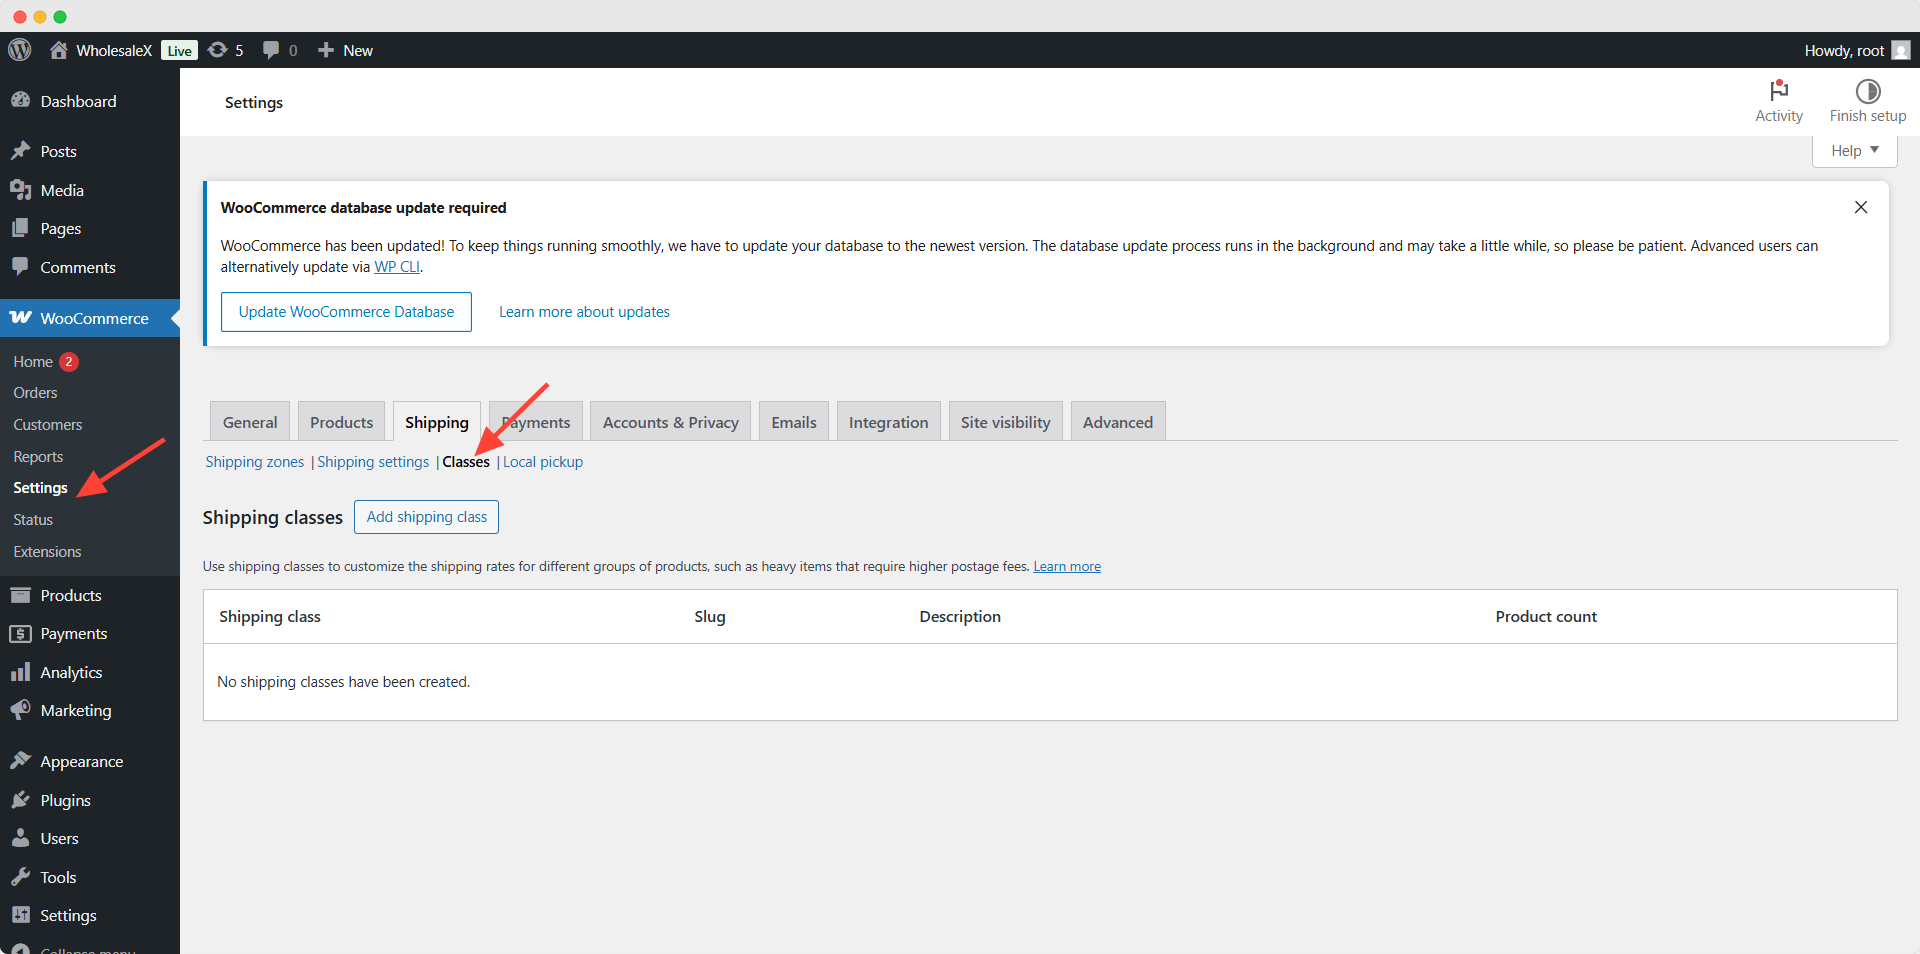
- Go to WooCommerce >> Shipping Classes
- Click on the Add New Shipping Class Button
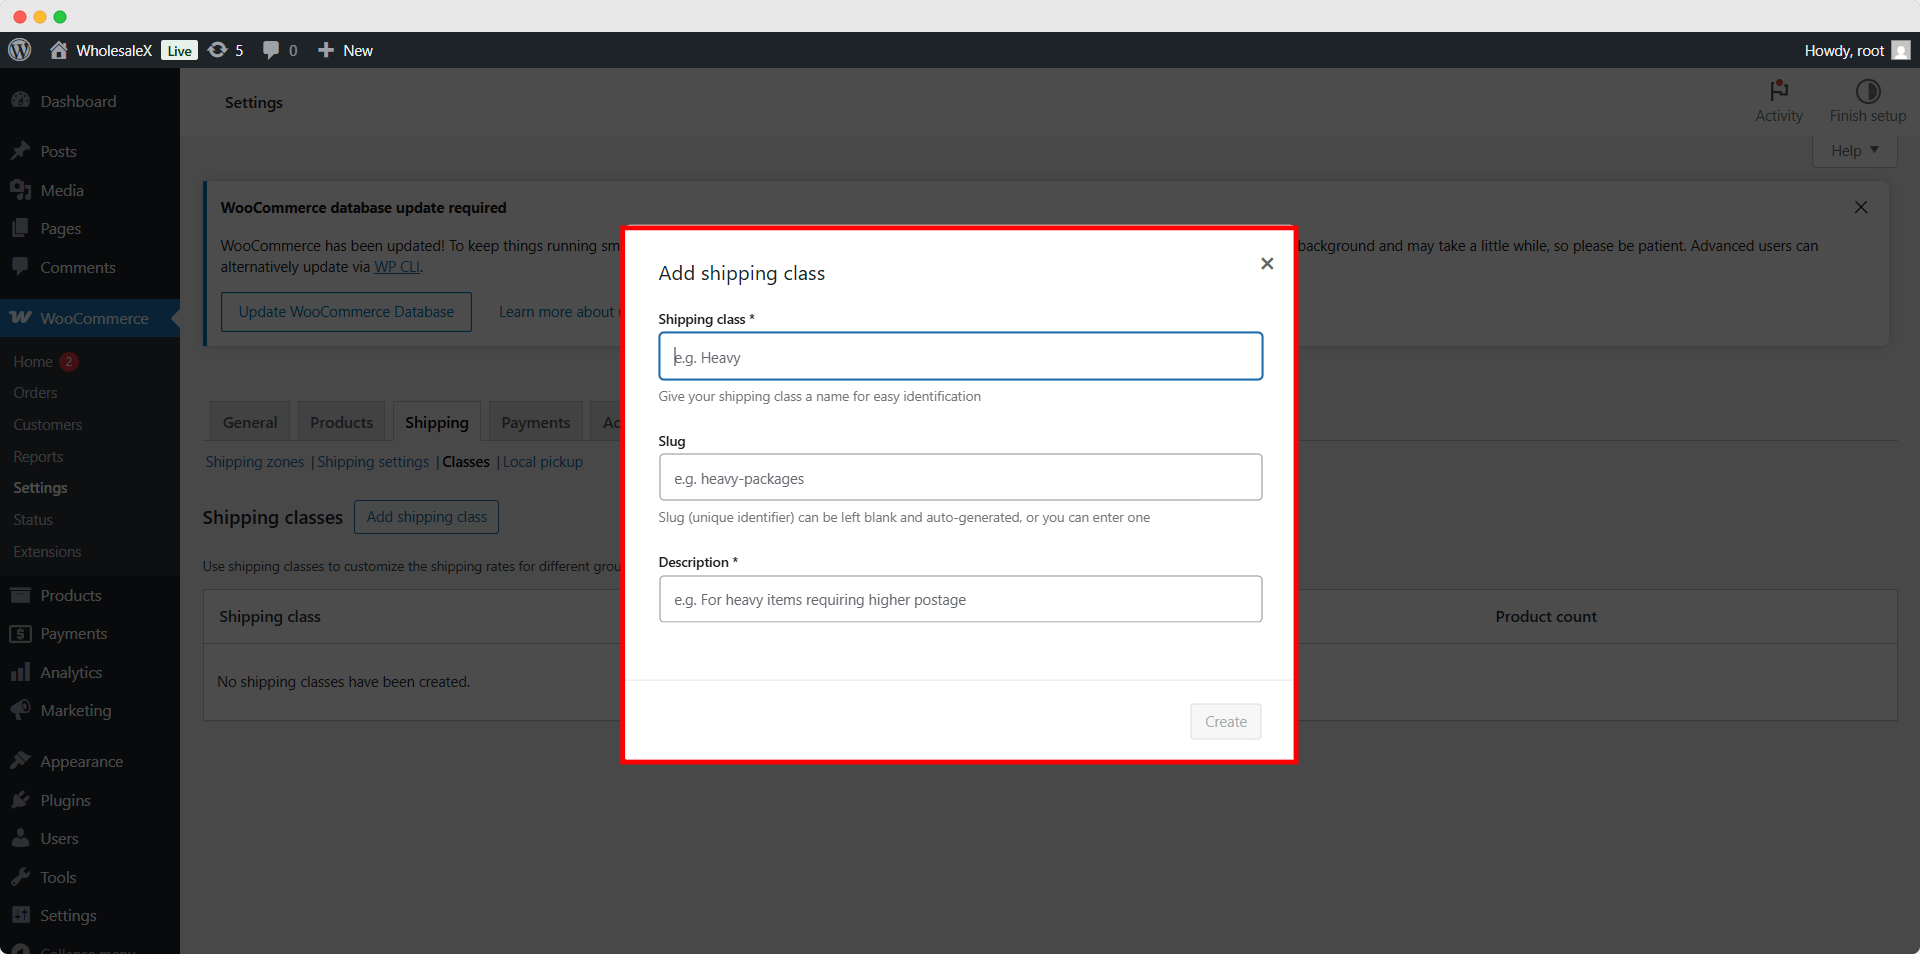
- Give a Name of the Class
- Add Slug and Description (optional)
Similarly, we can create as many classes as we need. For now, let’s create two more classes in the same way.
Step 2: Set Different Charges for Specific Classes
Now, we need to set different charges for the different classes that we have just created. For that, we need to:
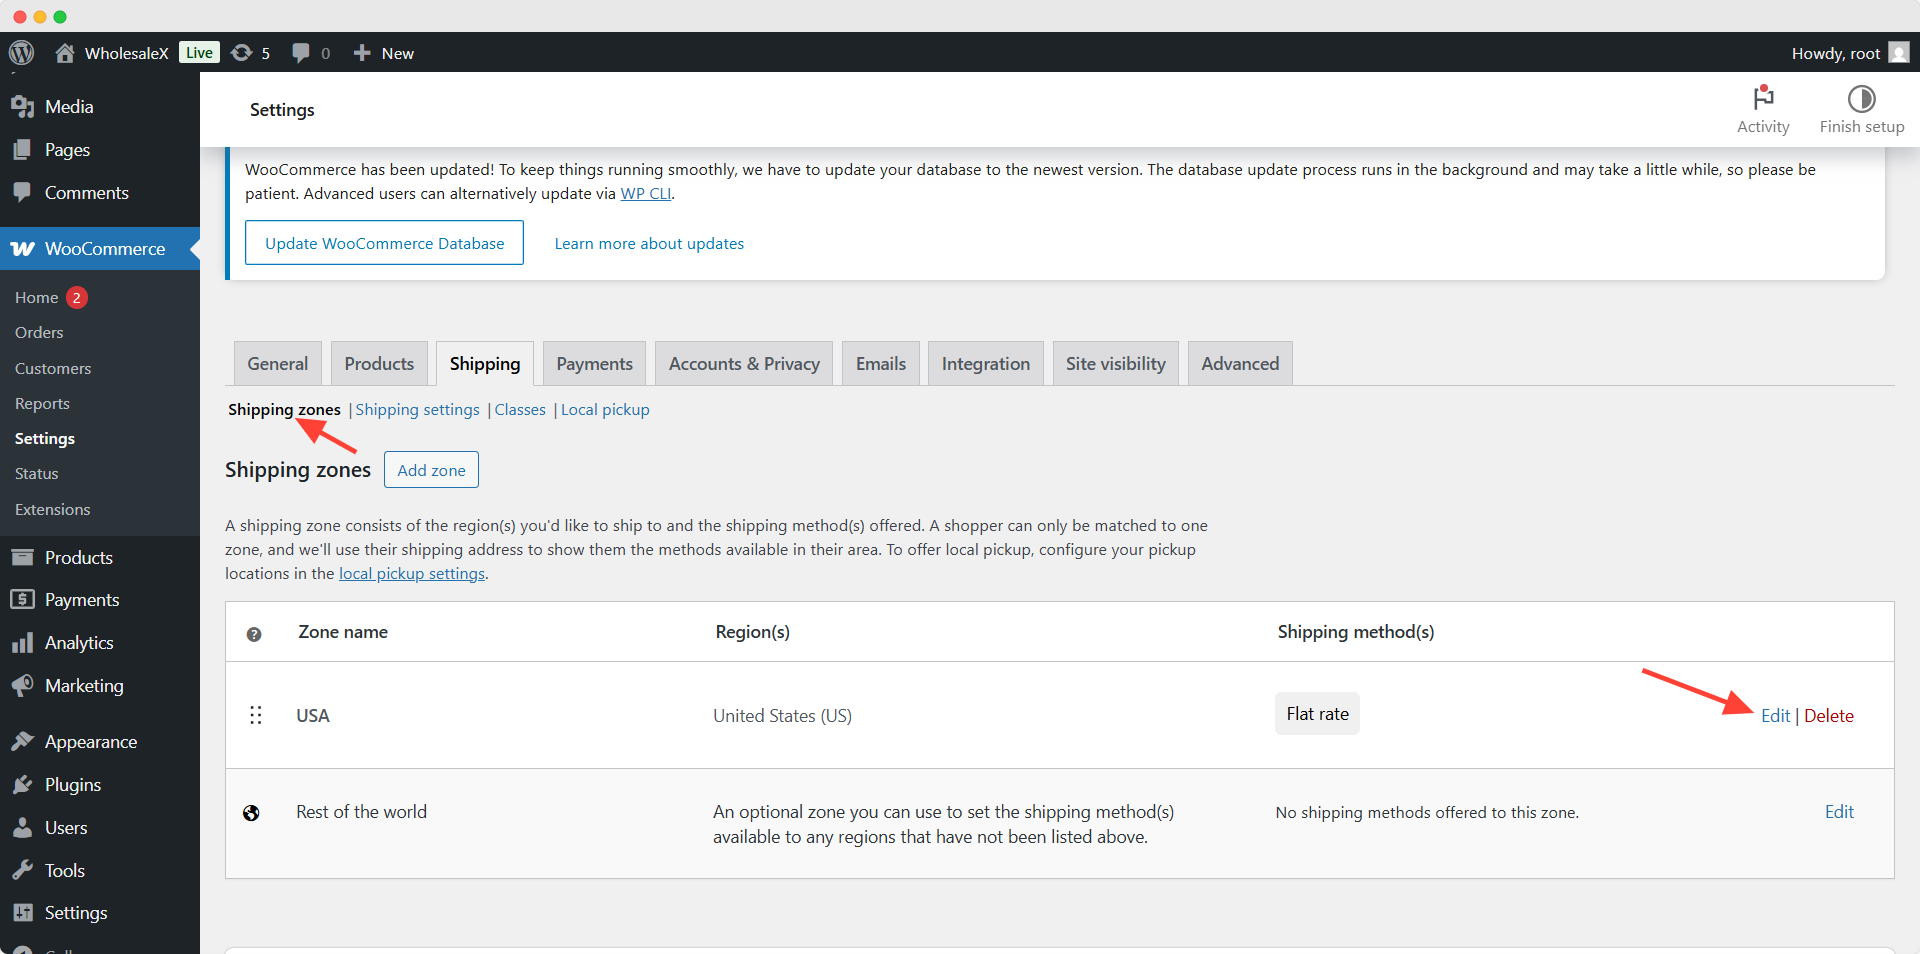
- Go to WooCommerce >> Shipping
- Start Editing Shipping Method
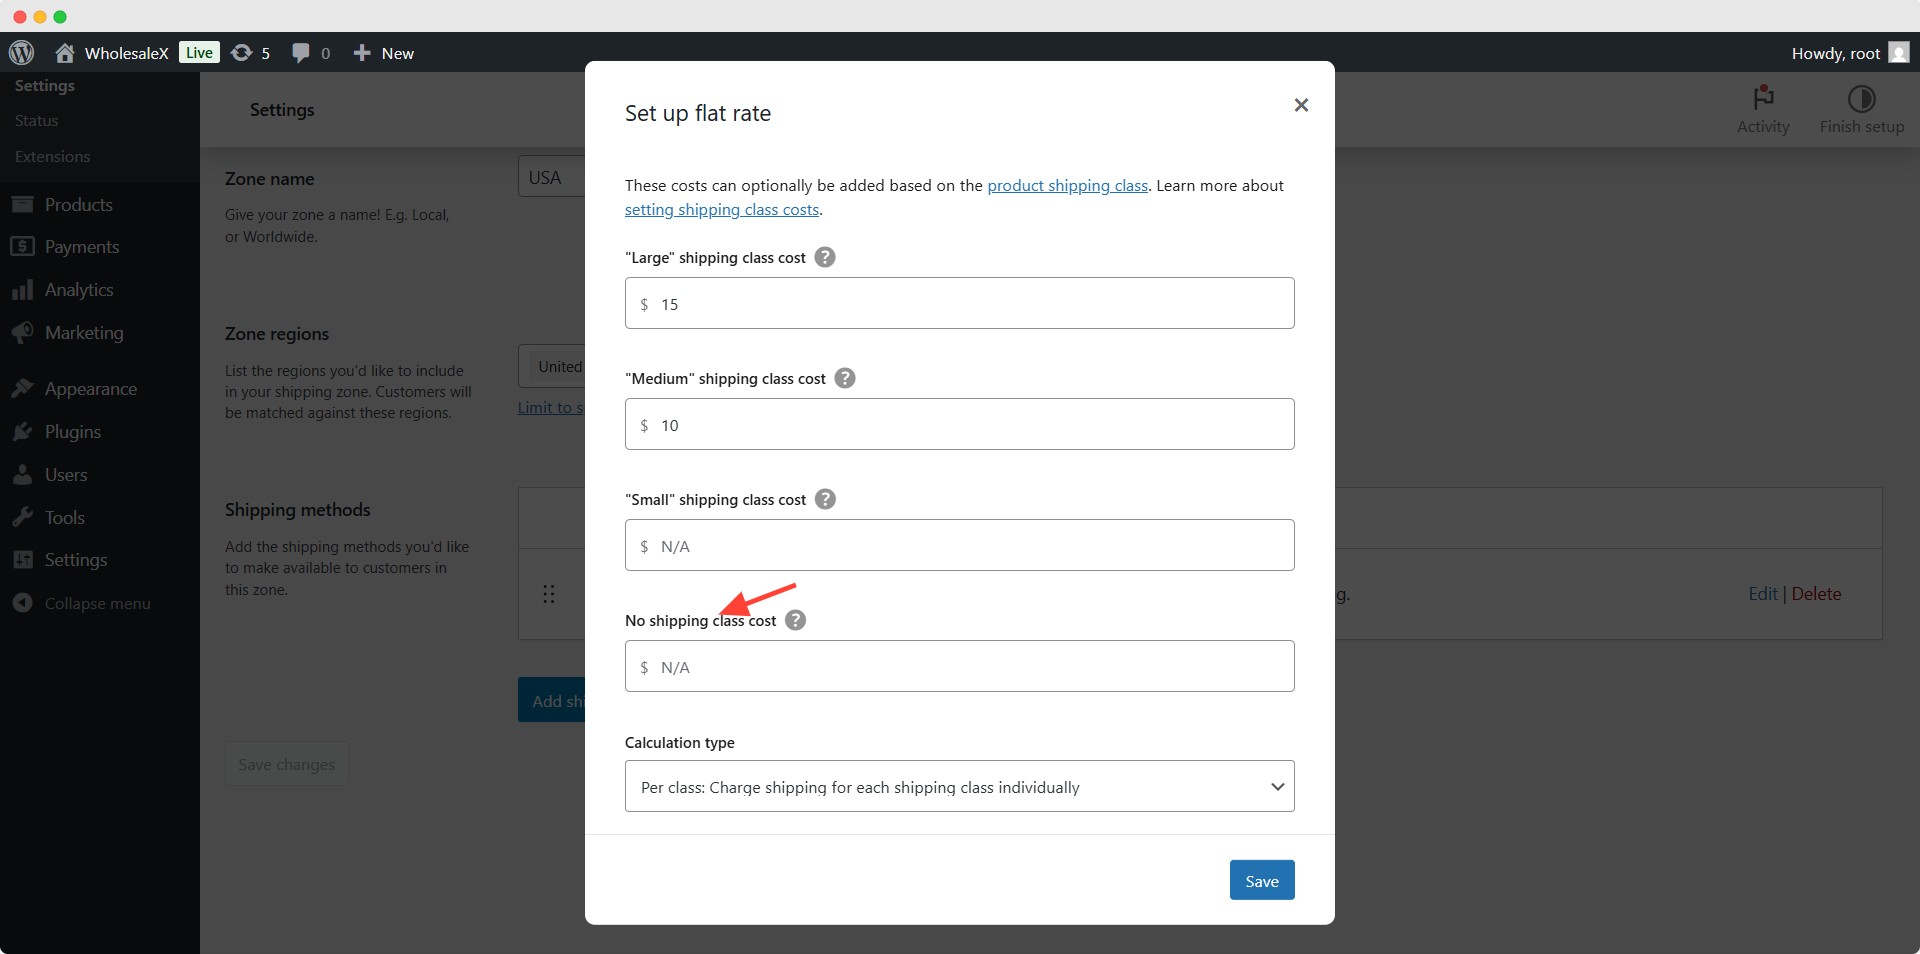
Here, you can see that we have already added a charge for the flat rate. Now, we need to add charges for the specific classes. We are keeping the small class blank and adding different amounts for the medium and large classes.
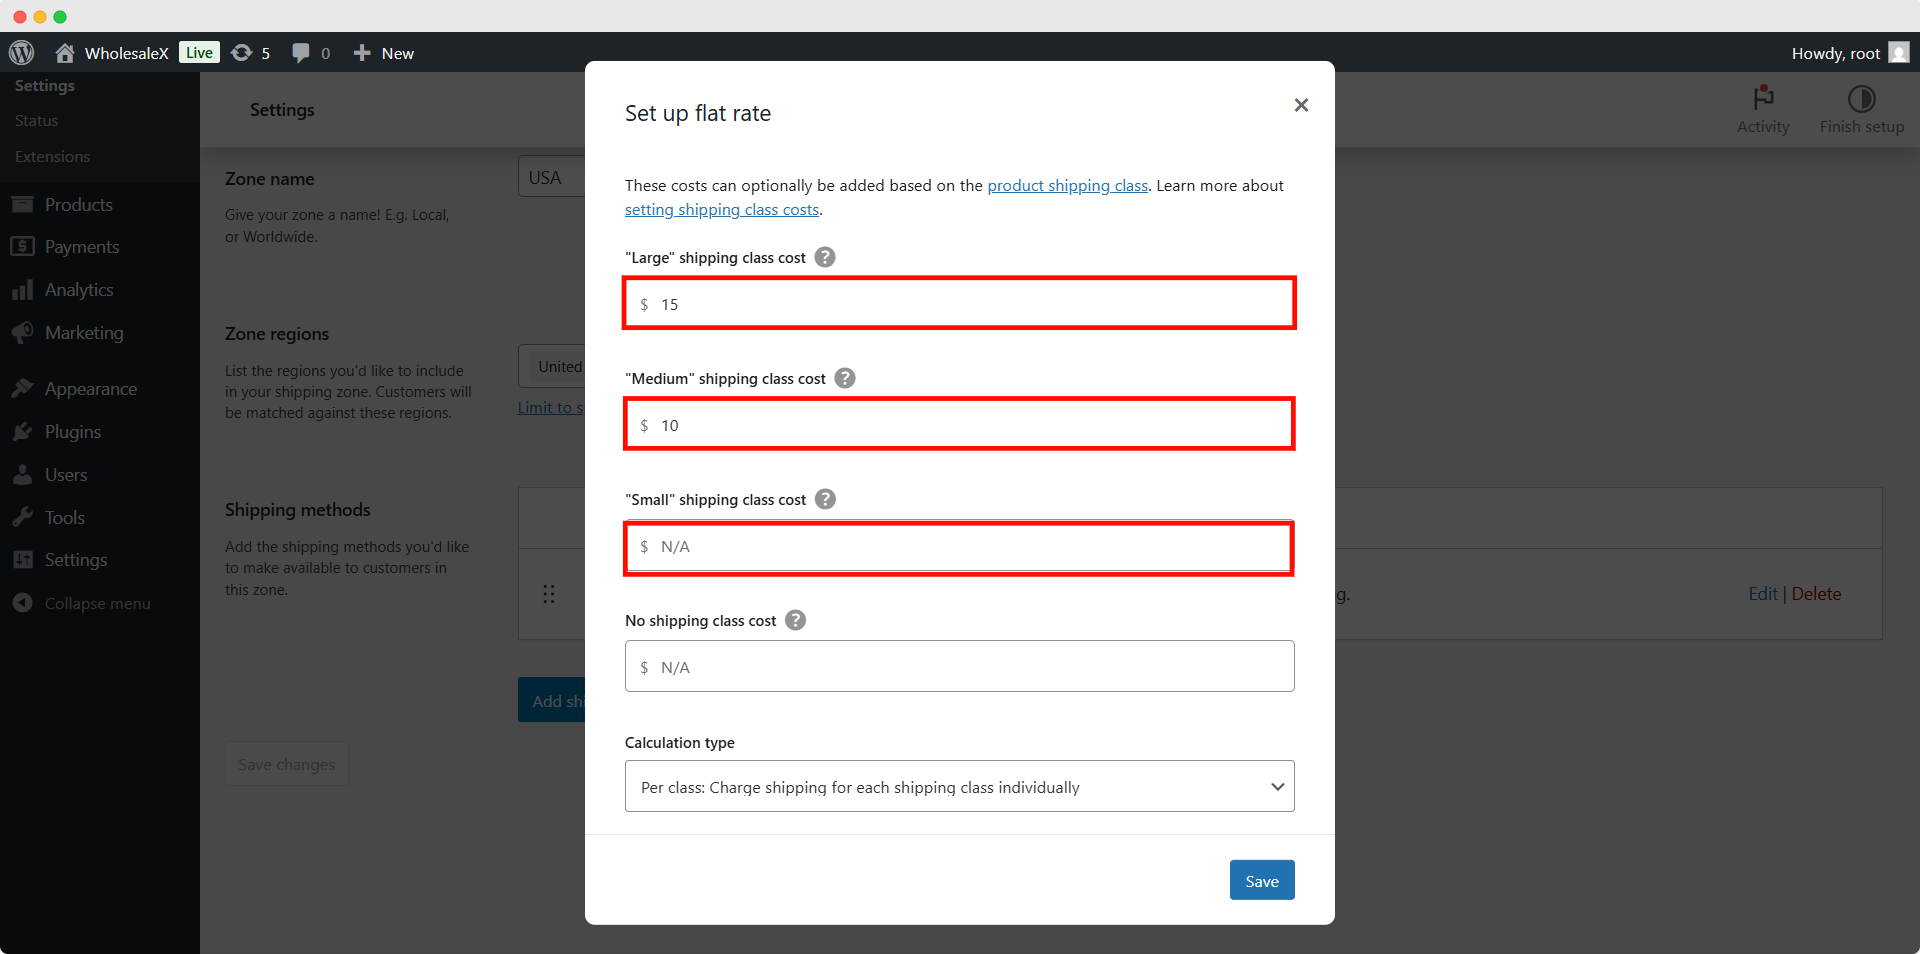
So, the customers will get free shipping for the small variation, pay $10 for the medium variation, and pay $15 for the large variation. However, you can also charge for all the classes if you don’t want to offer free shipping for any of the variations.
We can also set an amount for the products that don’t have classes. However, as we have already set a flat rate, it is not necessary. Adding a rate in this field will overwrite the flat rate.
Now, we also need to select how the shipping class costs will be calculated between:
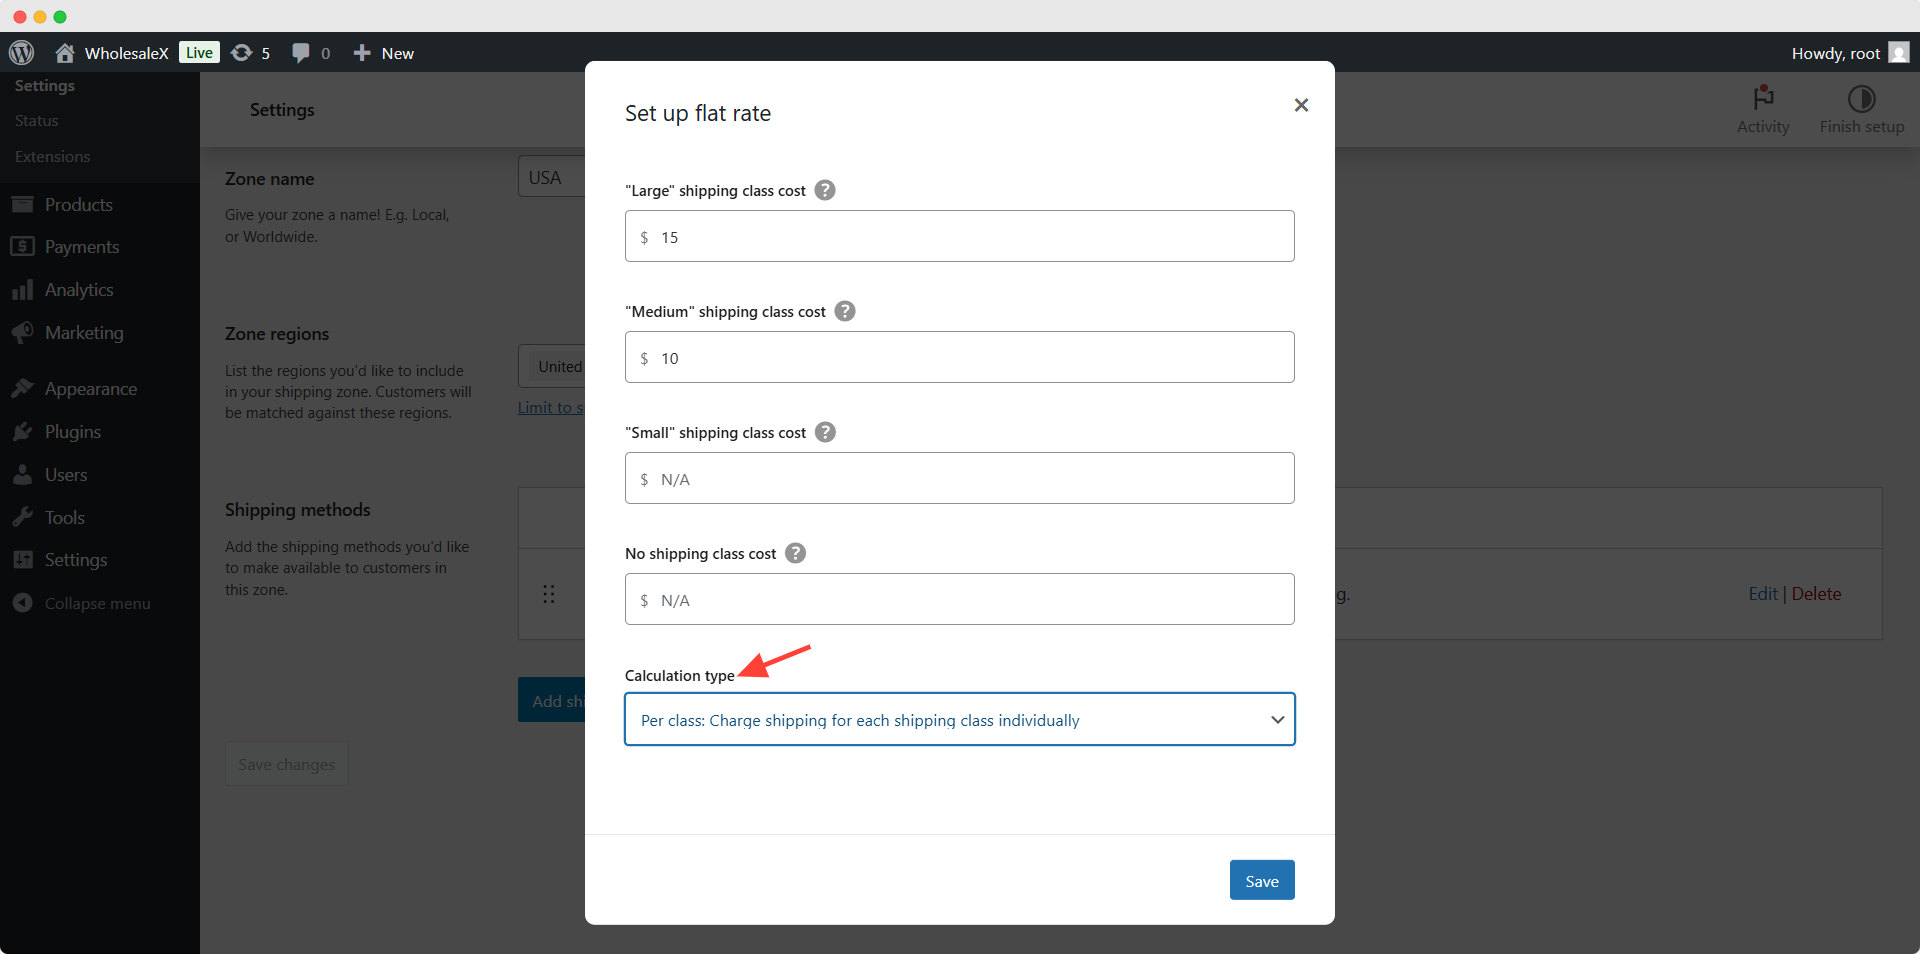
Per Class: Selecting this option will charge by summing the total costs by individual products shipping class costs if multiple products are added to the cart.
Per Order: Selecting this option will only charge the highest class costs of the products that are added to the cart.
Note: We have a detailed blog post on setting up shipping zones that you can explore if you need guidance.
Want your checkout to feel effortless?
With WowShipping, customers sail through shipping choices, making it easier for them to hit “Place Order.”
Step 3: Assign Classes to Different Product Variations
After properly configuring the charges, we need to assign the classes to our desired product variations. So, let’s go to the variable product for which we want to set multiple classes.
Now, we need to go through its variations and add different classes for specific variations. For instance, I am adding the free shipping class to the Small class, the Medium Class to the medium variation, and the Large Class to the large variation.
Then, we need to update the product and check whether everything is working fine or not.
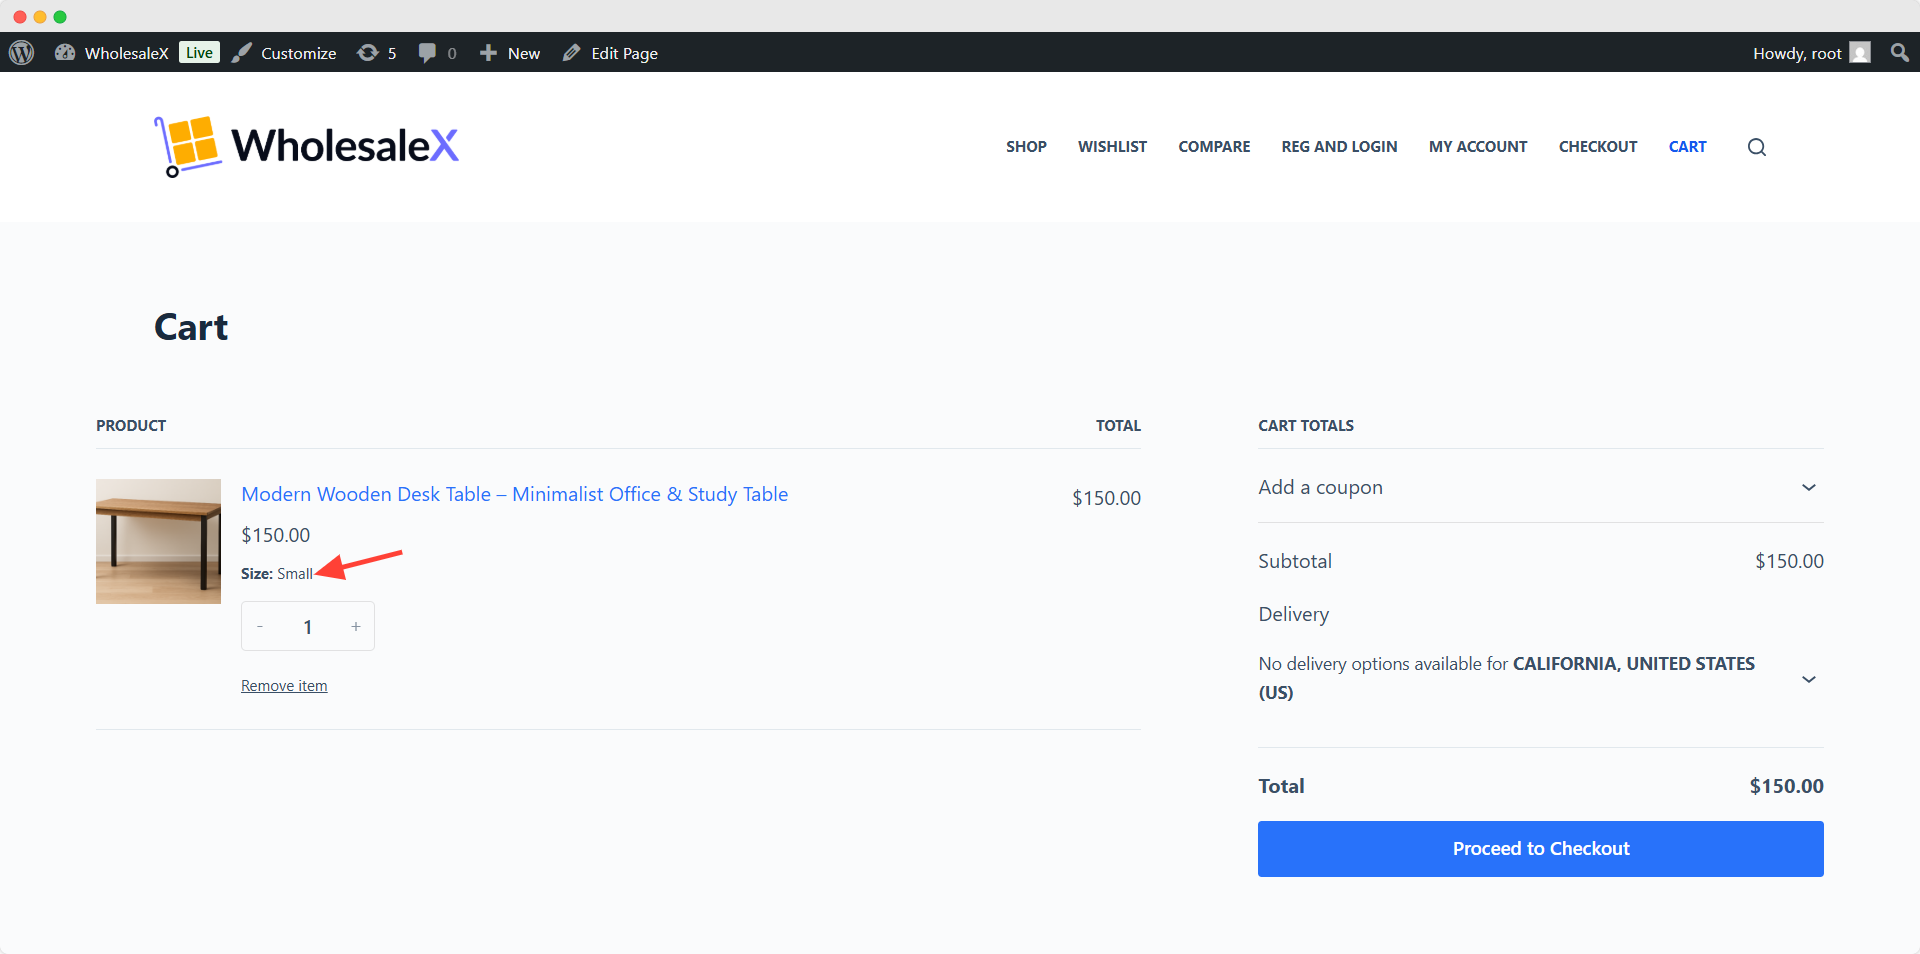
First, let’s add a small variation of the product to the cart. Here, you can see that no shipping charges are showing, so the customer will enjoy free shipping.
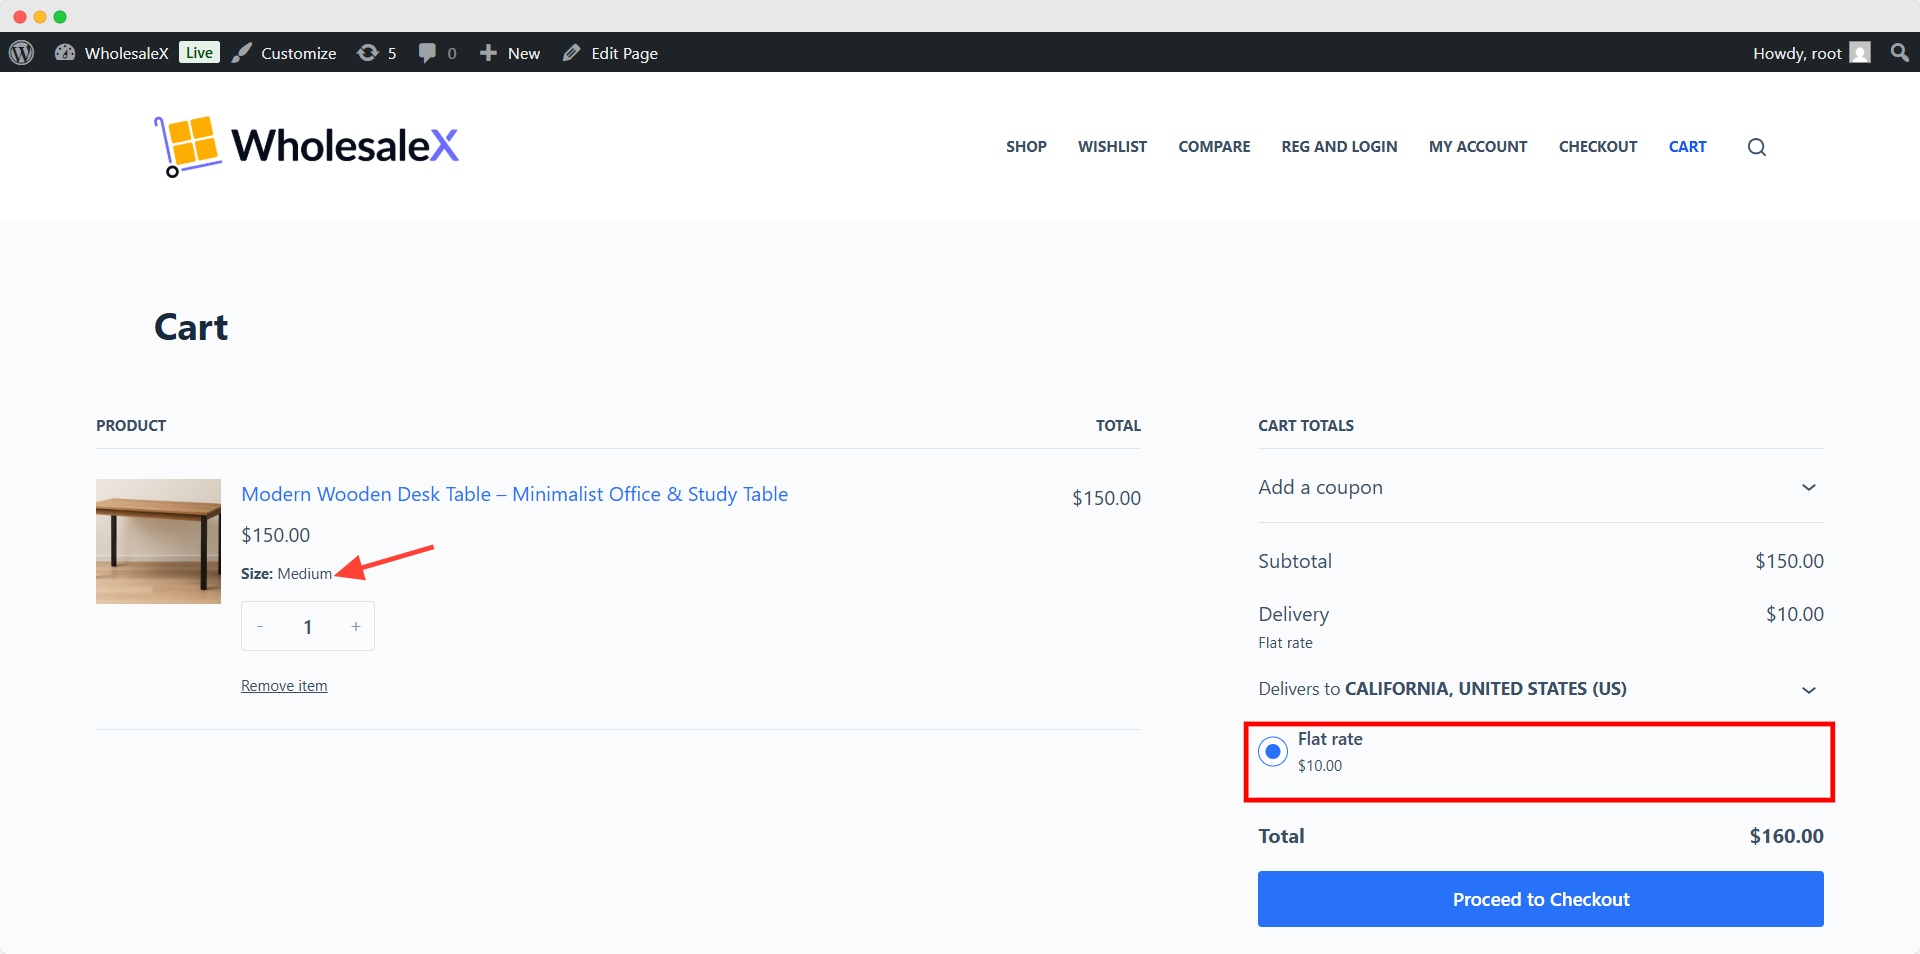
But if we add the medium variation of the product to the cart. The shipping cost will be $10, as we have defined in the shipping method.
Similarly, the shipping charge will become $15 once we add the large variation of the product to the cart.

Best Practices for Creating Multiple Shipping Classes
Creating multiple classes is good but can be harmful as well if you are unable to manage them properly. Don’t worry; we have got your back. Following practices can ensure that you are getting the expected results.
Plan Your Classes Strategically
As I have previously said, multiple classes can help you, but that doesn’t doesn’t mean you start creating too many classes. If it’s possible, try creating a single class for a group of similar products to keep the count as low as possible.
Assign Classes to Product Variations When Needed
It is necessary to set multiple classes to different product variations. You should only do this when it actually makes sense. Otherwise, you should stick to a fixed rate.
Combine with Shipping Zones
Make sure to properly combine shipping classes with shipping zones. For example, you can charge more for heavy items to remote locations by combining a class with the remote shipping zone.
Use Descriptive Class Names and Slugs
Make sure you add suitable names, slugs, and descriptions while creating a new class. So you can easily understand the purposes of them
Document Your Shipping Strategy
You maintain a document for the shipping strategy. It may seem unnecessary, but trust us; it will be useful in the future as you can effortlessly recall everything and make
changes if required.
Test Cart Behavior Before Going Live
Don’t forget to test whether the shipping classes are working before making them available to the customers. It will help you avoid any unwanted situations regarding shipping charges.
Review and Update Regularly
You should also keep a close eye on your shipping charges and collect feedback from customers. So you can update the configurations if required.
You may also like to read about:
- WooCommerce Free Shipping Coupons
- Setup WooCommerce Shipping Taxes
- Setup Role Based Shipping Methods
- WooCommerce Flate Rate Shipping
Conclusion
So, that’s all about multiple shipping classes and the steps to assign to variable products. Now, it’s your turn to follow the process and get the results you desire. You can share any feedback and suggestions in the comment section below. We would also love to know which product you are assigning multiple shipping classes for.
FAQs
Can I assign multiple shipping classes to a single product variation?
No, WooCommerce doesn’t allow us to assign multiple classes to a single product variation. You can assign different classes to different variations.
What will happen if I don’t assign any class to a single product variation?
WooCommerce will use the default flat rate for that particular variation if you don’t assign a class for that.
Will the class name be visible to the customers in the checkout process?
No, the customers will not see the class names. These will be only visible to the store’s admin so they can understand the purpose of the classes.